


Group shots are a great way to remember precious people, places and times but are often difficult to get right. Here are a few techniques to make yours the most popular in the family album.
There is something about a group photo that creates a strong emotional attachment. Hastily arranged pictures of friends huddled together on beaches, or generations of families sitting together at summer parties, can be found pinned to fridges and in frames on office desks across the land. What’s not to love about a picture of (mostly) all your favourite people together?

In fact, such is the power of the group photo, that even the really bad ones still have a special place in our hearts. The horizon might be on the slope, the light might be too harsh and two people will probably have their eyes closed, but it’s still the most popular picture on the family mantelpiece because of the sentimental value. So, imagine how powerful your group shot could be with a bit of photographic skill applied, too?
There are a few golden rules for shooting group shots and some techniques that will raise the standard of your photos from good to great. Let’s have a look at them.
Pick the location carefully
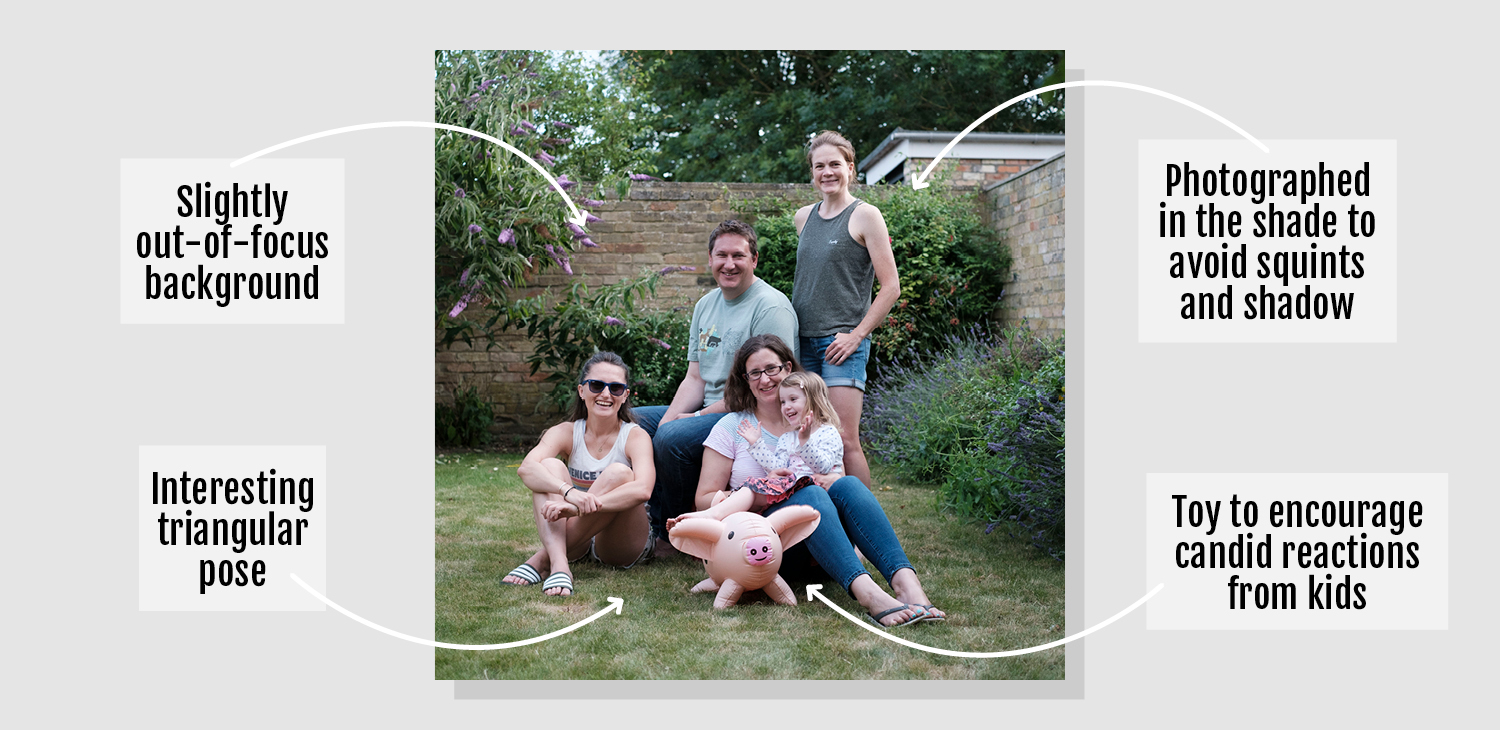
As with other types of portraiture, you’ll get the best results in the shade or in the ‘golden hour’ evening light. In bright, full-on sunshine, your subjects are more likely to squint and end up with shadows on their faces. If you are shooting on an overcast day, the softer light will help, but otherwise try to find a spot that’s in the shade.

While it’s nice to include some of the location in the shot, so you can remember where you all were when it was taken, don’t choose a background that’s too detailed, otherwise it will end up competing with your subjects for attention.
Is there anything around for some of the people in your group to sit on? As we’ll see in a moment, this helps break up boring, straight-line compositions and can give people who need it somewhere to rest while you shoot.
Posing and positioning
The biggest mistake photographers make when posing group shots is arranging people in a straight line. This might work well for a sports team photo, but we can do better when we’re aiming for a creative group portrait.

Try varying the height of your subjects by asking some people to sit down and getting others to stand. Take a couple of small camping chairs with you if you need to, and don’t be afraid to have someone sitting on the floor. Also, it may sound obvious but take advantage of the natural differences in people’s height – taller people will be able to see over the heads of shorter folks standing in front of them.
Be sure to watch out for how the horizon is interacting with your subjects. Adjust your camera height so that it doesn’t cut through your subjects’ heads. It’s much better to shoot from below and put their heads in the sky, or shoot from above by standing on something tall. Or just shift position so that the horizon isn’t visible at all.
Communication
It’s important to be confident and clear when you are directing your group but avoid the temptation to be bossy. Remember to be happy and your subjects will look happy, too. To make sure you can see everyone’s face clearly, ask your group to make sure they can see the camera – “if you can’t see it, it can’t see you”.
Small kids can be wriggly, so ask adults to hold on to them. You’ll also get the younger members of your group on side if you promise them a silly shot afterwards. Try to be reasonably quick once people are in front of the camera, to stop them getting bored.

Including yourself
Including oneself in a group shot is traditionally done with a 10 sec self-timer and a hasty sprint from the camera to your position in the composition. If you’re happy doing it like this, set your X Series camera to continuous shooting and it will capture a burst of frames instead of a single image (this helps ensure each person will have their eyes open in at least one shot).
Perhaps a better way of including yourself in the photo is to use the FUJIFILM Camera Remote app on your smartphone or tablet. You’ll be able to see what the camera can see on your device’s screen and trigger the shutter at just the right moment. Count everyone down to the moment and capture a few frames in a burst.
Camera settings
Burst shooting is a good way to make sure you have at least one frame where each member of the group isn’t mid-blink or momentarily distracted. You can combine different frames on your computer afterwards to form the perfect picture.
When it comes to lens choice, something of a natural ‘standard’ focal length works best, such as XF23mm or XF35mm. A lens that’s too wide can make people at the edges of the frame look a bit weird; a lens that’s too long puts too much distance between you and the group, making communication tricky.

Depth-of-field is a consideration when shooting this type of portraiture. You want a large enough aperture to blur the background slightly so that your subjects stand out, but not so large that the background is unrecognisable and people standing at the front or back of the group start slipping out of focus. An aperture of around F5.6 should be a good starting point. Use Aperture Priority to let the camera take care of any change in lighting conditions.