Quick Start Guide FUJIFILM XApp

Congratulations on downloading FUJIFILM XApp! This quick start guide introduces the app’s features and functions, and will help you get more creative with your photography.

Contents

Cameras Compatible with XApp

To use FUJIFILM XApp, both your camera and iOS* or Android device must be compatible. Compatibility covers all Apple devices running iOS13 and iPadOS13** to iOS16 and iPadOS16, as well as all Android devices running Android 11 to Android 13.

Before attempting to connect, please also check that your camera supports XApp here.

* iOS is a trademark or registered trademark of Cisco in the US and other countries and is used under license.
** iPadOS is a trademark of Apple Inc., registered in the US and other countries and regions.

Connecting Your Camera

Before you open XApp, please ensure Wi-Fi and Bluetooth are enabled on your smart device. It’s also essential to install the latest camera firmware.

Next, open XApp and select Pairing a new camera. You’ll see the instructions below on the screen.

  • Turn on the camera.
  • Press and hold down the DISP/BACK (Bluetooth) button until a Bluetooth & FUNCTION (Fn) SETTING menu is displayed.
  • Select Bluetooth > PAIRING at the top of the menu.
  • Please wait until pairing is completed.

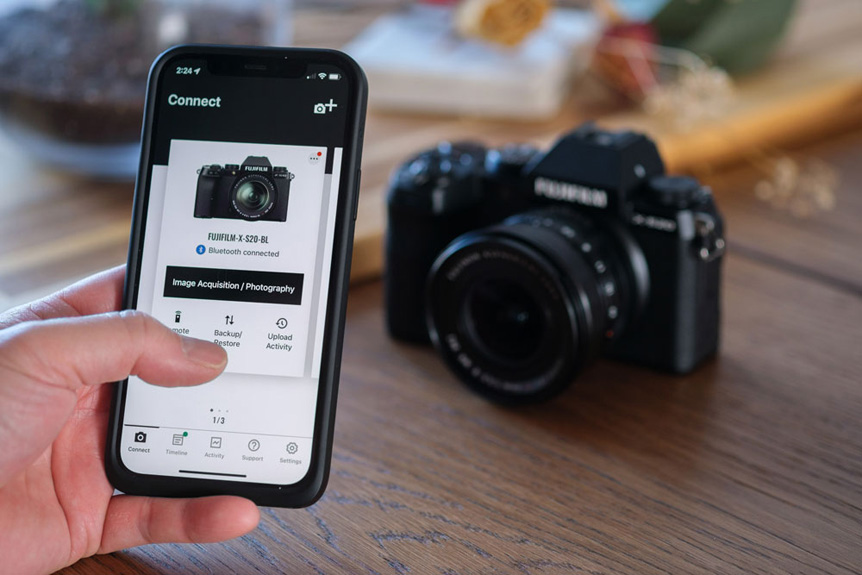
On XApp’s Connect page, you’ll see an image of your camera, the model name, and a Bluetooth connected message.

Transferring Images

Sending stills and videos to your smart device is quick, easy, and one of XApp’s key functions. You can begin to edit and share instantaneously. With your camera on and XApp open:

  • Select Image Acquisition/Photography.
  • If you see a pop-up stating XApp wishes to join the camera’s Wi-Fi network, please tap Join.
  • Observe the LED on the rear of your camera. It will flash between red and green to indicate data is being shared with your smart device.
  • Tap the small circle in the top-left corner of every image you wish to transfer. A green check mark will appear in each.
  • With all your desired images selected, tap Transfer the selected images. The process will automatically proceed.

Hint: Tap the grid or list icons above your selection of images to choose a preferred view.

Only JPEG and HEIF files can be transferred via XApp. To transfer a small, resized file, ensure the Resize button on XApp’s SELECTING IMAGES FOR TRANSFER page is toggled to appear green. You’ll see your smart device’s available storage within the same page.

Remotely Controlling Your Camera

Using your camera hands-free facilitates all kinds of creative and practical benefits. With XApp, not only can you view live scenes and release the shutter from your smart device – you can also adjust essential settings.

  • Open XApp and tap the Image Acquisition/Photography icon.
  • You’ll automatically enter image transfer mode, as outlined above. Simply tap the camera icon at the top of XApp’s display.
  • Your smart device replaces the camera’s LCD. You’ll see a view that emulates the camera display, including a live image.
  • Tap the image to change your focal point. Select S.S., F, and ISO icons to adjust exposure settings. Press the Film Simulation or WB icons to control the in-camera look.
  • To shift from photo to video mode, simply tap the movie camera icon in the bottom right of XApp’s display.

Hint: You’ll also find a self-timer icon, in case you’d like to step into frame. Control the scene from in front of the lens, begin the timer, and document the perfect personal moment.

Backup & Restore Camera Settings

The more you use your camera, the more customized to your preferred process it becomes. Between X Series and GFX System’s tactile, customizable buttons and dials, there’s plenty to remember. Thankfully, XApp lets you store those settings, then restore them if they’re lost.

  • When you open XApp, select the Backup/Restore option.
  • With all your camera customizations made, tap Backup settings from the camera.
  • If you wish to, customize the name of the backup.
  • With your backup saved, choose the Restore option to apply them to your camera body if lost, or to another body of the same model.

Activity Record & Timeline

XApp contains a few considered ways to track the progress of your image making. First, you’ll need to share location data from your smart device.

Adding Location Data

This setting should be enabled by default, but to turn it off or on, navigate to your camera’s Bluetooth/SMARTPHONE SETTING menu, then set SMARTPHONE LOCATION SYNC to ON. As you prepare to make an image, you’ll see a globe and satellite icon in the top right of your camera’s display.

Now you’re free to create. Your smart device will automatically transfer GPS data to your camera. Location data sharing only works while XApp is running. You can switch to other apps – just don’t close XApp entirely.

Sharing & Viewing an Activity Record

In order to use XApp’s Activity Record and Timeline features, you’ll first have to begin a record. This requires signing in.

  • Open XApp and select the Activity icon.
  • Sign in with Apple, Google, or Facebook, depending on your preference.
  • Tap the Upload Activity icon to sync activity with your account. Upon first use, you’ll be prompted to give XApp permission to access these records from your camera.
  • Tap the Set button. You’ll see many activities that can be recorded, but for the most comprehensive tracking, select All items.
  • Press Set to the camera, to complete.

XApp’s Activity panel provides a clear overview of your entire image making history. You can total the number of stills made, minutes of footage recorded, which cameras and lenses you used, and preferred Film Simulations.

Activity Record is a great way to see how you’ve evolved as a creative, and can provide beneficial insight when it comes to choosing tools for a session or trip. Be sure to check in every now and then.

Timeline

XApp’s Timeline function lets you track when and where you have created images. This can be useful for a range of practical purposes, or simply as a reminder of your imaging journey.

  • Open XApp and tap the Timeline icon.
  • Enter the map to see where you’ve made images.
  • Viewed by date, explore the cameras, lenses, and Film Simulations used during a particular session.
  • Tap the pencil icon to change the title of your session and add field notes as desired.

Hint: Zoom and swipe to navigate in map view, and see an expansive or highly detailed record of locations.

If you ever need a refresher, XApp’s Support icon leads you to all kinds of useful information – including a digital camera Q&A containing your camera’s instruction manual, and tutorials on each of XApp’s features.