


Carl Hare
Carl Hare is a Fujifilm UK Product Specialist and Freelance Photographer based in Hampshire, UK. Carl started out his photography life as a wedding and event photographer, but has since expanded his photographic skills into many genres. Carl has a great passion for educating and has been teaching courses and workshop on many different genres of photography since 2014. These days Carl is just as comfortable shooting headshots in a studio environment or teaching lighting techniques as he is being outdoors shooting landscapes and wildlife in the depths of winter in the Arctic. Carl previously shot with Nikon equipment up until he decided to switch over to the Fujifilm X Series cameras and lenses in 2012 and the GFX system in 2017.
Have you ever really got to know your camera properly? FUJIFILM X Series cameras are laden with great features, so there’s a good chance you may not know all of them. We asked FUJIFILM product specialist Carl Hare to compile a list of his handiest hacks. Here’s what he came up with!
Customising the function buttons
Your X Series camera has a range of customisable function buttons. Exactly how many will depend on which model you have. Each one has a default setting as standard, but you can change this to something more suitable to your shooting needs. Here’s how:
- With the camera on, press and hold the DISP BACK button for four seconds to bring up the FUNCTION (Fn) SETTING menu.
- Navigate through the menu to choose which button you would like to customise, then press MENU OK to view the list of settings available.
- Press MENU OK when you are happy with the chosen option and continue to customise the rest of the buttons as you wish.
- To exit, press the DISP BACK button and your settings will be saved automatically.

Customising the Q Menu
In addition to programming Fn buttons, you can tailor the Q Menu to your needs using a similar process. Just follow these steps:
- With the camera switched on, press and hold the Q button for four seconds to bring up the editable Q Menu screen.
- Navigate to the shortcut you would like to change and then press the MENU OK button.
- A list of options will appear – choose the one you want to use in that particular location and press MENU OK again.
- Repeat this process until all Q Menu options are set up as you want them, then either press DISP BACK or half-press the shutter release to get ready to shoot again.
Want to go one step further?
Create custom settings
As well as being able to set up the Q Menu or a specific button to your requirements, with selected X Series cameras, you can create custom shooting modes that set a series of camera functions ready for a particular type of shot. You could, for example, set up a custom setting for shooting black & white landscapes or a type of sport. Start by creating the custom setting itself:
1. With the camera turned on, press the MENU OK button and scroll down to IMAGE QUALITY SETTING.
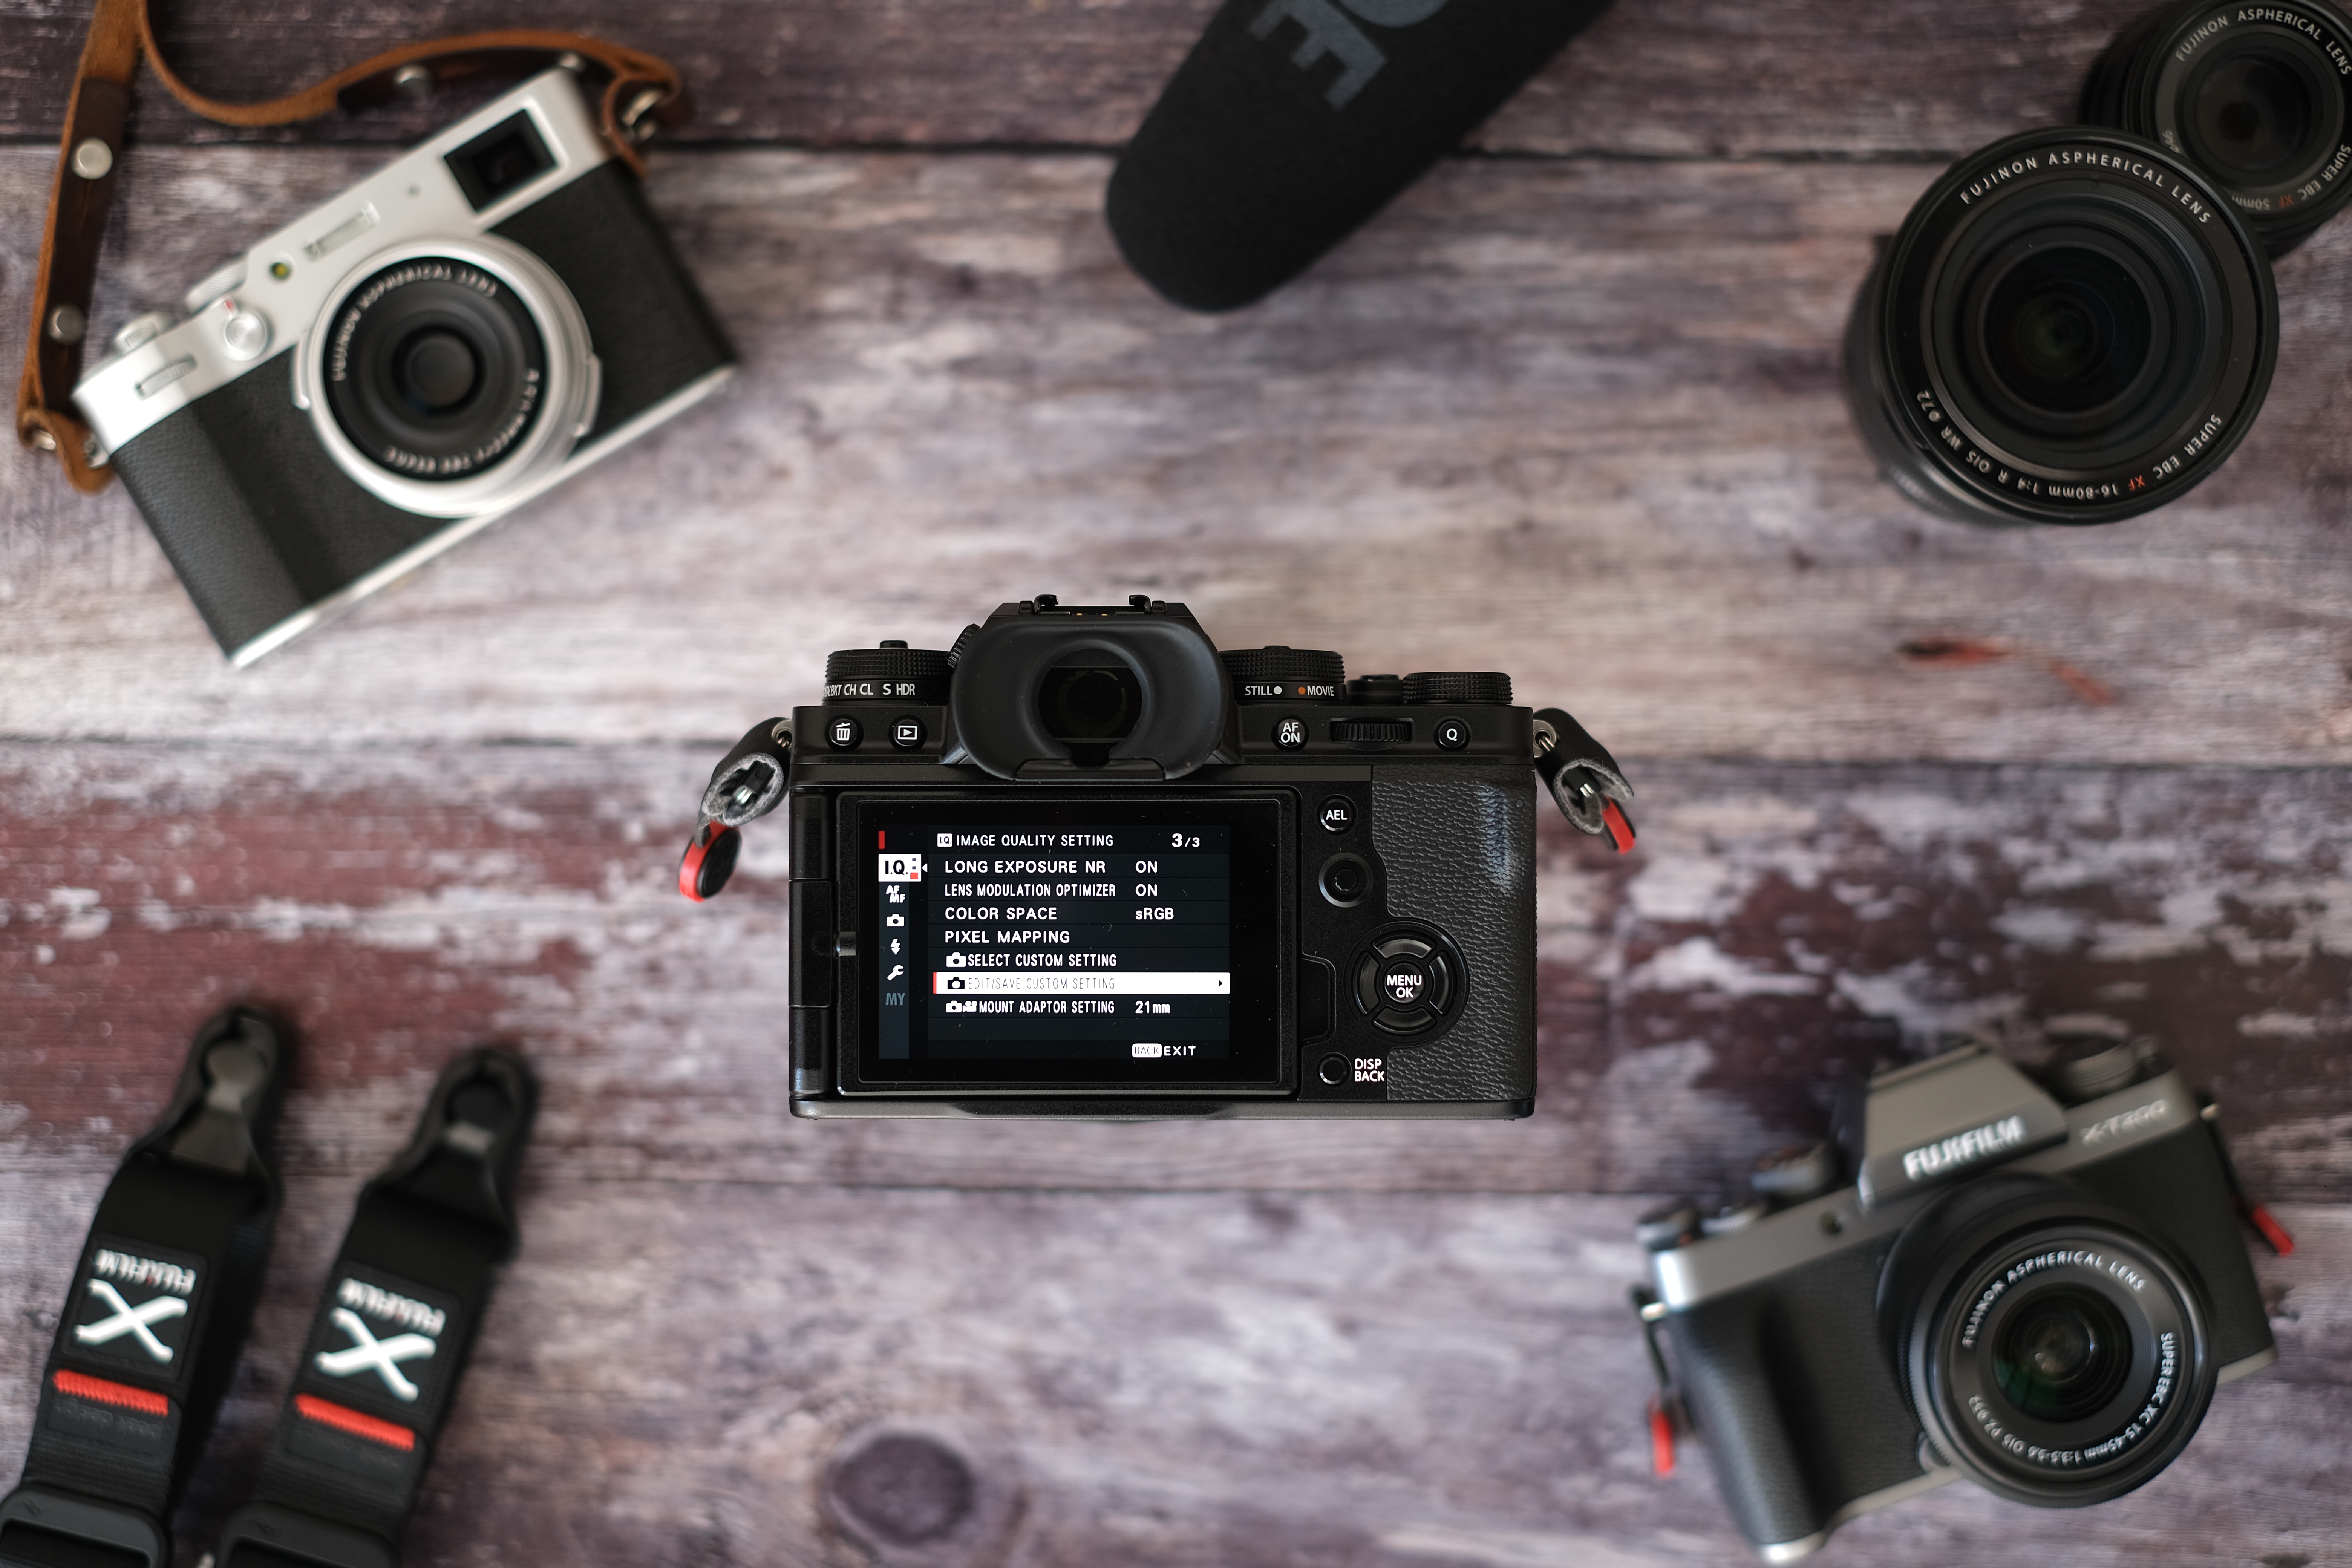
2. Select EDIT/SAVE CUSTOM SETTING and press MENU OK.
3. You will now see a list of seven custom settings named CUSTOM 1 to 7.
4. Highlight the custom setting you want to customise and press MENU OK.

*The next step will vary depending on which FUJIFILM camera you have.
You will either see:
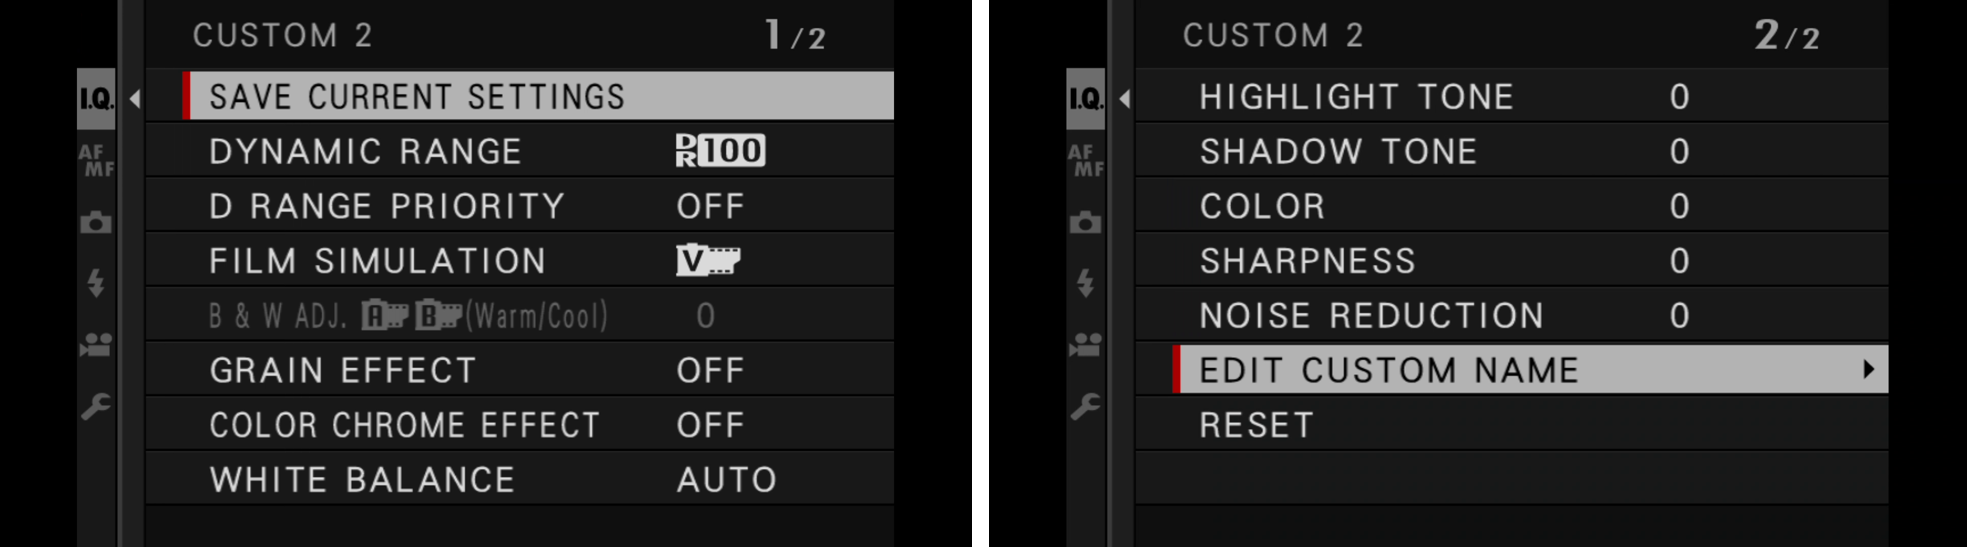
A) The CUSTOM menu below, which features the different settings you can apply, with SAVE CURRENT SETTINGS on the first screen, and EDIT CUSTOM NAME and RESET on the second screen. If this is the case, scroll through and change settings as required. Once you have selected your chosen setting, navigate to screen one and click SAVE CURRENT SETTINGS. You can then choose to EDIT CUSTOM NAME if you wish to name this particular set-up.
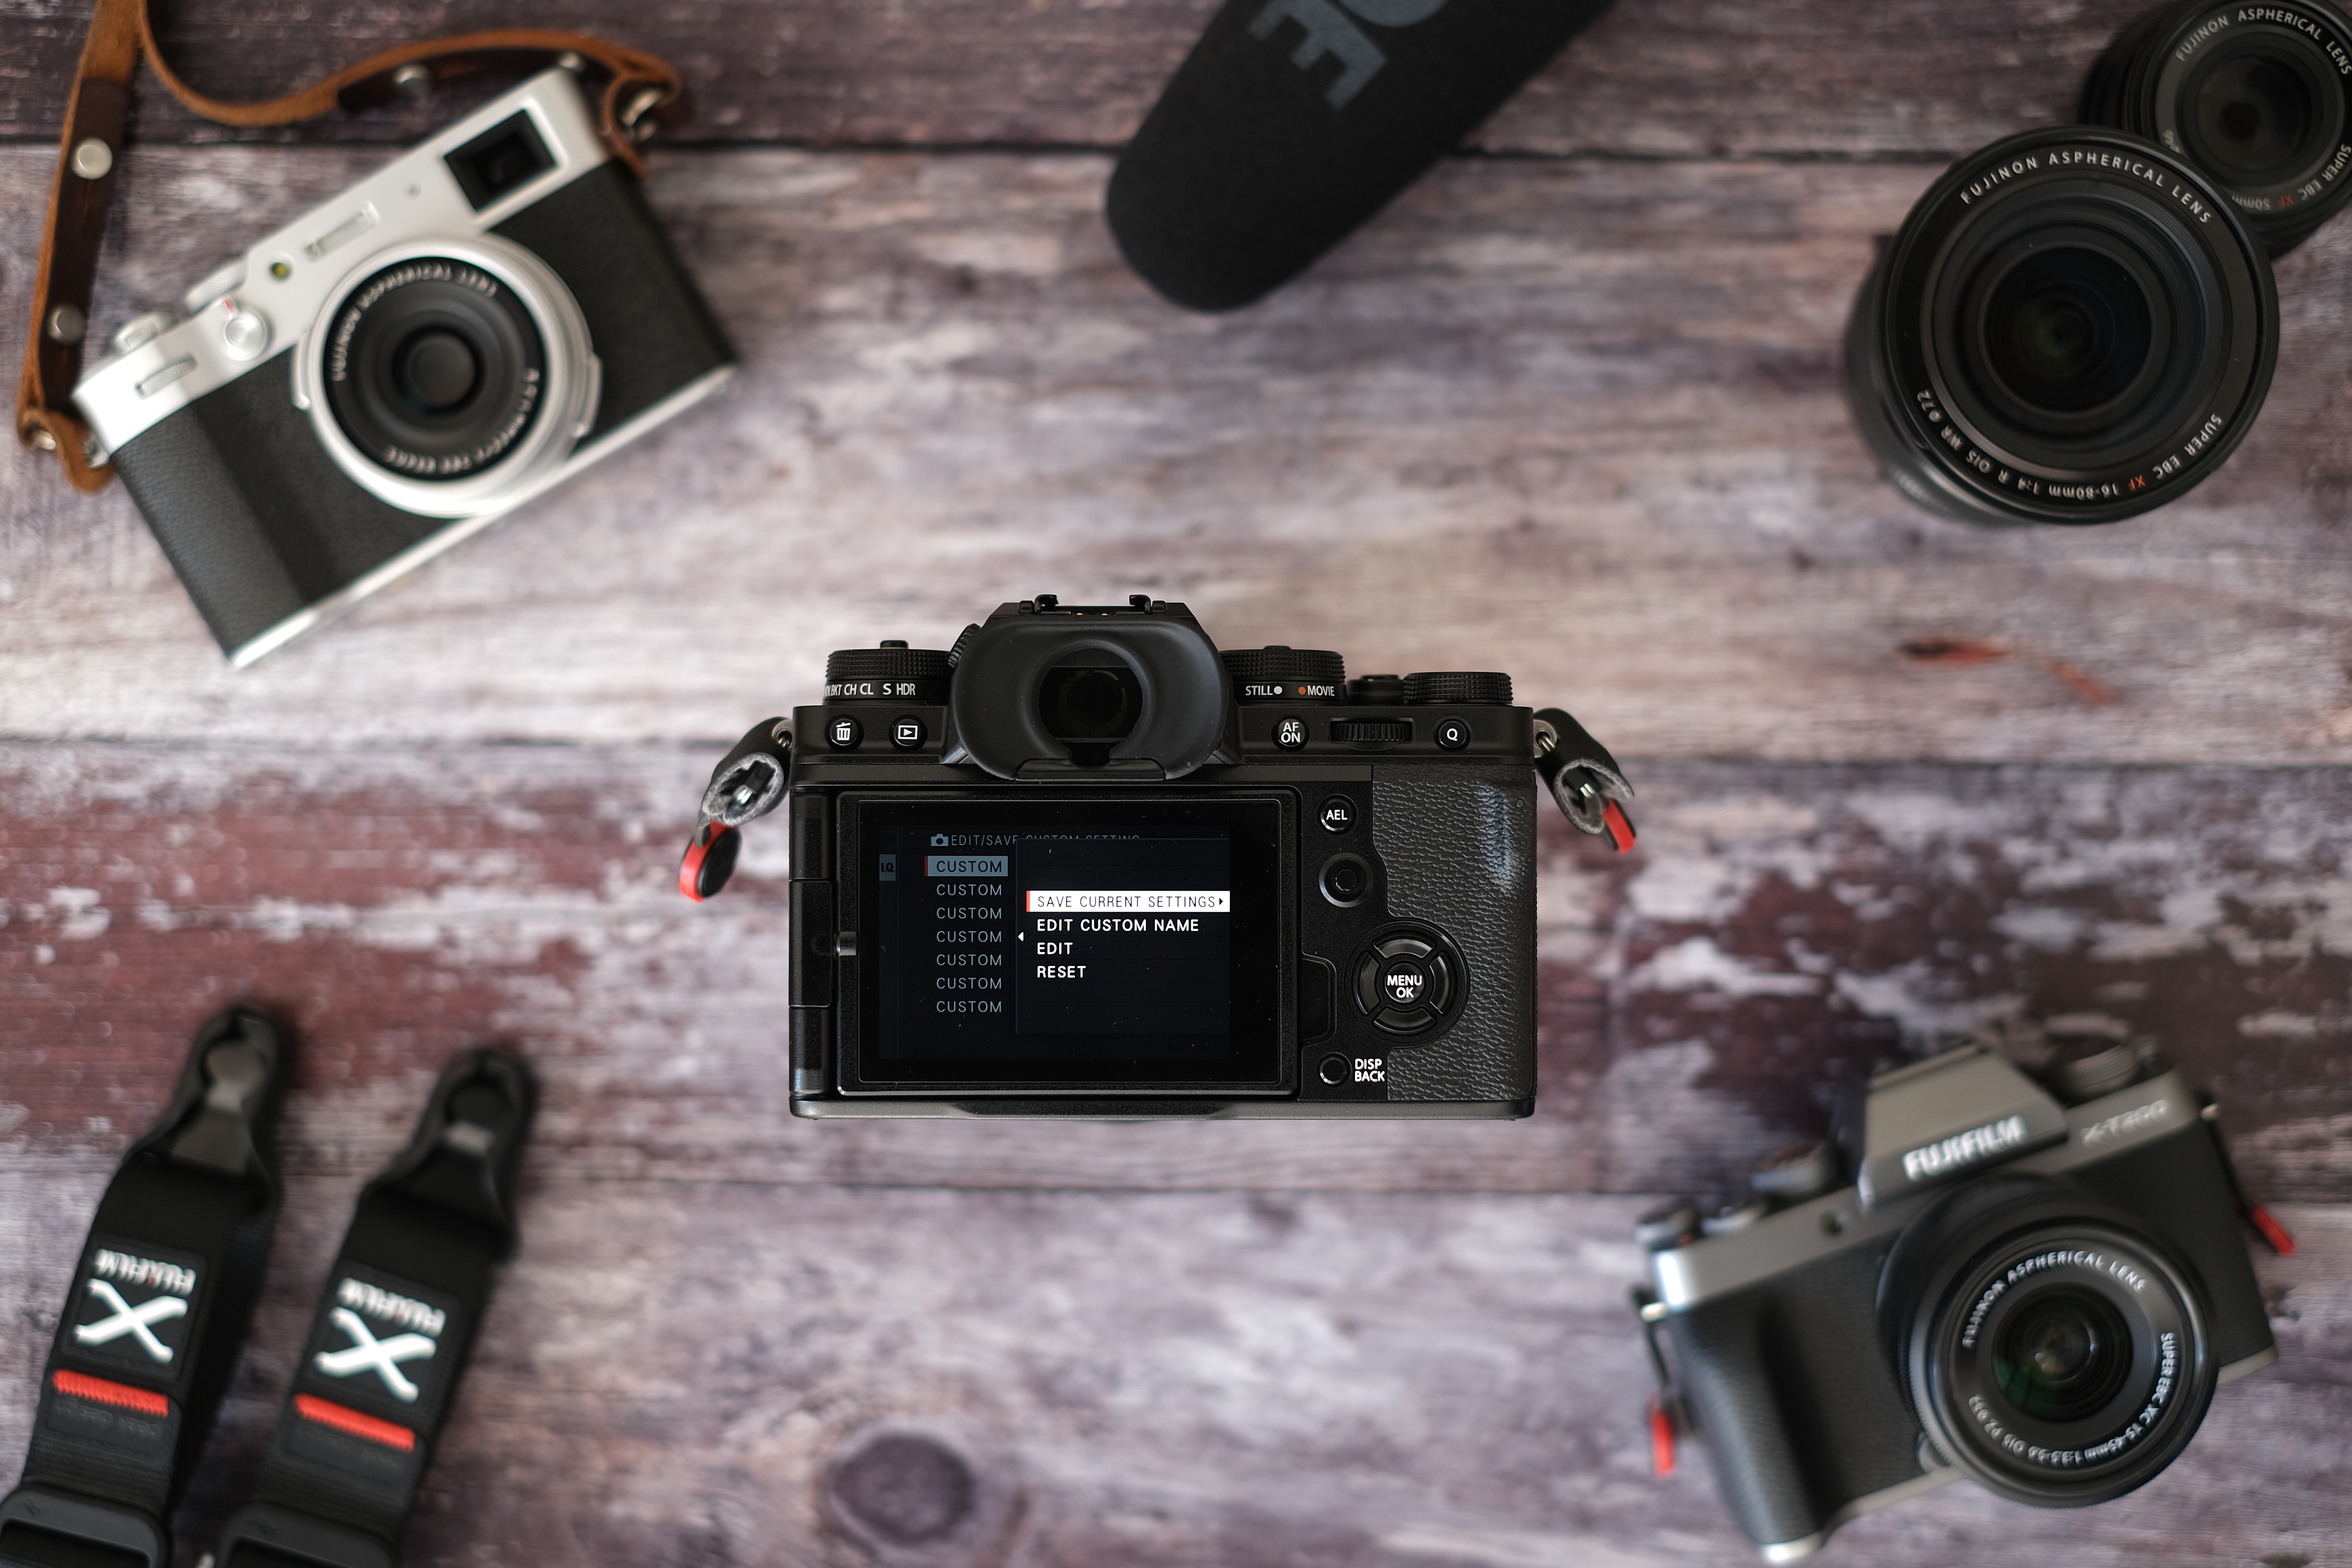
B) The following four options:
- SAVE CURRENT SETTINGS – save any settings you have changed in the Q Menu so far.
- EDIT CUSTOM NAME – name each profile.
- EDIT – edit the settings to save for your custom profile.
- RESET – resets all settings for that particular custom setting.
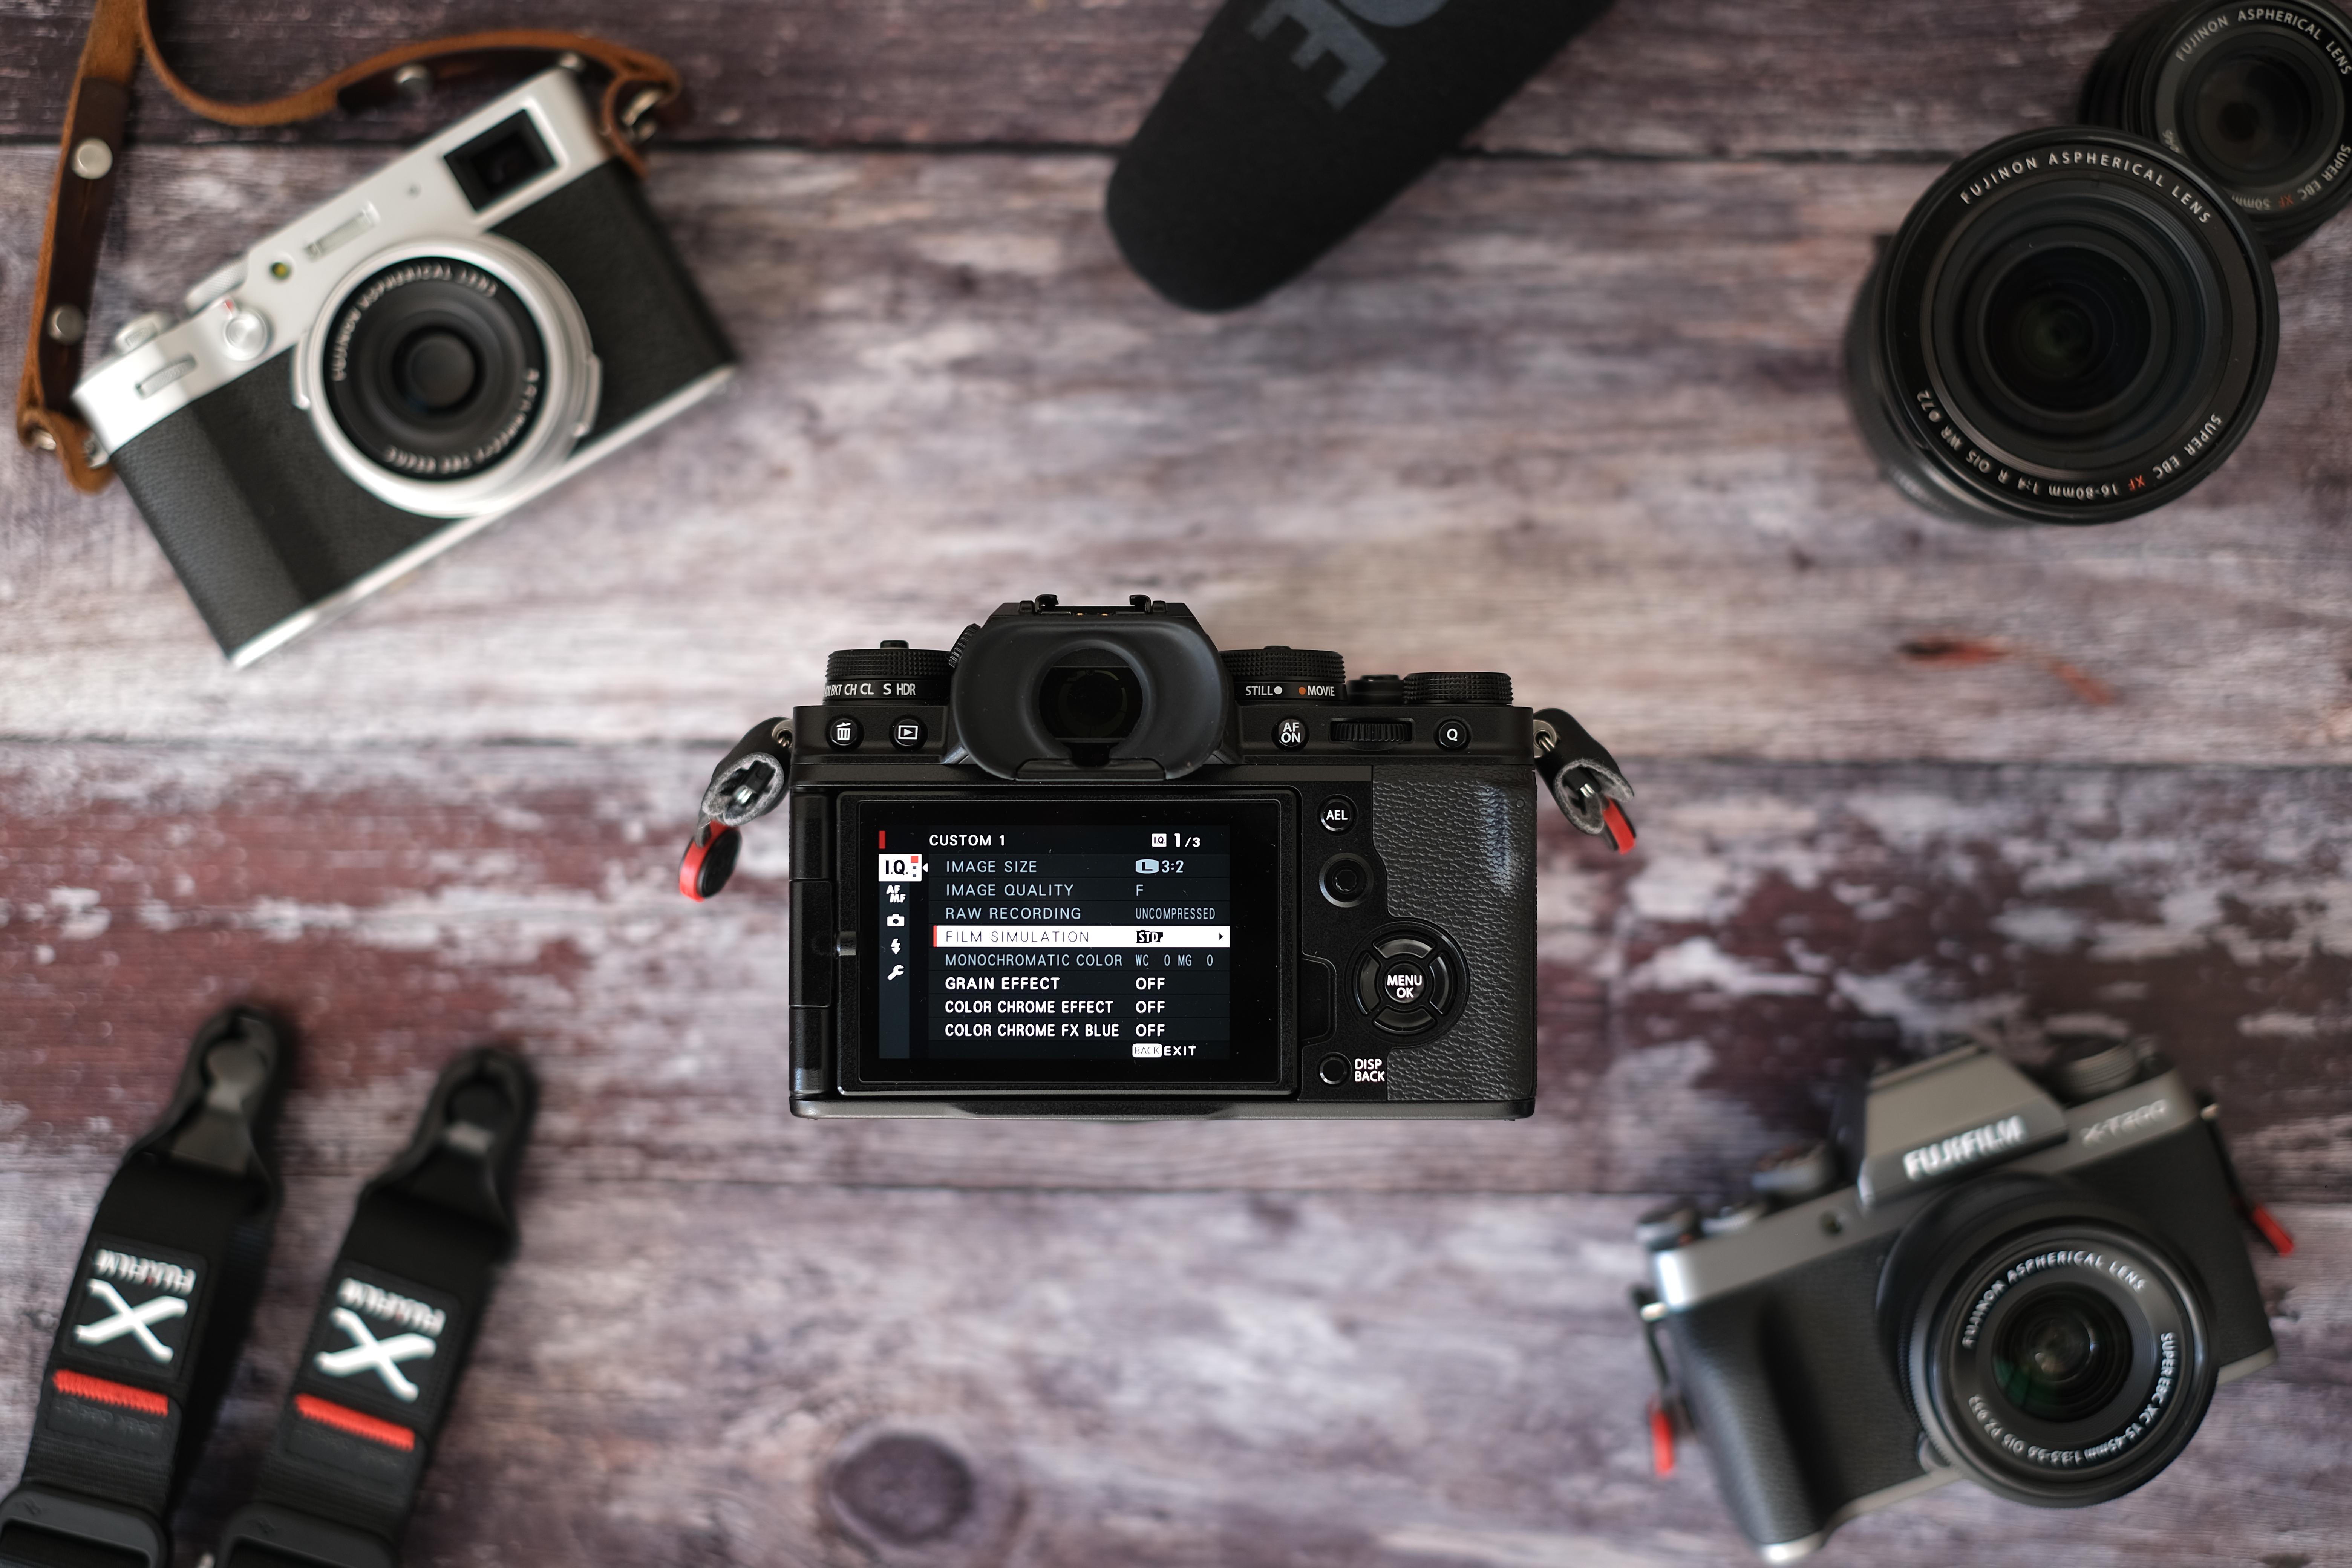
5. You can now change any of the settings highlighted in white by scrolling to the function, pressing MENU OK, changing it and then pressing MENU OK again to take you back to the menu.
6. When you are done changing all the settings, press the DISP BACK button. The camera will ask CUSTOM (number) SET OK? If your settings are how you would like them, highlight OK and press the MENU OK button.

7. You can now go in and change the name of the custom profile if you like.
Accessing these settings is easy while you’re shooting. Press the Q button and the custom mode option will be automatically highlighted in the top-left corner of the screen. Now, use the rear command dial to scroll through the seven custom modes – the name of each appears at the top of the screen.
To Focus Lever or not to Focus Lever?
That is the question! If your X Series camera has a Focus Lever, you can choose how it works. With the camera turned on, press in the Focus Lever for four seconds until the FOCUS LEVER SETTING menu appears, giving you three options to choose from:
- OFF: Focus Lever is inactive.
- BUTTON LOGO: push the Focus Lever in to activate.
- ON: Focus Lever is always active.

Shoot and share with the FUJIFILM Remote Camera app
If you want to quickly upload to social media, or simply want to send a nice picture of your holiday/pet to friends and family without having to upload it on to a computer, you can utilise the wireless connectivity functionality on your camera to connect to the FUJIFILM Camera Remote app. Then you can send full-resolution JPEG images to your smartphone or tablet.
Whatsmore, the app also allows you to shoot remotely (no more rushing to make the self-timer!) and update your camera’s firmware, amongst other things!
Out of the box, however, your camera is set to send a three-megapixel low-res image across the wireless connection. This is great for social media, but if you would like to send a full-resolution file, do the following first:
1. With the camera turned on, press MENU OK and scroll down to the SET UP menu (spanner icon).
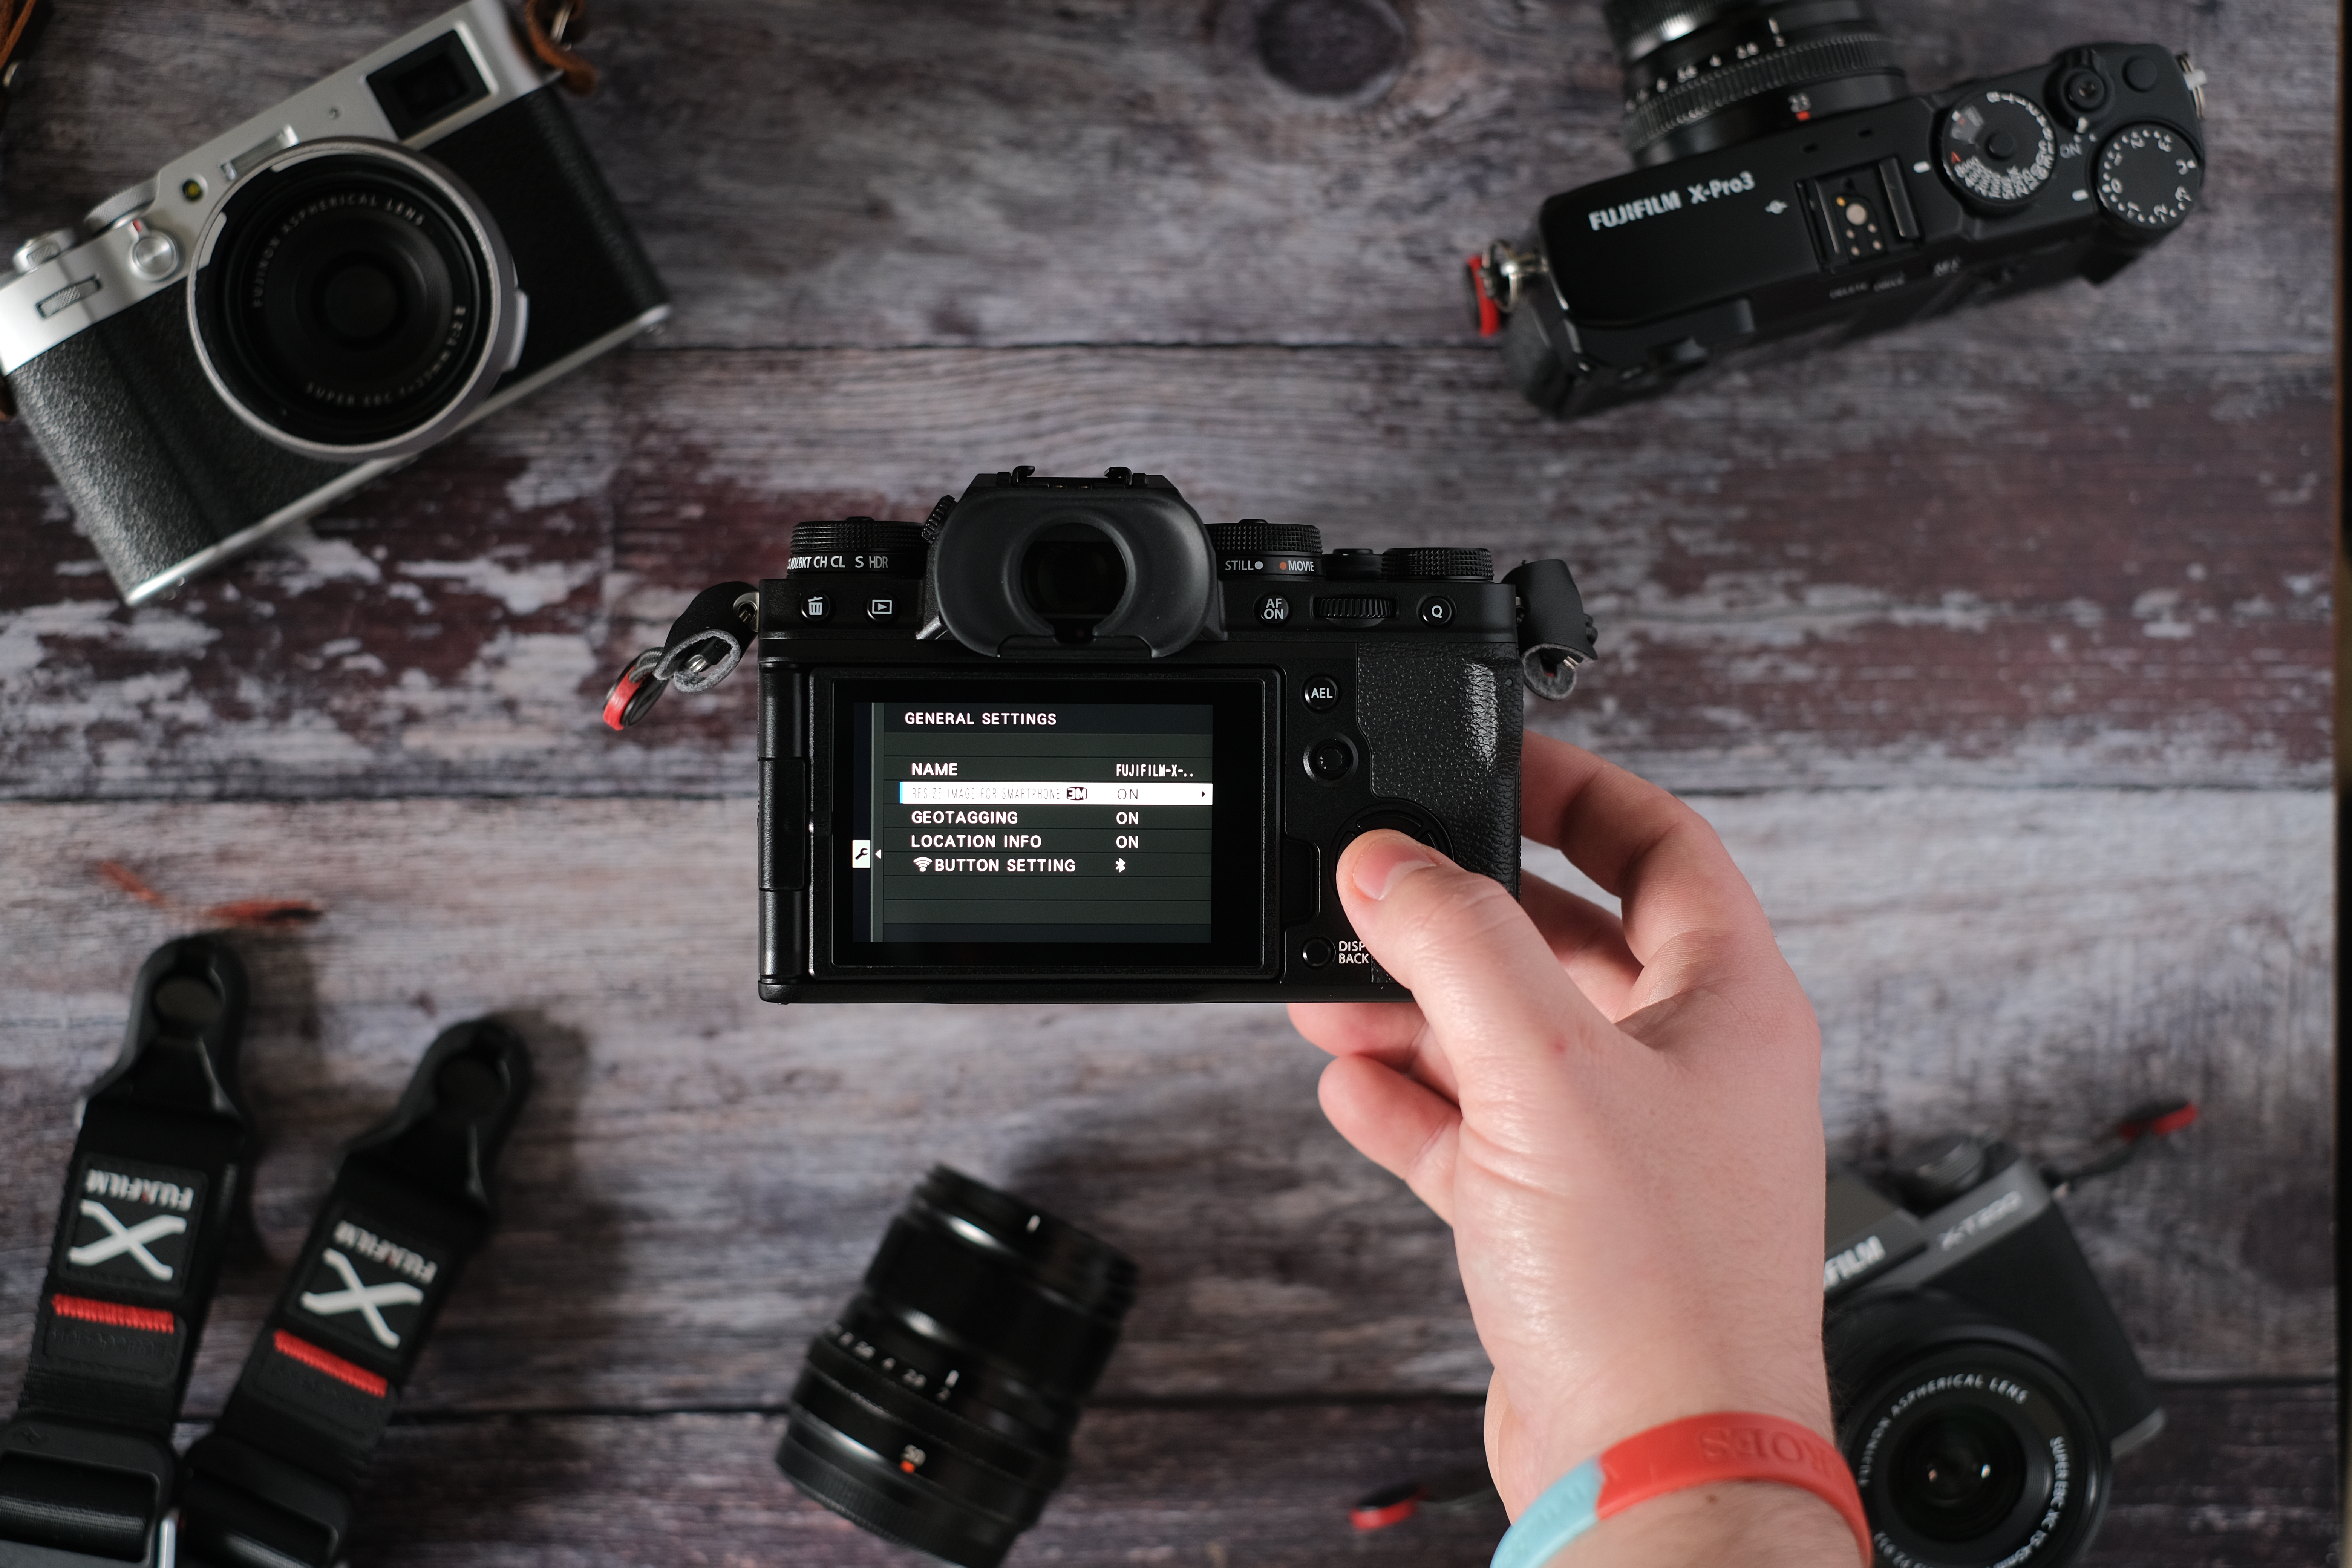
2. Scroll down to CONNECTION SETTING, then press MENU OK and scroll down to GENERAL SETTINGS and hit MENU OK again.
3. Now, scroll down to RESIZE IMAGE FOR SMARTPHONE and change it from ON to OFF. This will now allow you to send a full-resolution JPEG image from the camera to your device.
In order to transfer your photos on to your smart device, you will need to download the FUJIFILM Camera Remote app from your app store.
1. With the app downloaded, turn on your camera and access the menu, then scroll down to the SET UP menu (spanner icon).
2. Navigate to the CONNECTION SETTING page and then select Bluetooth SETTINGS, followed by PAIRING REGISTRATION.
3. On your smartphone, open the FUJFILM Camera Remote app and you will be prompted to choose a camera to connect to. Navigate through the settings to select the model of your camera, once you have found your camera, click ADD.
4. If you haven’t already, follow the on-screen instructions on your smartphone and then click PROCEED. You will see your camera’s name appear.
5. Click on your camera’s name and the connection pairing will begin. When the pairing is complete, you can choose to have the time and date transfer across from your smartphone. I choose this option as it is more accurate.
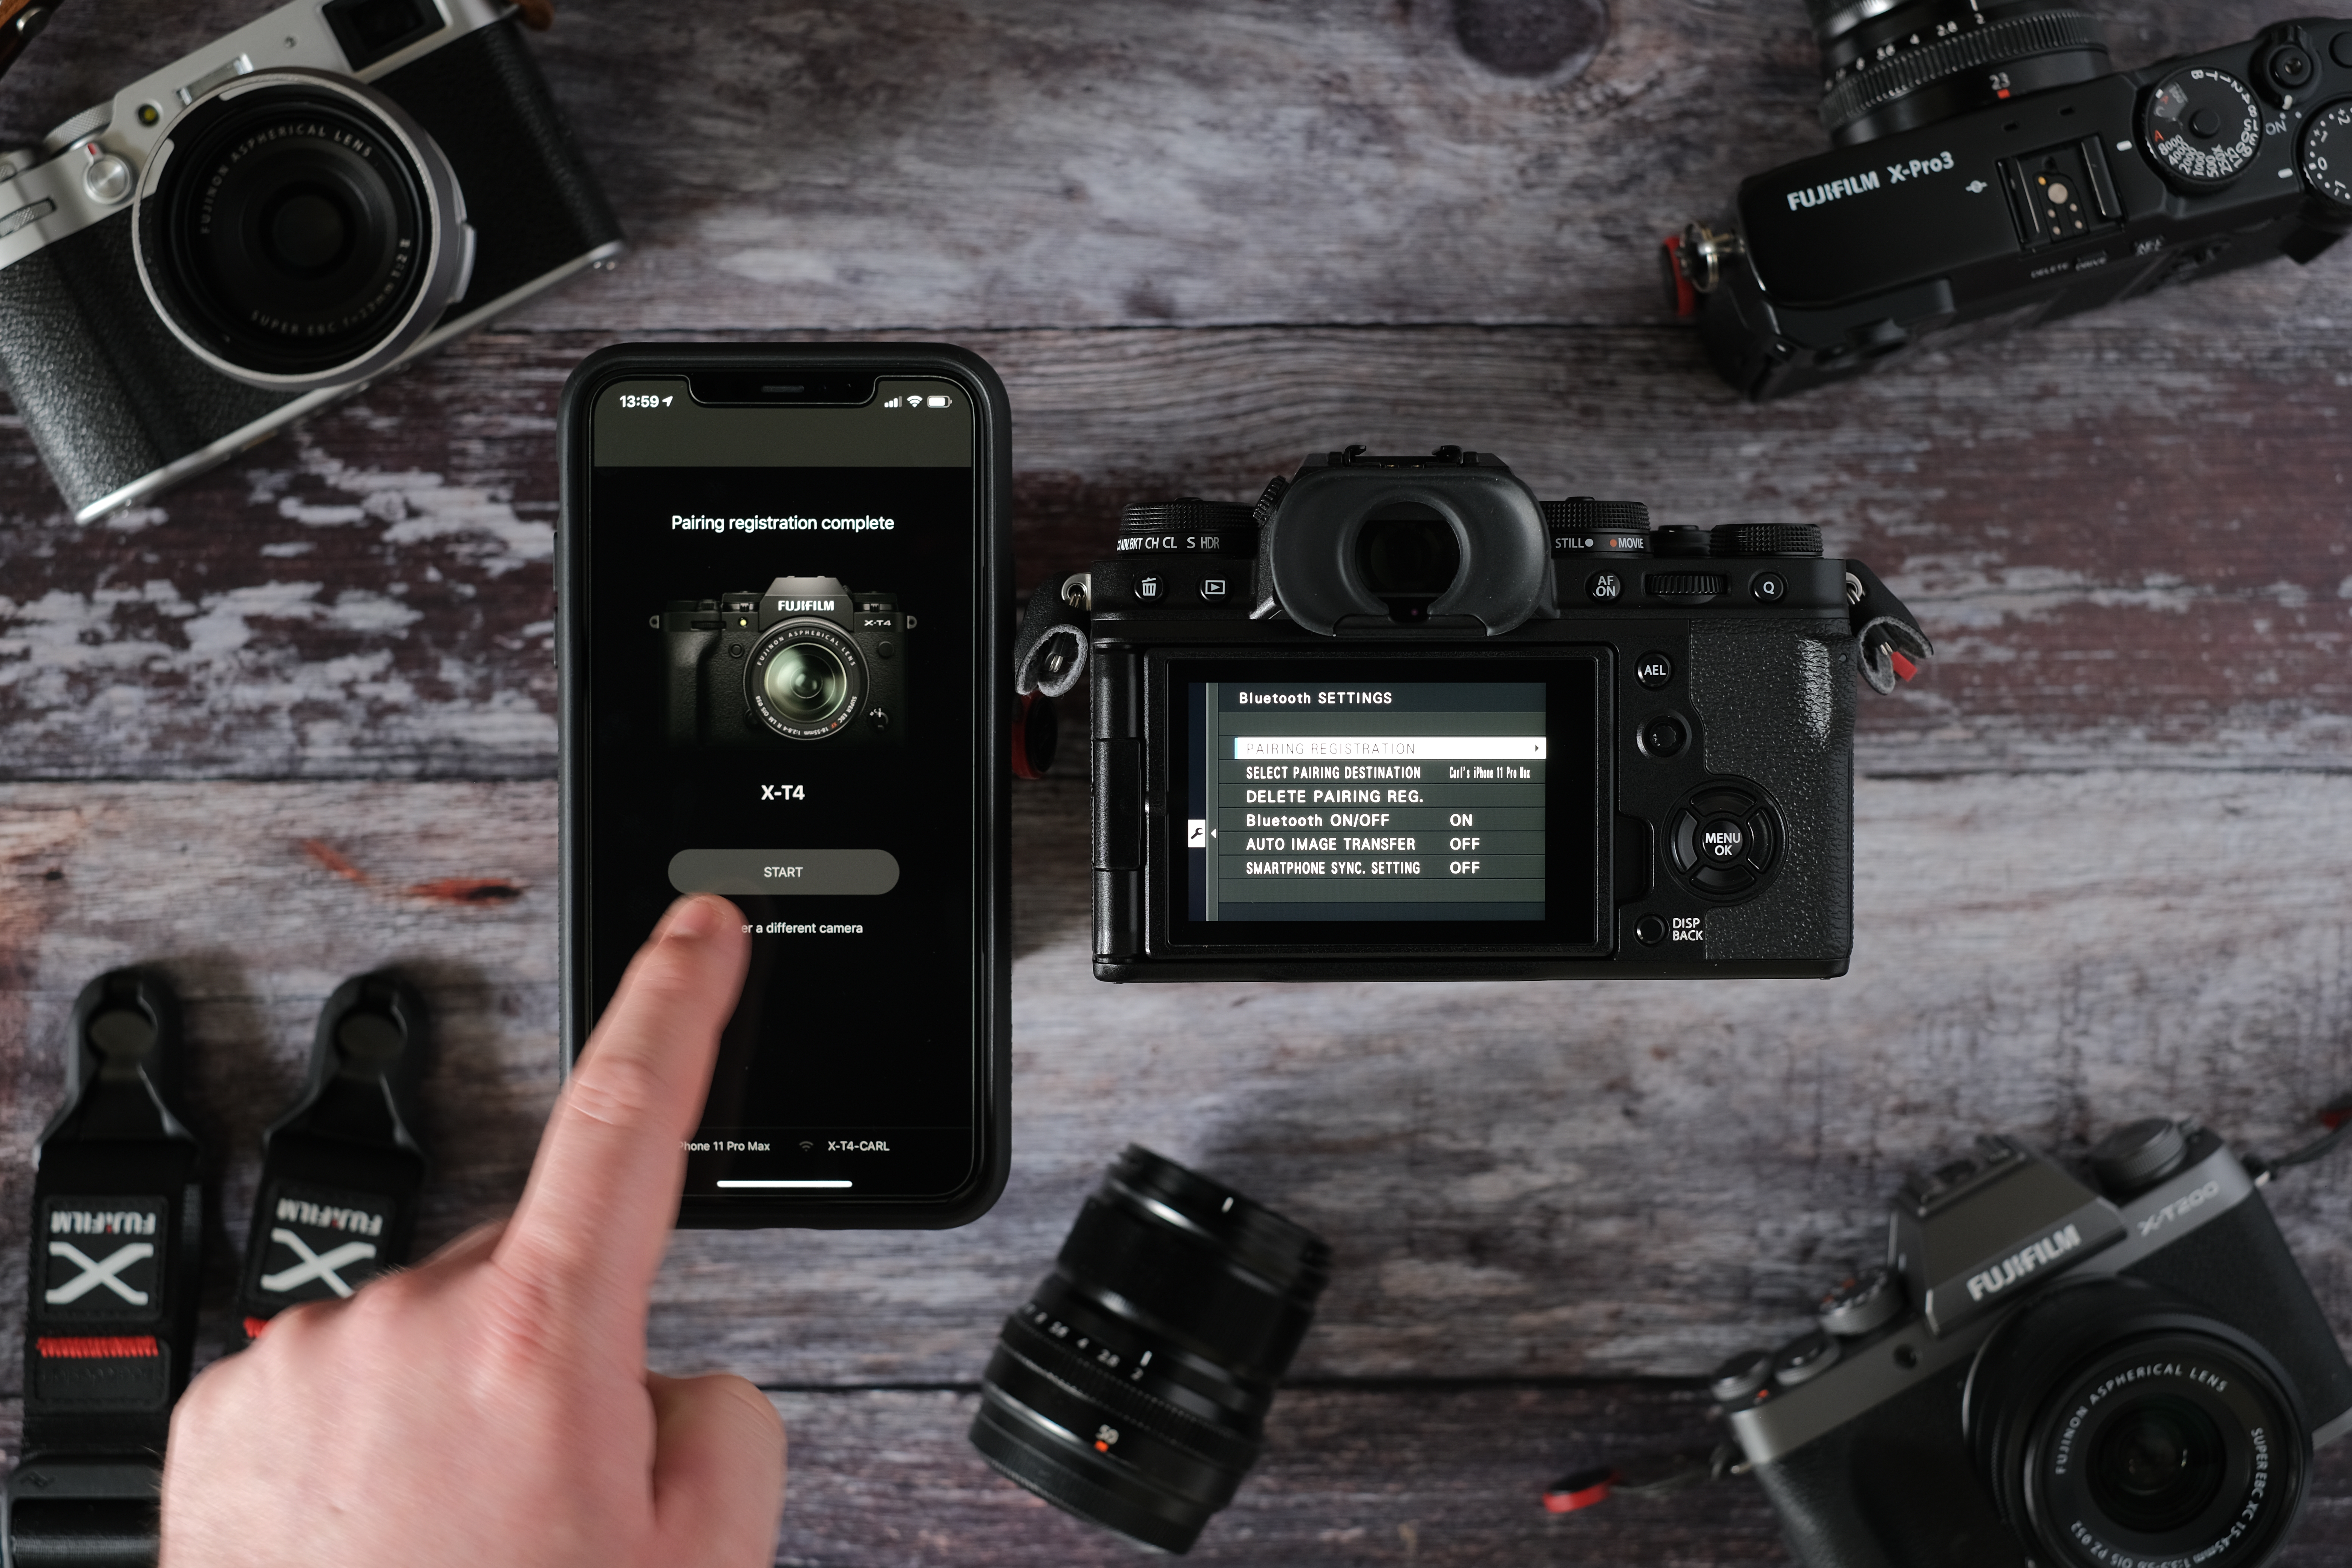
6. Next, click START on your smart device and you should see a white triangle symbol next to the name of the camera you are connected to. This shows that there is a Bluetooth connection between your smartphone and device.
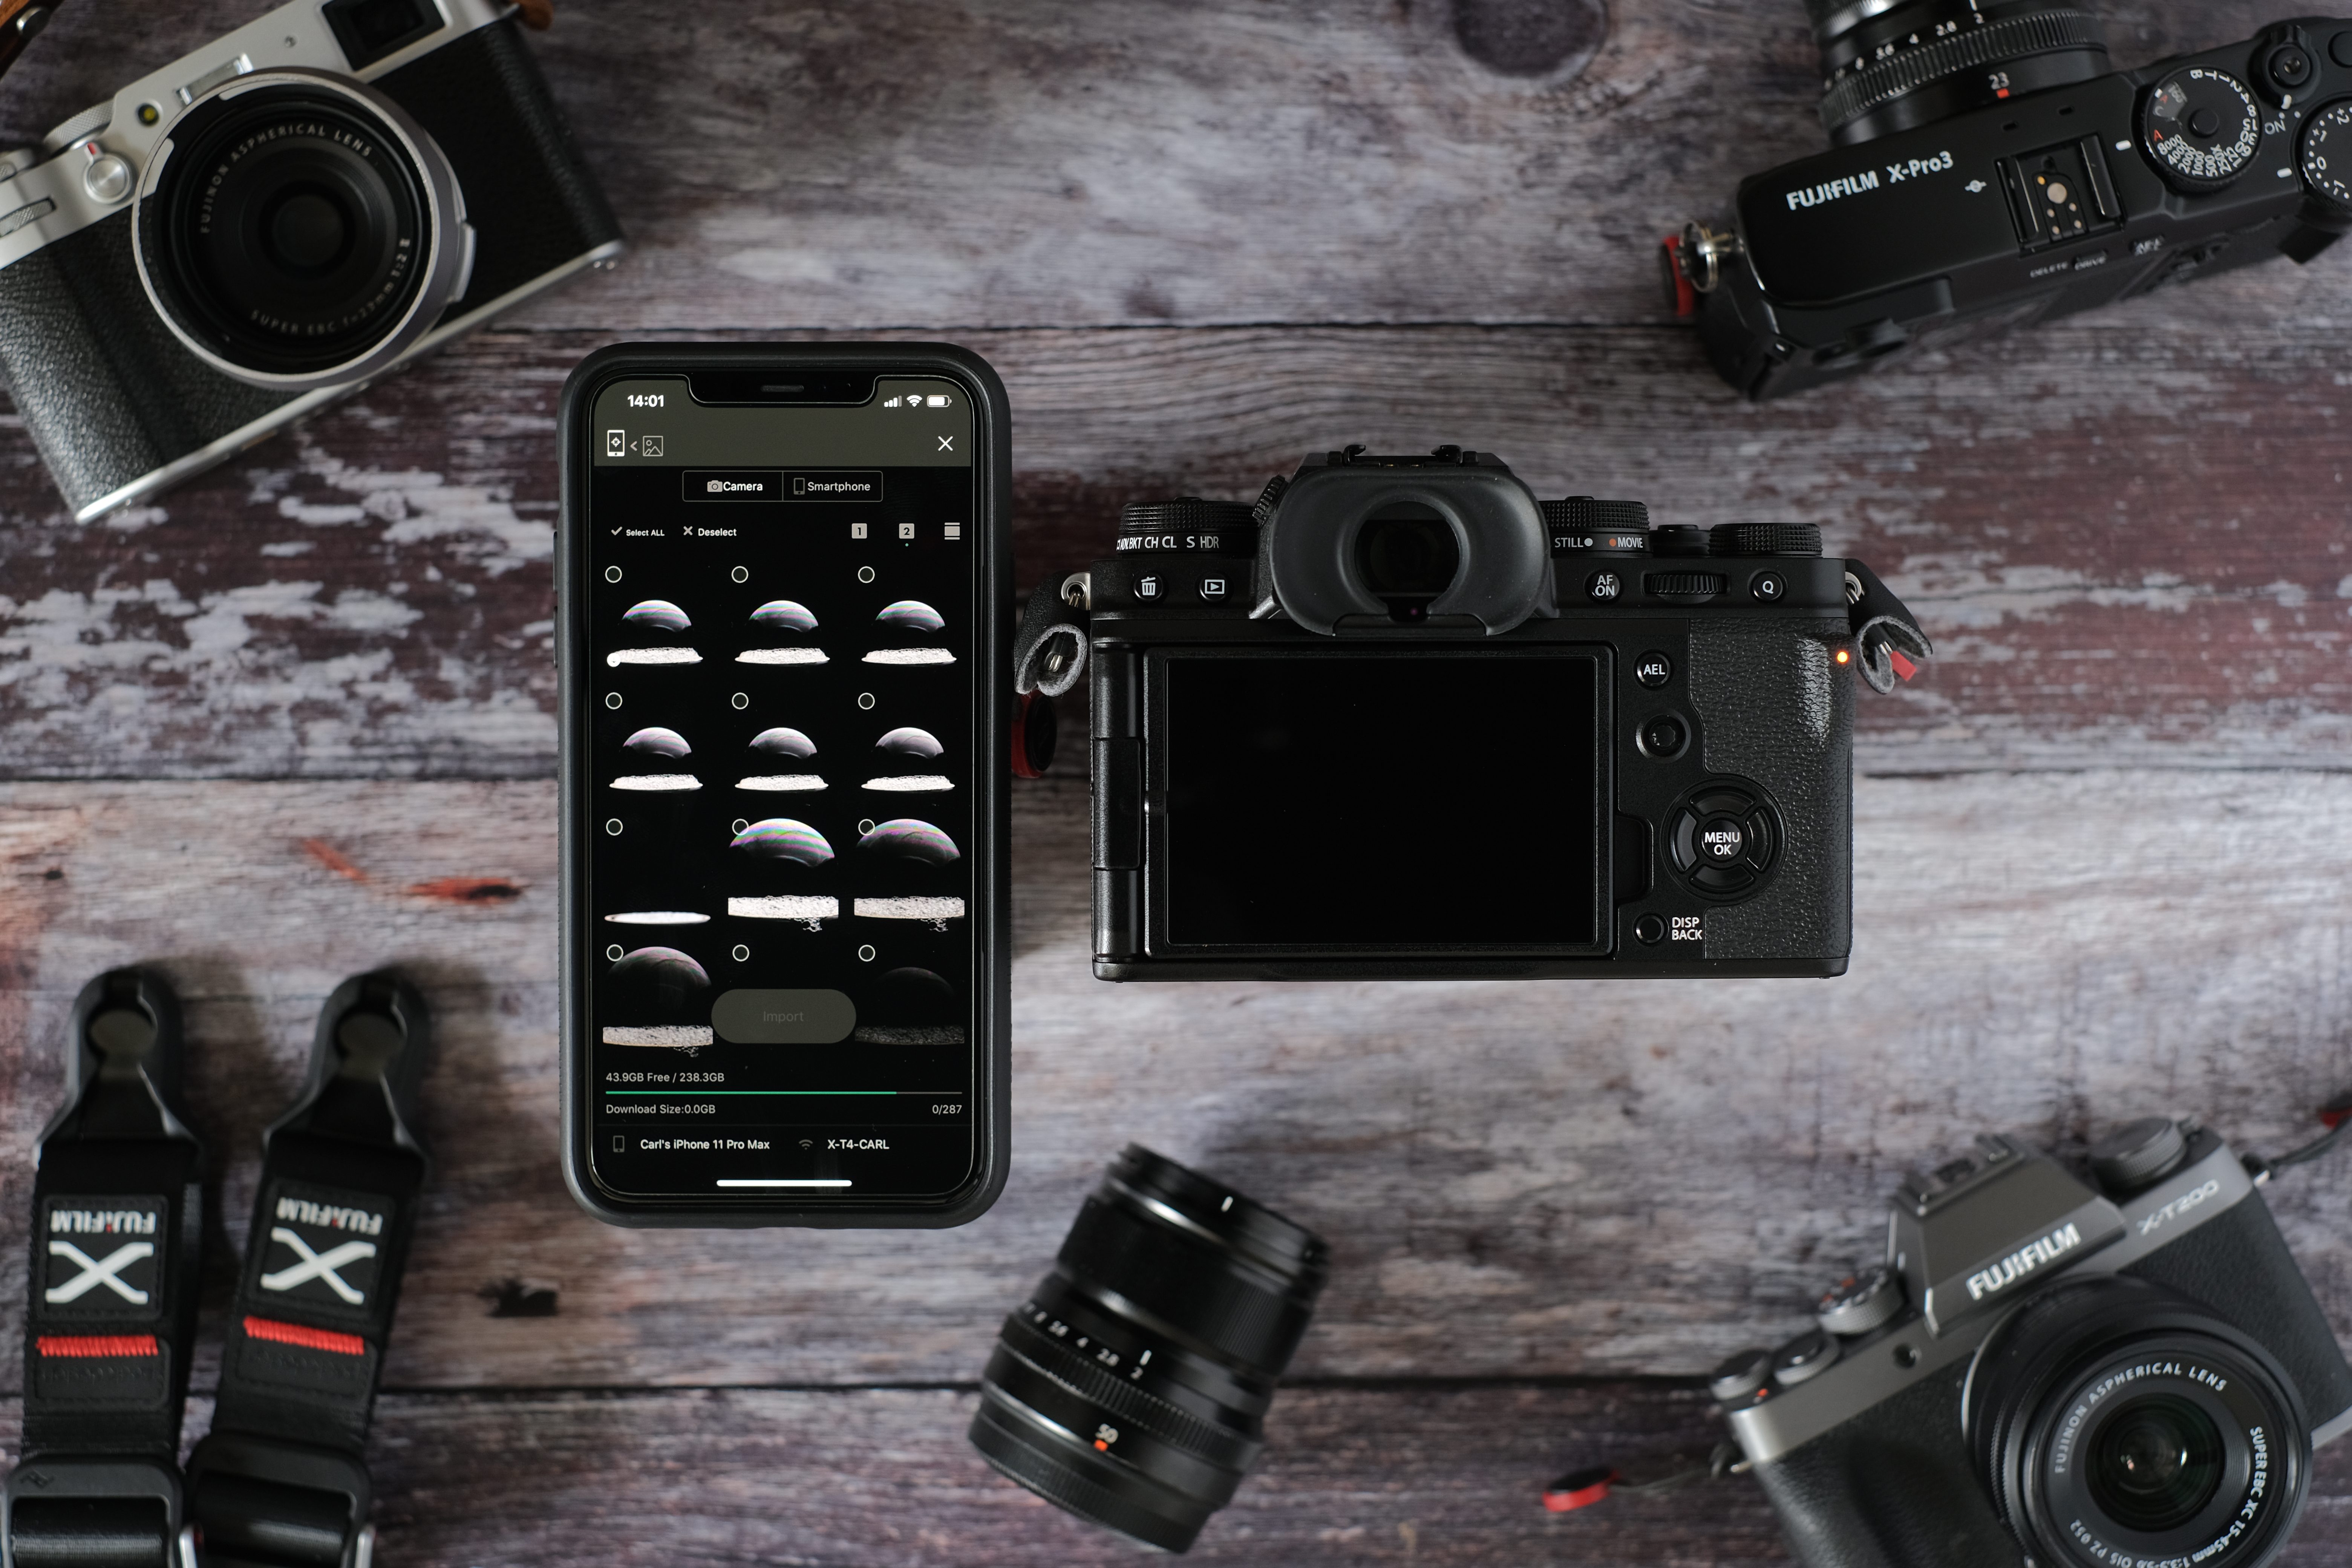
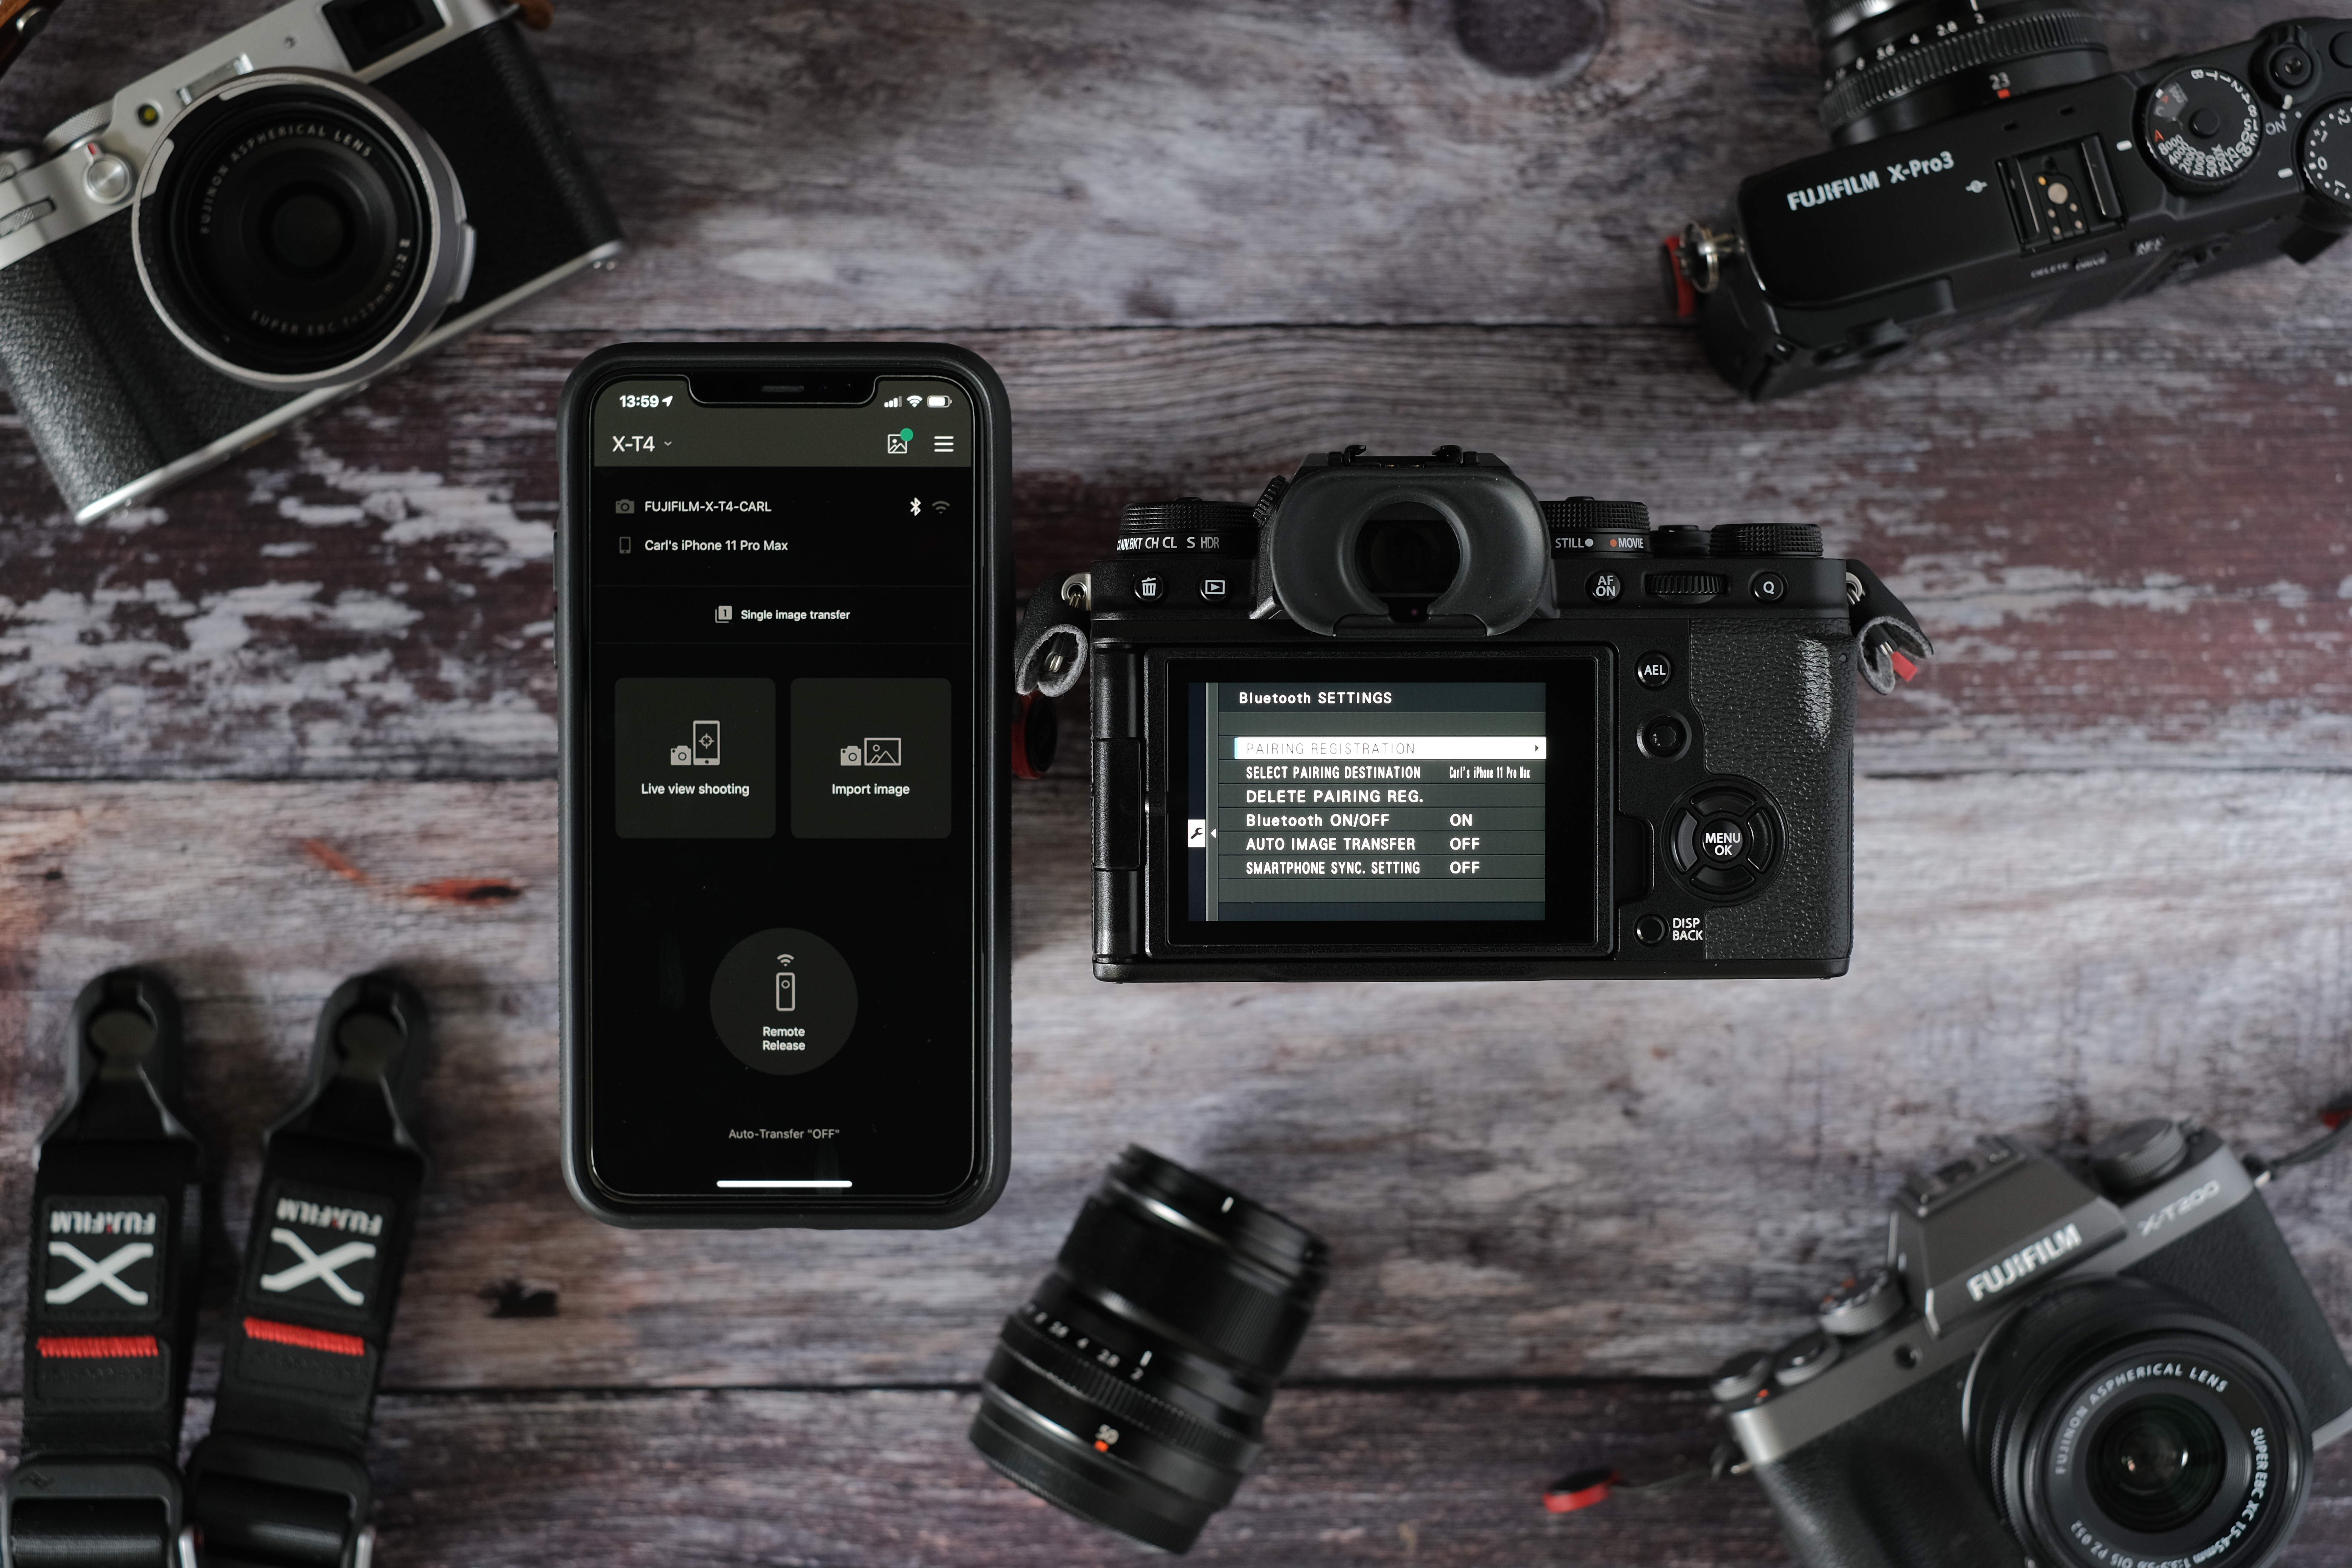
7. Click on your camera name and you will be taken to the functions of the app and camera. You can either import JPEG images from your camera, or you can start Live View Shooting, which uses your device as a wireless remote for shooting pictures/filming video.
8. Click on Import Image. Once your camera has connected, you will see your images displayed on your smart device. Tap to select which images you would like to import – you will see a green circle in the top-left corner of your image when it is selected.
9. Once you have made your selection, press the IMPORT button and the images will be transferred to your phone. These will appear in your camera roll or a gallery.
10. Once completed, click OK at the top right of the screen, then the X at the top right of the screen. This will disconnect the camera from the device.