FUJIFILM Tether Plug-in PRO - Users Guide 6 - Using the Control Panel in the PC mode
Using the Control Panel in the PC mode (operation from Mac or PC)
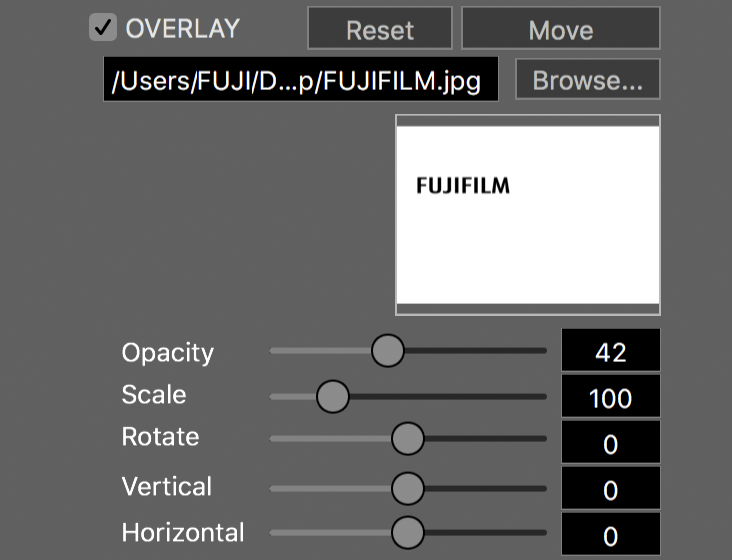
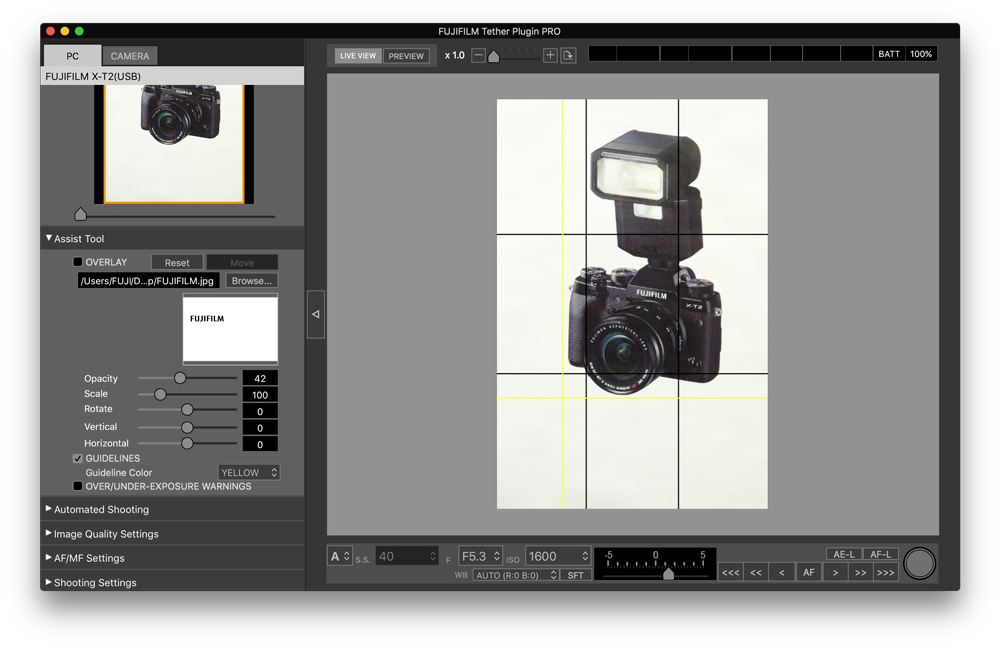
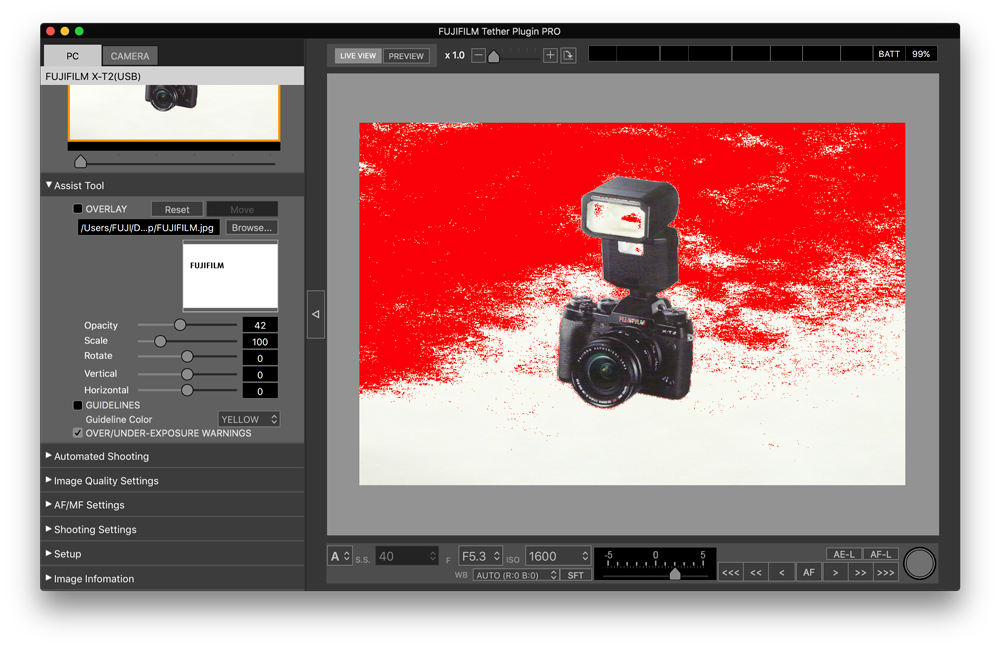
Check the Overlay box to overlay a specified image on a captured image. You can also adjust the image’s opacity, scale, rotation and display location.

Check the Guidelines box to display grid and guidelines in the image display area. You can specify guideline color and use the mouse to drag the guidelines to a different position.

Check the Over / Under-Exposure Warnings box to show highlight clipping and shadow clipping in the image display area.

This tool allows you to specify exposure conditions for exposure bracketing. Note that using this function increases the number of shots taken. This is useful for blending multiple exposures for HDR. Prepare an exposure blending application separately. This can be used in combination with FOCUS BRACKETING.

This tool enables focus bracketing with graduated change of focus positions. Note that using this function increases the number of shots taken. This is useful for stacking multiple exposures for focus stacking. Prepare an exposure stacking application separately.
Specify one end of focus-bracketing range as End-point1 and the other end as End-point2. Click on applicable positions on your image, using the eye dropper tool, to specify the end points.
This can be used in combination with EXPOSURE BRACKETING.

This tool offers functionality equivalent to the camera’s Interval Timer Shooting. This cannot be used in combination with other bracketing functions.

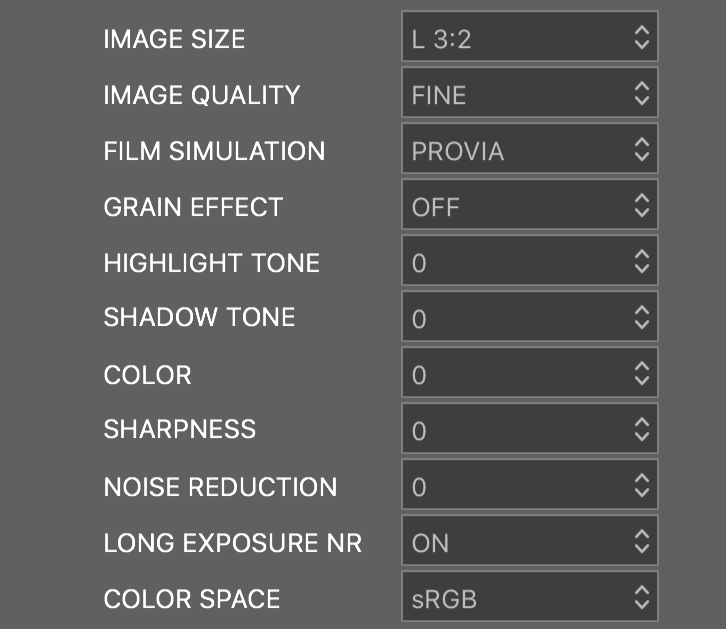
IMAGE QUALITY SETTINGS MENU DISPLAY SELECTION BAR
Use this bar to specify some of the settings in the camera’s Image Quality Settings menu. Items available vary depending on which camera is connected to the computer. See your camera’s Owner’s Manual for details.
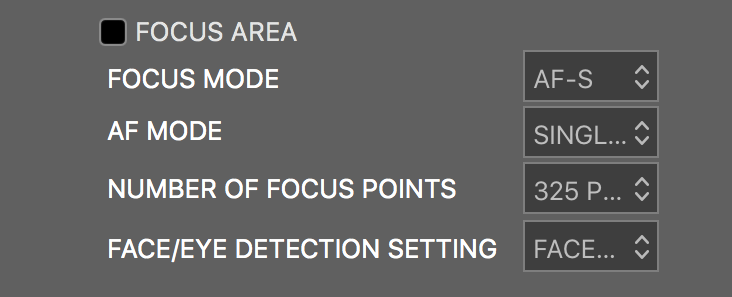
Check the Focus Area box to make Focus Area changes, using the image display area. See your camera’s Owner’s Manual for details.
SHOOTING SETTINGS MENU DISPLAY SELECTION BAR
Use this bar to specify some of the items in the camera’s Shooting Settings menu. Items available vary depending on which camera is connected to the computer. See your camera’s Owner’s Manual for details.

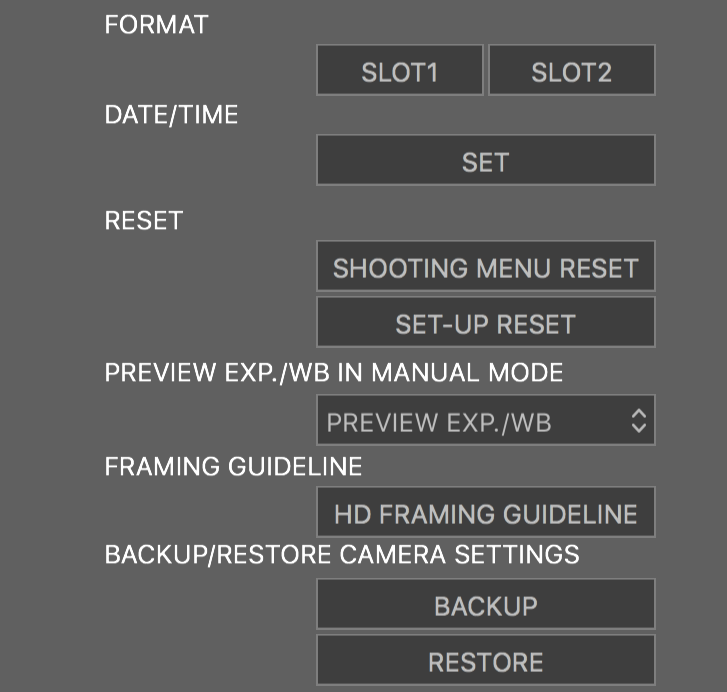
SETUP MENU DISPLAY SELECTION BAR
Use this bar to specify some of the items in the camera’s Setup menu. Items available vary depending on which camera is connected to the computer. See your camera’s Owner’s Manual for details.
The camera remembers the adjustment even after tethered shooting is completed.

IMAGE INFORMATION MENU DISPLAY SELECTION BAR
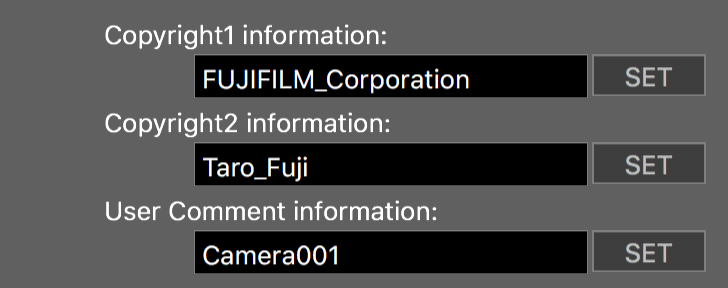
Use this bar to define and modify Exif data the camera generates and attaches to each image file, including copyright information and user comments. The camera remembers the settings even after tethered shooting is completed.