 8 minute read
Master Multiple Light Setups
Certain iconic looks can only be achieved through considered combinations of lights – but more sources don’t have to lead to difficulty
The previous chapter detailed how to make great images with just one light, but it’s easier with several. With a multiple light setup, you have more control. You can light more creatively and with greater freedom. And you can work with increased speed on demanding projects, giving clients options that make them happy.
You might think that multiple lights are complicated. In fact, it’s a problem solver. It gives you the ability to mix hard and soft more easily, replicate natural light with more accuracy, and control contrast and color. With reflectors, you have to move them in or out, or choose different surfaces to control the brightness of your fill or accent lights. But with a dedicated fill light, you can just dial it up or down for an exact look.
Technically, triggering multiple lights is simple, thanks to modern radio systems. And if you use a system like the Profoto Air, you’ll be able to set the lights’ power remotely, too. So, you can work without an assistant if required and still devote attention to the subject.
This chapter will walk you through three multi-light portrait techniques. We’ll start with a classic three-light effect that’s easy to set up, but which punches above its weight in impact. Next, we’ll mix a spotlight with a ring light and use gels for a striking fashion look. Finally, bouncing multiple lights, creating a light and airy effect, where your subjects can move around freely. As you practice, use your flash meter and make notes of the power, to easily remember settings the next time you set up.
1. Make Flattering Three-Point Lighting
This classic portrait setup uses a main light, a fill light, and an accent light. It’s hard to get wrong, beyond not using it at all. The key light sets the overall exposure and dimension, the fill light softens the shadows and reduces contrast, while the accent light separates the subject from the background.
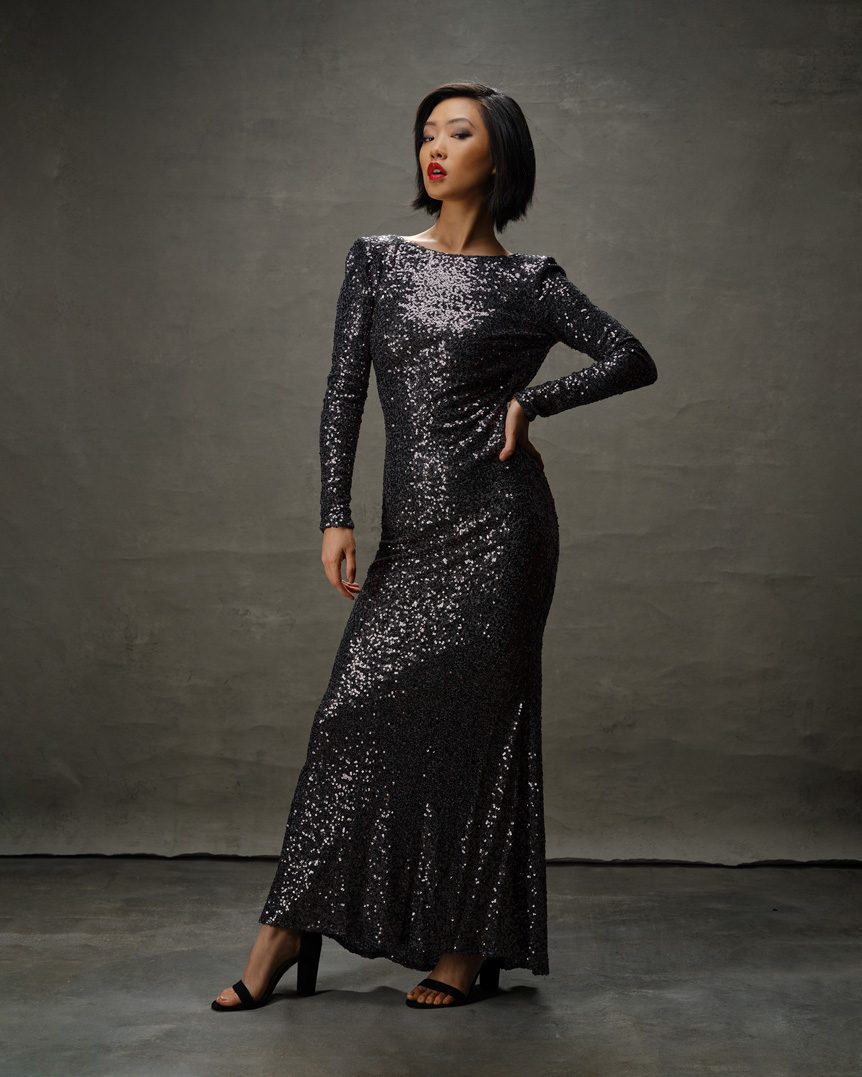
Photo 2022 © Ab Sesay | FUJIFILM GFX100S and FUJINON GF80mmF1.7 R WR, 1/125 sec at F8, ISO 100
It’s timeless for a reason and still used today by big names in portrait photography, because it can be so flattering. It’s also very simple to do, so it’s one you use almost anywhere, even if space is limited. Just add a canvas background – like the Gravity backdrop here – and you can do it away from the studio in a hotel room or at home.
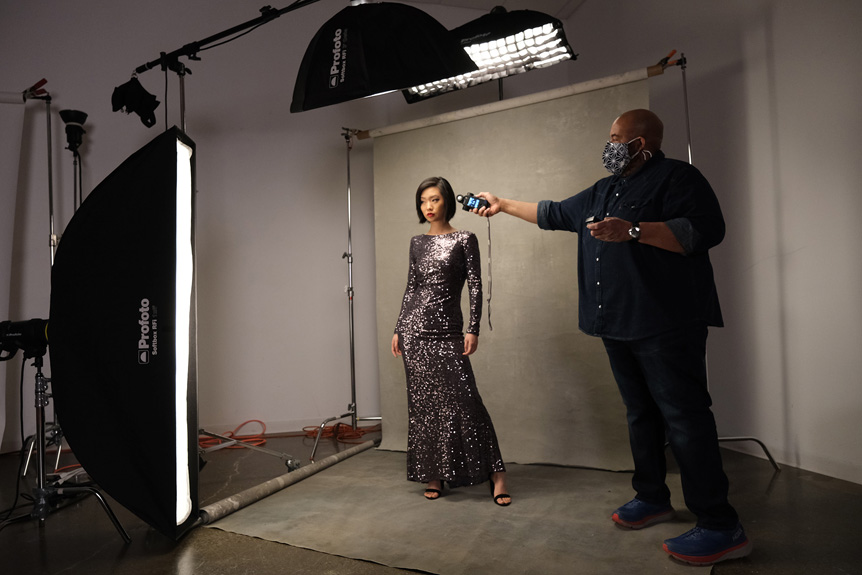
The key light is fitted with a 3ft octabox on a boom, and angled down at about 45º. The octabox makes the light soft, while the angle avoids too much spill on the background, keeping the subject separate from it. The accent light will add to that separation when it’s introduced. The key light adds dimension, shaping the subject’s face, so get this right before adding the others. With it in place, we have a picture, but the subject’s chin and eyes are in shadow and you also can’t see detail in the dress. That brings us to the fill light.
The fill light is fitted with a stripbox and feathered, so its edge is catching the subject to reduce spill. Its long shape also means I can frame the full length and still bring out detail in the dress, and it softens the key light’s look. If we used a larger softbox on the key light, there’d be more wrap, but also more spill on the background, so the fill allows us to keep the key smaller and more dramatic.
I heavily judge the fill light effect based upon the subject’s eyes. There’s no point in filling the wrong shadows, so reposition it if they move. And don’t overpower it. The fill light should lift the shadows and lower contrast. The main light should look like it is wrapping around the subject more, but not overwhelming it. Here, the fill light metered at F5.6 compared to the key light at F11.
For the accent light, a gridded stripbox is used horizontally and angled down from above. The grid means it’s more focused and its long shape lights the subject’s hair and shoulders evenly. Again, watch the power. You can still get a good highlight without areas overexposing, so keep it subtle. I dialed it to F12.7 here, because the subject has darker hair and I wanted a stronger, more dramatic accent light on the shoulder. However, many times I have my accent light a stop under, or at the same exposure, as my key light.


Photo 2022 © Ab Sesay | All lights
Photo 2022 © Ab Sesay | Key light only
Photo 2022 © Ab Sesay | Fill light only
Photo 2022 © Ab Sesay | Accent light only
If you need to scale down this setup, you can get away with not using a stripbox as the accent light, with a regular softbox for the fill light, or an umbrella with a diffuser as the key light. A large bounce reflector could also be used for the fill.
2. Create a Striking Four-Light Fashion Effect
Use multiple lights – and you can mix in more exotic light shapers. This setup uses a spotlight, a ring light, and red-gelled background lights for a striking and non-traditional look. The key light does very little heavy lifting – it’s just a streak across the face – and the fill light is much lower in the ratio, keeping the contrast high and the look edgy. It’s a look that would be virtually impossible to make with a single light.
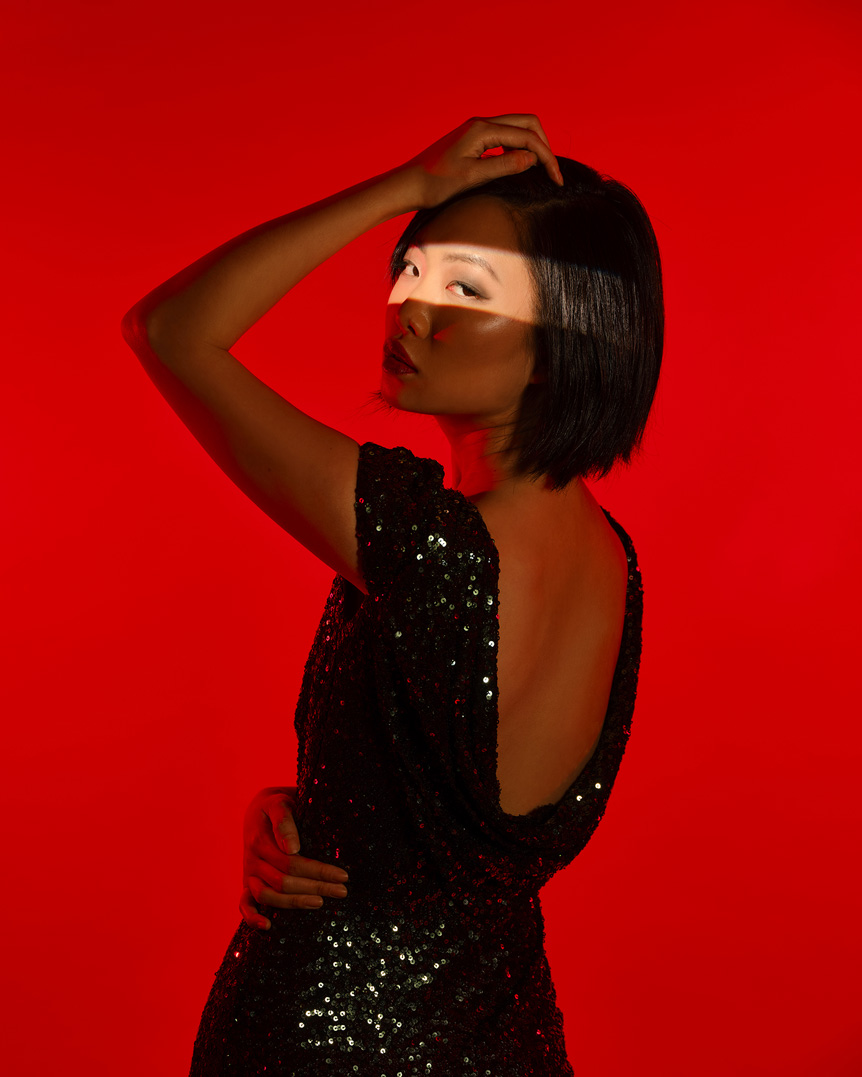
Photo 2022 © Ab Sesay | FUJIFILM GFX100S and FUJINON GF45-100mmF4 R LM OIS WR, 1/125 sec at F8, ISO 100
The key light is very simple here, but it’s still the storyteller – it guides the viewer’s eye. We’re using an Elinchrom Zoom Spot accessory, which goes from an 18º to a 36º spread. Inside are leaves that let you trim the light further and make that hard edge that’s cutting across the subject. With a focused and precise effect like this, I place a mirror at the front of the set, so the model can look into it and better see how the light is falling on her face. Otherwise, an assistant would reposition the light, aiming it at the model’s eyes as she moves around.
The ring light being used as the fill is mounted on a stand directly in front of her – and while the key light is metered at F9, the fill is much lower at F4. It gives us an overall fill, bringing detail into the dress, defining her body shape and lowering the contrast a little.
The two background lights are both fitted with red gels and feathered, so they’re hitting the subject a little, too. This gives us a subtle accent on the sides of her face and hair. It also links her to the background and stops her looking superimposed. The backdrop itself is red, which adds to the intensity. Background lights are metered at F3.6, about a three-stop difference from our main light, getting maximum saturation from the gels and backdrop


Photo 2022 © Ab Sesay | All lights
Photo 2022 © Ab Sesay | Key light
Photo 2022 © Ab Sesay | Fill light
Photo 2022 © Ab Sesay | Left and right background lights
This setup would be difficult to scale down exactly as is, but for the spotlight you could use a snoot or barn doors. It would not give the same sharp edge, but it would focus the light in a creative way. A simple softbox could replace the ring light for fill.
This setup would be difficult to scale down exactly as is, but for the spotlight you could use a snoot or barn doors. It would not give the same sharp edge, but it would focus the light in a creative way. A simple softbox could replace the ring light for fill.
3. Make Multiple Lights Look Like One
Multiple lights are a huge benefit in lighting a large area. Do it right, and you can make it look like there’s only one huge, diffused light source involved. It can produce very soft shadows, and when combined with an infinity curve, makes a small studio feel like a huge room. The sheer volume of light makes it a great setup for group shots. The subject can move around without easily falling out of the light, like our previous setups with spotlight. There is no bad angle, because even when she turns her face out of the light, we still have a V-flat bouncing light back on to her face.

Photo 2022 © Ab Sesay | FUJIFILM GFX100S and FUJINON GF45-100mmF4 R LM OIS WR, 1/125 sec at F11, ISO 160
We do it by pointing two lights into the ceiling, making it look like a giant softbox or a skylight on an overcast day. Of course, you need a white ceiling to do that, because the light will pick up the hue of whatever it’s bouncing off. A black ceiling will barely reflect the light at all.
Even with a soft look like this, you need shape and direction on the subject. Here, we used a giant indirect umbrella. Without this key light, the effect can just look flat.
For this setup, I started with the key light, then added in the V-flat for the fill light. Though we’re getting bounce from the floor, this does a lot to open up the shadows on her face. After that, I dialed in the background lights. These need to produce an even spread. With just one – or uneven power – it produces a gradient that makes the backdrop look grey and spoils the infinite look. You should avoid too much spill on the subject, too, so here the lights are raised up closer to the ceiling.


Photo 2022 © Ab Sesay | All lights
Photo 2022 © Ab Sesay | Key light
Photo 2022 © Ab Sesay | Bounce fill light
Photo 2022 © Ab Sesay | Background light
Initially, my exposure on the model was F9.2, but it changed to F11.2 once the overhead lights were added, because they are acting to make the background lighter than the subject, while also adding more fill to her as they bounce all over the set. For comparison, the backdrop is metered at F12.7.
In the next chapter, we illustrate how to turn day into night with simple lighting effects that can completely alter the mood of a scene.


