 15 minute read
How to Master Hard & Soft Light
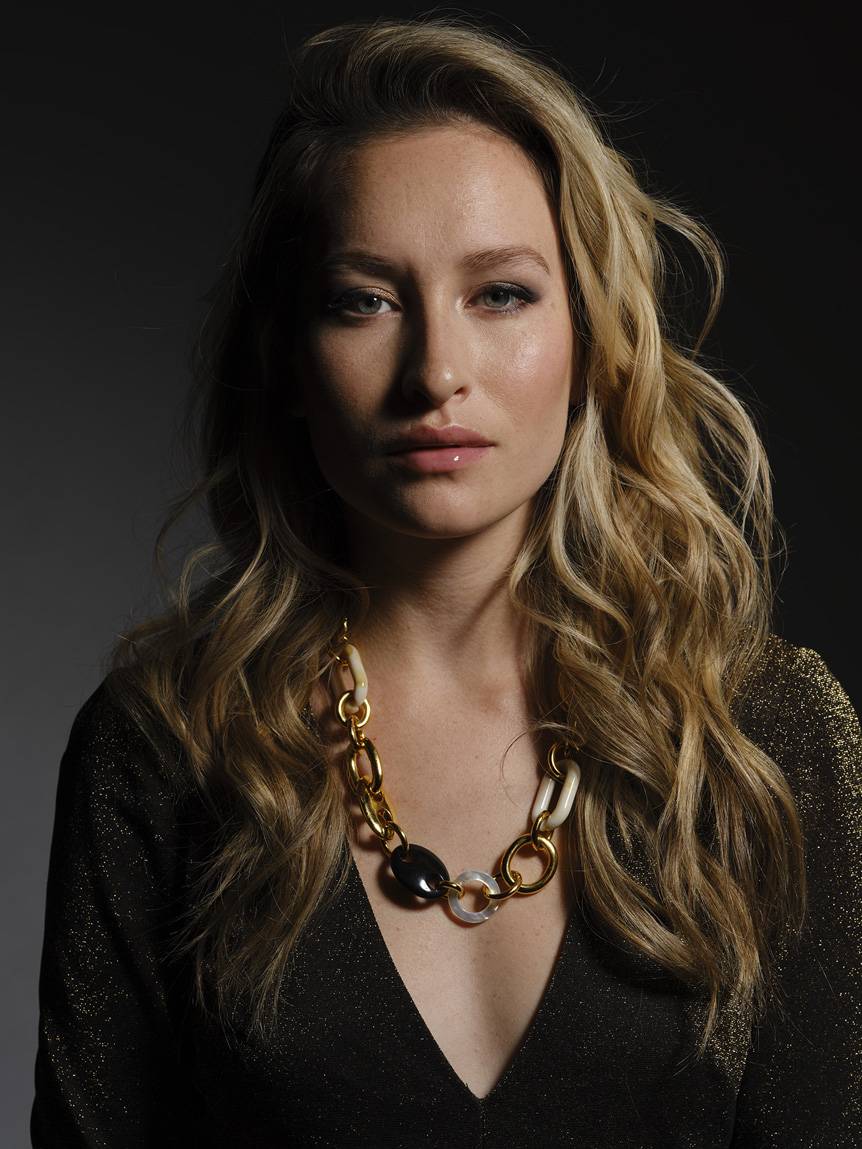
Light is your visual language. Hard, soft, or somewhere in between, knowing how to read and achieve it will allow you to work out what’s best for your project – or get the look a client wants
Keep in mind that there is no such thing as ‘good’ or ‘bad’ light – only light that is, or isn’t, appropriate for your subject. Many people think softening light is an advantage, but that’s only true if it’s right for the subject. There are always times when you need to make the light harder.
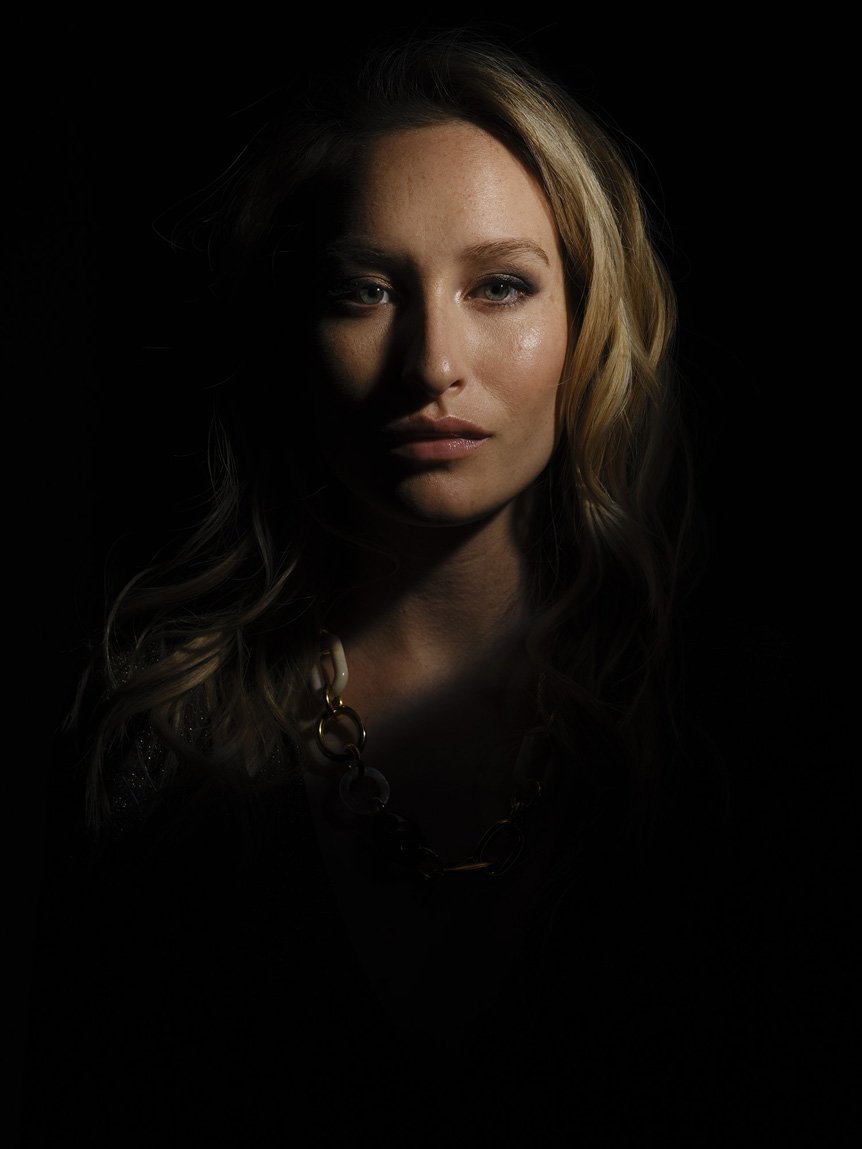
Understanding when to do this allows you to completely alter the mood of an image. If you want ‘edgier’ light, more texture, or stronger shadows, hard light can work. If you need to make a subject look younger, hide blemishes, or light reflective subjects (with products such as jewelry), soft light can work. And you can mix the two styles to make images ‘pop’ with a desirable hard-soft effect.
You may have to photograph a subject that will later be composited on to a background plate, taken from stock or another location. In that case, you need to read the light and match it. For example, if you’re photographing a subject that needs to be added to a sunny background, you don’t want to utilize really soft light, because it won’t match. Understand the differences – and how to achieve them on set – and you will make your clients happy.
Section 1. Understand What Makes Hard or Soft Light
In this section, we’re going to define all the most important terms associated with hard and soft light – like specularity, shadow transition, shadow contrast, and the wrapping of light. This will help you read the light and replicate it in your own projects, or when asked to by a client.
The example images will show the changes made by different lighting types.
Specularity and Specular Highlights
Understanding this will help you decide how to light different kinds of subjects. Specularity refers to the mirror-like qualities of a surface. Smooth ones are usually highly specular, while textured surfaces are not. This means they reflect light differently. The more specular a surface, the stronger the highlights it will reflect.
In photography, a specular highlight is one that appears as though it’s directly reflecting the light source, therefore hard sources will give hard highlights, while soft sources give softer ones. In some cases, this means the highlights will directly mimic the shape of the original light source.
Hard light sources give specular highlights that are small and hard, like a pinpoint. Soft light sources give highlights with more of a glossy sheen. Hard-soft light sources do a little of both.
In the left image, a Profoto TeleZoom Reflector is fitted to the flash. This is a hard light source and will create small, bright specular highlights. In the right image, still using the Profoto TeleZoom Reflector, a Full Silk diffuser is added between the flash and the model. Softening the light source creates softer highlights.
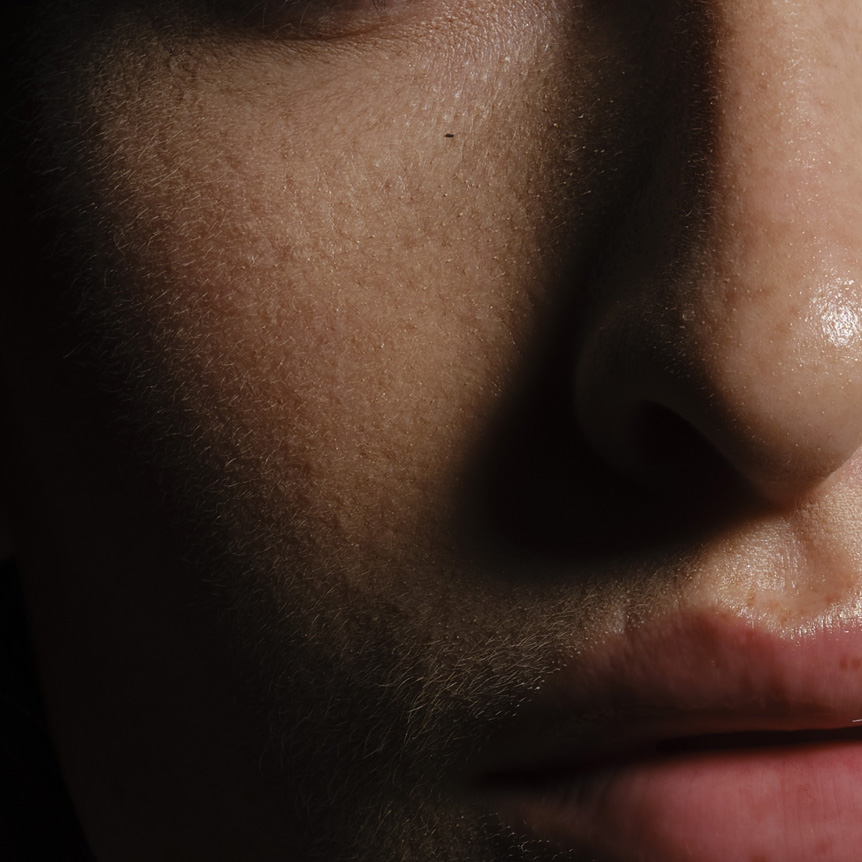
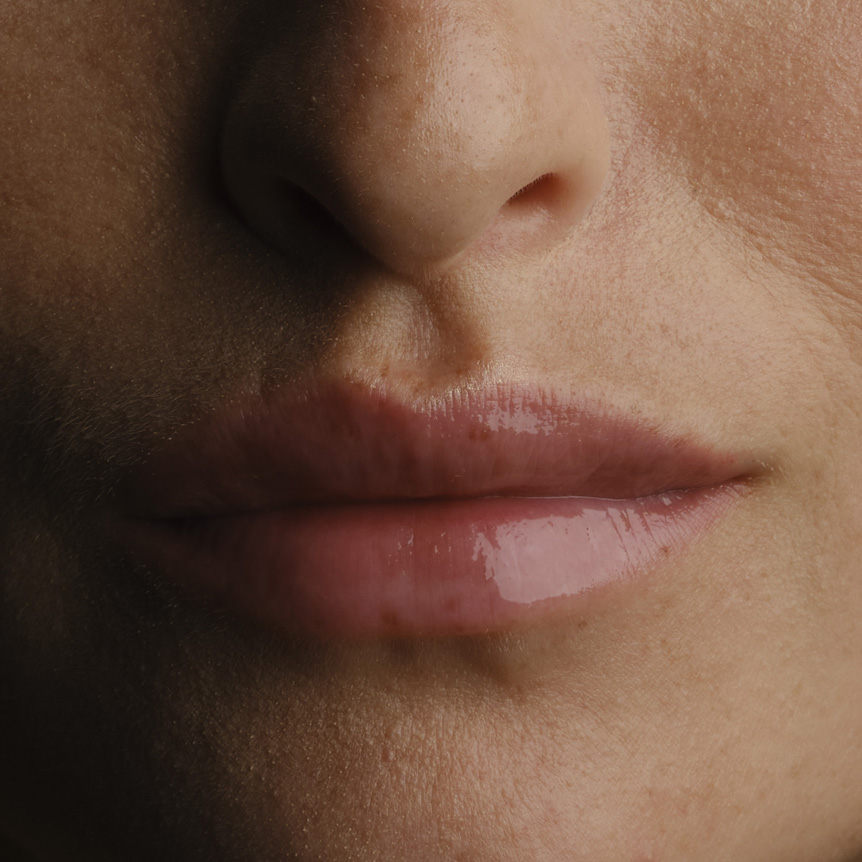
From the hard light source, note the bright, tight specular highlights on the tip of the nose and lips. These are characterized by very high contrast between the brightest part of the highlight and the normally exposed areas it’s transitioning into. Hard light shows more skin texture than soft light.
From the soft light source, dimmer and broader specular highlights are visible on the lips, while the highlights on the tip of the nose are barely visible. There’s much lower contrast between the highlight and the normally exposed area. Soft light shows less skin texture than hard light.
Specular Contrast
Specular contrast refers to the brightness of the specular highlights compared to the other, properly exposed part of the image. Hard light sources create highlights with greater specular contrast than softer sources.
With the hard light source on the left, we see very tight specular highlights in the subject’s jewelry. The metal is highly specular and, with a hard light source, specular contrast is very high. The highlight immediately goes from a bright bloom to normal exposure. The high specular and hard light source means these highlights may still overexpose, even though the rest of the exposure is normal.
With the soft light source on the right, the highlights on the subject’s jewelry are not as bright and have a much lower specular contrast. Wider and dimmer, they move from a soft sheen to normal exposure. Lowering the specular contrast means highlights are less likely to overexpose at the same general exposure.
Shadow Transition
Shadow transition refers to how gradually a shadow changes from its darkest point into the normal exposure of the image. Hard light has a sharper, more distinct shadow transition; soft light has a less distinct transition. In cases of very hard lighting, shadow transition can seem almost immediate. In very soft light, the shadow transition can be almost imperceptible.
Just as with the previous examples, in the photo on the left, a Profoto TeleZoom Reflector is fitted to the flash head, creating a hard light source. This leads to shadows that are clearly defined, with a hard edge between shadow and normal exposure. Notice the subject’s nose shadow. With the hard light source, its edge is a well-defined line between the shadow itself and normal exposure. It’s the same in the subject’s jewelry, where the length of transition is short.
As before, when a Full Silk diffuser is added between the flash and the model, in the photo on the right, it softens the light. This is clearly seen in the shadow transition, which is less clearly defined and with a more gradual edge between shadow and normal exposure. Here, the nose shadow is very different. The transition between shadow and proper exposure is more gradual. The jewelry’s shadows also show more gradual transitions, giving the impression of softness.
Shadow Contrast
Shadow contrast is defined as the difference in brightness between the shadow area and the normal exposure. Lower shadow contrast makes light look softer. Higher shadow contrast makes light look harder. The lower the shadow contrast, the more a light can be said to have a wrapping effect. Shadow contrast is controlled using a reflector or fill light.
In the image on the left, we see how using a single flash head with no fill light or bounce reflector creates higher shadow contrast, and therefore makes the light feel much harder overall. The light looks a lot more directional.
The same single head – now with the addition of a 5ft reflector as a fill light, seen on the right – reduces shadow contrast, therefore the light looks softer. The light looks more wrapped around the subject. Notice that the fill light adds more specular highlights in areas like the subject’s lips. This is the ‘hard-soft’ light that will be explained later.
Using the single hard light source, shadow contrast is high. The subject’s nose shadow has much greater contrast with the surrounding skin tones, and the light looks harder.
With the fill light added, the nose shadow has the same shadow transition as before, but with less of a difference in brightness between the shadow and surrounding skin tones. This lower shadow contrast makes the lighting look softer.
Section 2. How to Set Up for Hard or Soft Light
Making the light harder or softer can be done in six main ways. Here, we’ll show each of them. These include changing the size of the light source, its distance, how focused it is, its level of diffusion, direction, and finally the amount of fill light in conjunction with the main light.
Size
The bigger the light source, relative to the size of the subject, the softer the illumination. Therefore, use modifiers that increase the size of the light source to make it softer, such as umbrellas or softboxes. Use modifiers that narrow the beam to make it harder, like small reflectors or snoots.
This example on the left uses a 4x3ft softbox, placed directly next to the model’s face. Being comparatively large in size, the light produced by it is very soft.
For the image on the right, a mini softbox is placed at the same distance. Even though the type of modifier is similar, because it’s smaller, the light is harder.
The light from the large softbox creates broad, low-contrast specular highlights. Light wraps around the face, shadow transition is greater, and shadow contrast is lower than the smaller softbox.
The smaller softbox still produces soft light, but it is harder than the larger softbox. Shadow contrast is higher, shadow transition is more defined, and specular highlights are smaller and stronger. The light doesn’t wrap around the face as much.
Distance
The closer the light source to a subject, the softer its effect becomes. It’s the same principle as that of relative size. As a light source gets further from the subject, its relative size decreases, and the light is harder. As it gets closer, and relatively larger, the light softens.
In the studio, larger spaces give you more flexibility in this, but even small changes in distance make an obvious impact. Remember, too, that lights used very close to the subject have the danger of causing hotspots in the exposure. Those further away will need greater power to achieve the same exposure.
With the left side of the comparative example, a 3ft octabox is placed about 1ft from the subject’s face. Being close to her, the light is comparatively soft. On the right, the same 3ft octabox, now placed 7ft from our model, has become a harder light source. So, even traditionally soft light sources can look hard when used at sufficient distance.
Close to the subject, the 3ft octabox’s relative size gives very soft light. It produces broad, low-contrast specular highlights, low shadow contrast, and smoother shadow transitions. With the octabox further from the subject, its relative size is smaller, so the light is harder. It has smaller, more contrasty specular highlights, sharper shadow transitions, and greater shadow contrast.
Focus
The more focused the light rays, the harder the light source will be. Examples of focused light sources are those like spotlights or projectors. Unfocused sources scatter the light rays, giving a softer effect.
In a highly focused light source, the light rays have almost zero scatter, and this light will remain hard, whether it’s relatively close or further away, so the effect of distance is diminished.
Here, on the left, we have a spotlight placed 1ft from the subject. Because the light is focused, the effect is hard, even though it’s close to the subject. On the right, at 10ft away, the light is harder, but doesn’t differ as much as it would with a less focused source.
With the close-up light, shadow transitions are fairly sharp and shadow contrast is high. Because of the focus, the specularity is similar across both images.
As the light is moved further from the model, shadow contrast is still high, and shadow transitions are even sharper – almost immediate, in fact. Because of the focus, the specularity is similar across both images.
Diffusion
Diffusion is light passing through something that makes it less focused. This increases the relative size of the light source compared to the subject, and it also makes the light source less focused. Typical diffusers are softboxes, shoot-through umbrellas, scrims, and silks.
In the image on the left, a 3ft octabox placed close to the subject (with its regular scrims in place) creates a diffused light source. The close distance and light scattered by the diffuser makes the light soft.
The same softbox with its scrims removed produces a very different look, seen here on the right. The light is obviously harder, even though its size is still much larger than the subject.
With diffusion, the light is softer and more wrapped. Shadow contrast is lower, shadow transitions are slower, and specular highlights are broader and lower in contrast. Without diffusion, there’s a huge difference. Shadow transitions are much sharper, shadow contrast is higher, and the specular highlights are tighter and more contrasty. Catchlights are also much more obvious.
Direction
The direction of light alone can make it look harder or softer. Move the light source closer to the axis of the lens, and shadows are reduced or eliminated, making it look softer. Move it off the axis and shadows will increase, making it look harder. You can see how it works here, with two different modifiers used at different angles to the subject. The ability to make a hard light source look softer gets us closer to the infamous hard-soft light look.
On the left, a ring light is positioned directly on axis with the camera and the subject’s face. This has the specularity of a hard light, but it appears softer, because its position has eliminated most of the shadows. On the right, the ring light is moved to the side of the subject. It’s kept at the same distance, but its direction means that shadows are introduced, making it look like a much harder light source.
Although the ring light has high specularity, when it is placed on the lens’s axis, shadows are so small that the light’s hard qualities are less noticeable. Specular highlights are visible on the nose and lips.
Moving the ring light to the side of the subject adds shadows, making the light look harder. The light’s shape means shadow transitions are less than crisp, but shadow contrast is high, and specular highlights are visible on the lips.
Still looking at the direction of light, this time in the image on the left, a TeleZoom Reflector is positioned directly on axis with the camera and the subject’s face. This is a hard light source, but the position of the light will make it seem softer.
In the image on the right, the TeleZoom Reflector is kept at the same distance from the subject, but moved to the side. The same light source now gives a harder look, especially the shadows around the chin and nose.
With the TeleZoom Reflector on the camera’s axis, we get the specularity of a hard light, but with shadows almost eliminated, it has the look of softer lighting. Shadow transition is sharp, and shadow contrast is high, but the shadows are so small, it’s less noticeable.
Pushing the reflector to the side of the subject makes the shadows larger, and though the shadow transition and shadow contrast is very similar, the light looks much harder.
Fill
Fill light reduces shadow contrast, so light appears softer. Without any fill or spill, shadow contrast will be higher. There are two types of fill: direct and diffused. A direct fill light acts like a harder light source, while a diffused fill acts like a softer light source.
On the left of this comparison, a TeleZoom Reflector is set up one side of the subject, with a black velvet-covered V-flat on the other. The black velvet stops any spill or fill, and is called negative fill. In the image on the right, opposite the same reflector is a mirrored reflector, which gives us a direct fill. Mirrored reflectors bounce more light than diffused reflectors.

Photo 2022 © Ab Sesay | FUJIFILM GFX100S and FUJINON GF110mmF2 R LM WR, 1/125 sec at F11, ISO 125
In this third setup, a white V-flat is used. The white finish diffuses the light as it reflects it. This reduces shadow contrast, without changing the quality of the shadows.
To compare all three:
- Negative fill from the black velvet keeps shadow contrast high, giving the hardest look to the light.
- Direct fill from the mirror reduces shadow contrast, also adding hard specular highlights. There is more definition within shadow areas.
- Diffused fill from the white V-flat reduces shadow contrast, and the bounced light is more scattered, wrapping the face.
Section 3. Now Use Fill to Make Hard-Soft and Soft-Hard Light
Sometimes, a client will ask you to make an image ‘pop’ – and a hard-soft light effect hits the spot. This combines high-contrast specular highlights and sharp shadow transitions, but very low shadow contrast. This light is crisp, but not overly hard.
To that, we can also add soft-hard light, which mixes high-contrast, but broad specular highlights with medium shadow transitions and very low contrast.
In the next chapter, we look at five fantastic effects that can be achieved with just a single flash. These simple, but striking looks will help you travel light and set up quickly, but – most importantly – illustrate the power of creativity in lighting.


