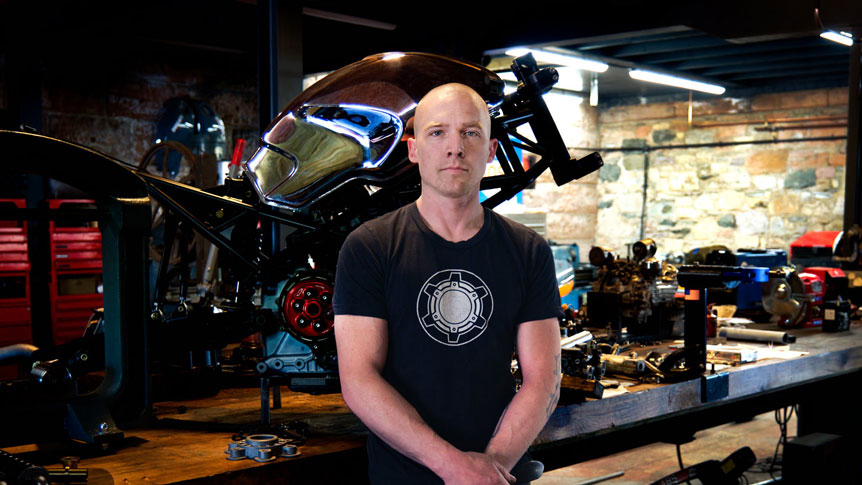
7 minute read
Get the Look: Day to Night
Well thought-out and executed lighting can turn an uninspiring scene into an eye-catching image. Here, you’ll learn to craft night-time looks to attract a viewer
This chapter is all about creating mood with lighting. You can do that by controlling contrast and color – and understanding why and how it works will take your photography to a new level. In commercial, advertising and fashion jobs, it will make your images stand out, ultimately leading to more bookings.
Color is particularly important to mood. Different hues let us convey emotion and shape a story. Cool tones can be comforting and calming. Warm tones are more exciting and optimistic. And if you use contrasting colors within an image, you will create focus. For instance, the eye is drawn to warm elements, while cooler tones recede into the background.
You can see this in the example images. The lighting gives us the look of dusk, with the subject picked out by flash. We place the flashes to look like part of the scene, as though they’re safety lights on a building’s rooftop. This gives us the mood and story, while the complementary colors draw your eye to the subject. It doesn’t look overly lit, but it’s still eye-catching – perfect for an advertising image.

Photo 2022 © Ab Sesay
With the right lighting setup and camera settings, it’s simple to do. To get the contrast in color, we add color correction gels to the flash to make it warmer. Once the camera’s white balance is set to correspond to the new temperature, the subject looks normal and the rest of the scene looks cooler in comparison.
Why Not Make This Image at Night?
You might be wondering why we create this effect in the daytime, rather than waiting for ambient conditions to appear naturally. It’s all about control. To get this look naturally, we would be restricted by time and location. The right ambient light would last for about 15 minutes, with its intensity changing all the time. That’s not compatible with a commercial project where you could be renting a space by the hour, or only have permits to work for so long. In a typical session you will send images to the art director, have them review it, come back with suggestions… by then your available light has disappeared. What’s more, most clients want to work during normal business hours!
By controlling the time of day with our lights, we work in a consistent fashion and stretch out the session for as long as required. It’s also a simple way of taking a daytime scene, that looks relatively sterile, and giving it much more pop.

Photo 2022 © Ab Sesay | FUJIFILM GFX100 and FUJINON GF32-64mmF4 R LM WR, 1/15 sec at F16, ISO 50
How to Set Up Your Day-to-night Scene
First, you need the right location. Find a place where there is no direct sunlight, so you can work in the shade. A location between tall buildings is the perfect space for this. Overcast conditions are also best, as they’re more consistent and give you full control. Work in the middle of the day when natural light isn’t very warm, even in the shade. If you work in warmer light, the contrast with color gels will be less pronounced. This scene also has lots of detail and texture, which makes sense of the lighting we’ll use. That detail keys the viewer into the lighting style we’ve chosen. They understand it’s meant to be a safety light under a fire escape.
This effect uses one key light and one accent light, so it’s very quick and portable. Success comes from their power, position and modification, as well as the right camera settings. Both lights are Broncolor 800 L flashes fitted with hard reflectors. The key light is held over the subject from the front on a boom. It uses a Broncolor P45 Narrow Angle Reflector to give it a harder quality, defining the subject and preventing too much spill. The accent light is attached to the stairs using a Cardellini-style clamp, putting it above the subject, fitted with a simple beauty dish reflector, delivering a little more spread and softness.
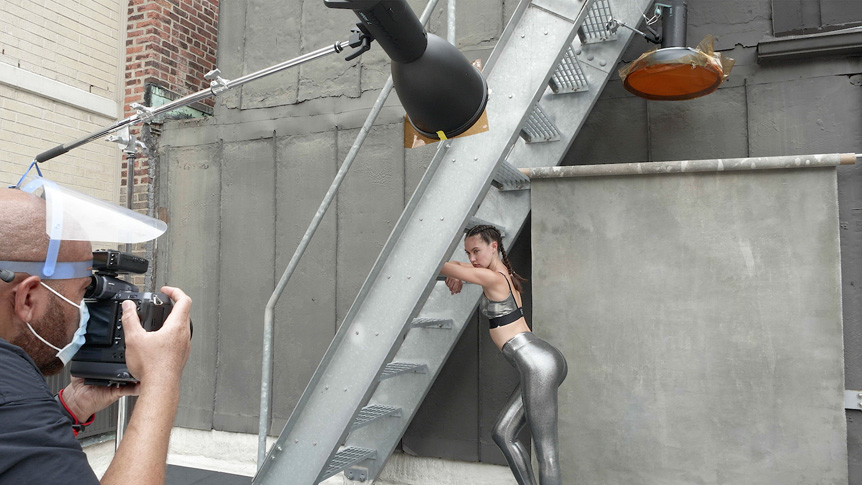
Photo 2022 © Ab Sesay
The reflectors are used for the type of hard light produced by the lights we’re mimicking. They also focus the light, helping with the color contrast we want to produce. If there is more spill, it will look muddy and you won’t get the strong contrast of blue shadow and warmer highlights. The position of the accent light is also very important. It’s held close to the wall, just as a safety light would be mounted, giving a similar throw.
On to both lights we then fit a Color Temperature Orange (CTO) filter or gel. Ungelled, the lights’ output is around 5500K, which isn’t far off the same as daylight. The CTO filter changes the output to 3200K.
Color correction filters like these come in sheets that can be cut to size, or in pre-cut shapes to fit specific sizes of light. On the accent light, we simply tape a sheet over the reflector. On the key light, it’s clipped to the reflector. The important thing is that you cover the entire light source. If not, you’ll get a split in the color of the output. In terms of strength, these are full CTO gels, but you can also get 1/2 CTO and 1/4 CTO filters with less density.

Set the Flash Power and White Balance Correctly
Now you can meter and set the power of the flash. It’s important to do this after fitting the CTO gels, as they will lower the flash output. With a Full CTO gel, output is reduced by a little over one stop. This has a knock-on effect on how powerful a light you need, as does the ambient light level you’re working in. You can use lower power lights, but they restrict you in the amount of control you have – and the speed you can work at. The output of these Broncolor lights falls from 800Ws to 400Ws with the gel added. That’s still plenty. A typical speedlight will drop from 75Ws to 37Ws, which could be too little.
When mixing flash with available light, your aperture setting affects the brightness of the flash, as well as the available light in the image. But changing the shutter speed will only affect the brightness of the ambient light. So, first we make sure the flash power is looking good on the subject, then adjust the shutter speed to get the available light correct. In this scene, I used exposure settings ranging from F11 at 1/15sec to F16 at 1/30sec, with the small apertures used to increase depth-of-field and keep the details in the scene clear.
As you dial the shutter speed to affect the available light, watch the contrast between it and the flash. If the wider scene is too dark in comparison to the flash, the mood will change and it will start to look overlit, like a spotlight on stage. Here, the available light is about a stop darker than the flash, so it’s kept subtle.

Photo 2022 © Ab Sesay | FUJIFILM GFX100 and FUJINON GF32-64mmF4 R LM WR, 1/15 sec at F16, ISO 100
If the scene needs to be brighter overall, lower your shutter speed. But if your shutter speed is getting too low, and may introduce motion blur or camera shake, lower the power of your light and either open up your aperture, or increase ISO setting. If the scene needs to be darker, use a faster shutter speed. If the shutter speed is raised beyond the maximum sync speed of your lights, then increase the power of your lights and close the aperture to tone down the available light.
To make adjusting settings easier and maintain the same ratio of flash to ambient light, use a light meter like the Sekonic L-858D or Sekonic L-478D, which are capable of metering the percentage of flash vs ambient light.

Photo 2022 © Ab Sesay
Finally, remember to set the white balance to correspond to the gelled lights. Here, it’s set to 3200K. This will make the light on the subject look neutral, and the available light blue. Use Raw mode and you’ll be able to fine-tune this in post, if required.
Another thing that helps you control available light using shutter speed, is working with a camera that has excellent image stabilization. The GFX100 I used has 5.5 stops of In Body Image Stabilization, so I can comfortably lower the shutter speed to as low as 1/15sec and get sharp results. That means I can use smaller apertures for more depth-of-field, too.
In the next chapter, we look at how to use High Speed Sync flash. This is a vital tool for commercial and fashion sessions on location, because it lets you freeze motion and balance direct sunlight with ease.