5 minute read
How GFX100 Camera Gives You Perfect Colors and Tones
We all know making photos in RAW can allow greater quality and give more freedom in editing. But GFX 100’s 16-bit RAWs do it even better
RAW files have been around for as long as digital imaging itself, but it’s only in the last decade and a half that they’ve risen to prominence for photographers. But what’s so good about them? Well, they allow more freedom when it comes to editing, giving loads of control to those who want it. They make it easier to control lighting and color, as well as improving the amount of detail that’s visible in a picture by returning detail to blacked-out shadows and bleached highlights.
Any camera worth its name should allow you to shoot in RAW, but FUJIFILM GFX100 has a trick up its sleeve that few other cameras can offer. It can record RAWs in 16-bit quality. Read on to find out why this is a benefit, and how to switch on 16-bit mode.
What is a RAW file?
As a quick refresher, a RAW file is the pure image data that’s taken directly from the camera’s sensor. It’s not processed in any way other than saving it to the memory card. In this way, all digital images start out as RAW files, but some are then converted into file formats such as JPEGs and TIFFs. And although JPEGs and TIFFs can still boast amazing quality, during the saving process, some information is always lost.
This information is lost either due to compression, or simply in fixing the data. So, whereas the flexible information in a RAW file would allow you to recover detail in highlights that seem to lack any, the fixed information in a TIFF or JPEG is far less useful in editing.
The drawbacks of RAW files are in the amount of space they take up on your card, and in the extra processing time and power that’s required to edit them. Because RAW files are all different – even those from other FUJIFILM cameras – you can only display them via software that’s designed to decode them. You’ll need to convert them to JPEGs or something similar for them to be viewed in a regular way.

Photo © Alison Conklin
How 16-bit RAWs Help You Do More
So, we know RAWs are great for editing, but how come 16-bit RAWs are better than others? Well, just as there are different levels of JPEG quality, RAWs come with different levels of quality, too. Some cameras can only provide 10-bit RAWs, but these still contain more information than JPEGs, which are 8-bit in terms of color depth. Then there are 12- and 14-bit RAWs, which contain even more data.
Basically, that increased amount of data means more control and less chance of degrading image quality as you edit a picture.
This is all down to the levels of color that a 16-bit file can contain. An 8-bit file has 256 shades of red, green, and blue, combining to make over 16 million colors. A 12-bit RAW file can contain 4096 shades of red, green, and blue, contributing to a potential 68 billion colors. Raise the bar to 16-bit, and you’re looking at 65,536 shades of red, green, and blue, and a potential 281 trillion colors.

Photo © Justin Black
Why More Colors and Shades Are Useful
Now, if your TV or monitor can only display an 8-bit or (in some cases) a 10-bit image, how do all the extra colors and shades offered by a 16-bit file make a difference?
This is down to the way tones are manipulated as a file is edited. Say you increase the contrast in a picture, this means you’re stretching the tonal range and, as the various levels of the color are edited, they’re pushed further apart. In files like 8-bit JPEGs, this means that banding appears, which can make smooth skies look uneven or add a blocky look to shadows. This look is also called ‘posterization’ and it contributes to making pictures look unnatural.
Now, if you have trillions of colors instead of millions or billions, you can stretch the tones more without the same banding and blocking appearing, allowing more freedom and scope in adjustments. So, with a 16-bit RAW file, you can expect to lift shadows and crush highlights without distorting the picture, keeping it looking clean and natural.
This lets you make photos with backlit lighting much more confidently, as well as offsetting problems caused in other high-contrast scenes.

Photo © Paul Von Rieter
How to Access 16-bit RAWs on Your GFX100
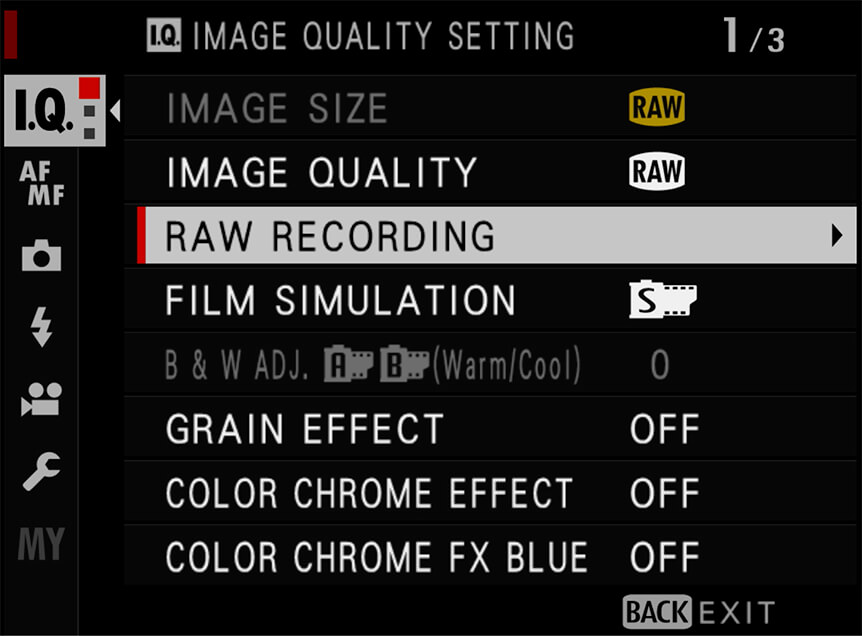
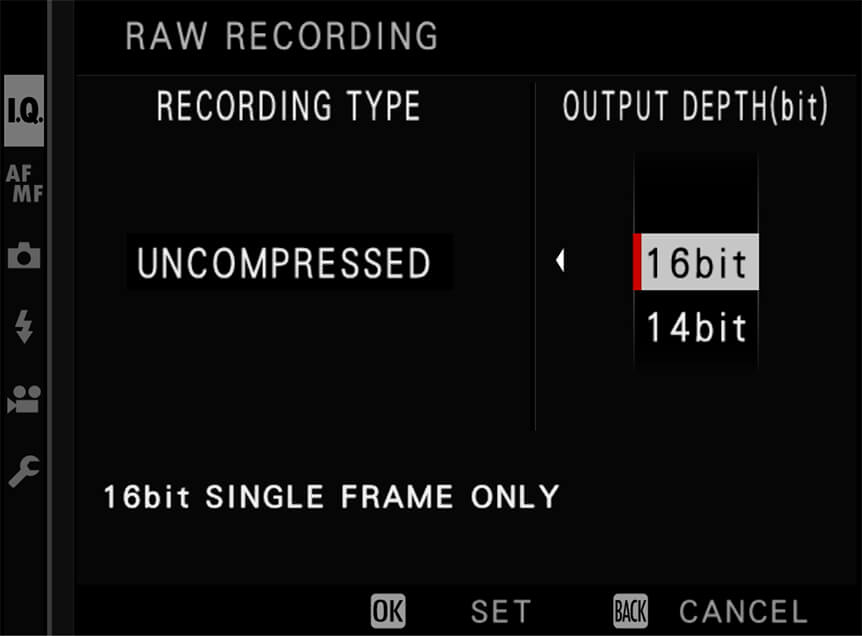
Switching to 16-bit RAW mode on GFX100 is easy. In the IMAGE QUALITY SETTING menu, find RAW RECORDING and scroll right. You’ll now have options for RECORDING TYPE and OUTPUT DEPTH(bit). Head to OUTPUT DEPTH(bit) and set 16-bit. When you select 16-bit, you’ll only be able to use it in the single-frame drive mode.
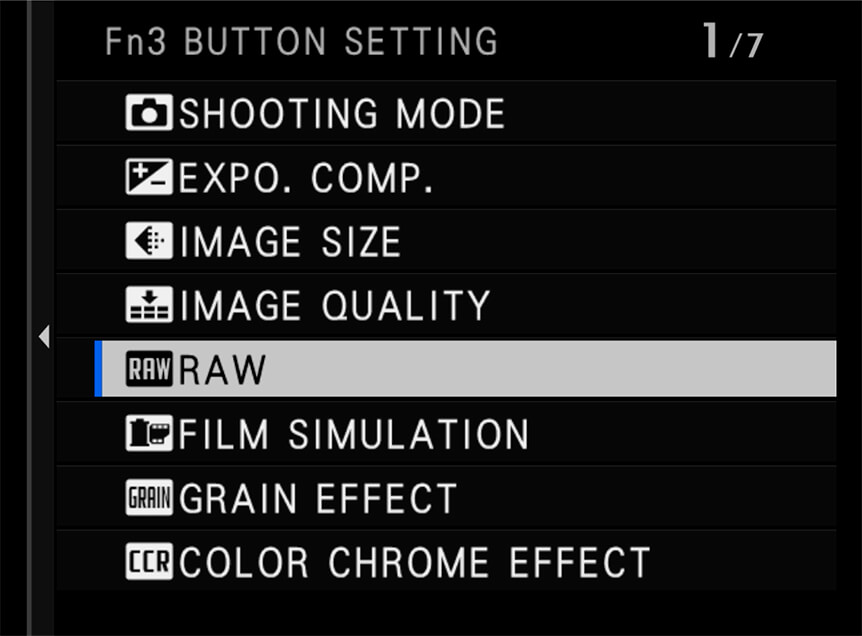
As detailed above, because these 16-bit files are larger than GFX100’s regular 14-bit RAW files, you may not want to use them for every subject. To make switching quicker and easier, when you do need the extra bit depth, why not map the RAW recording menu settings to a button on the body? You can do this by holding down the DISP BACK button on the rear of the camera to access the FUNCTION (Fn) SETTING menu. Next, highlight the button you want to change and pick the RAW RECORDING option.

What Else Can You Do With 16-bit RAW Files?
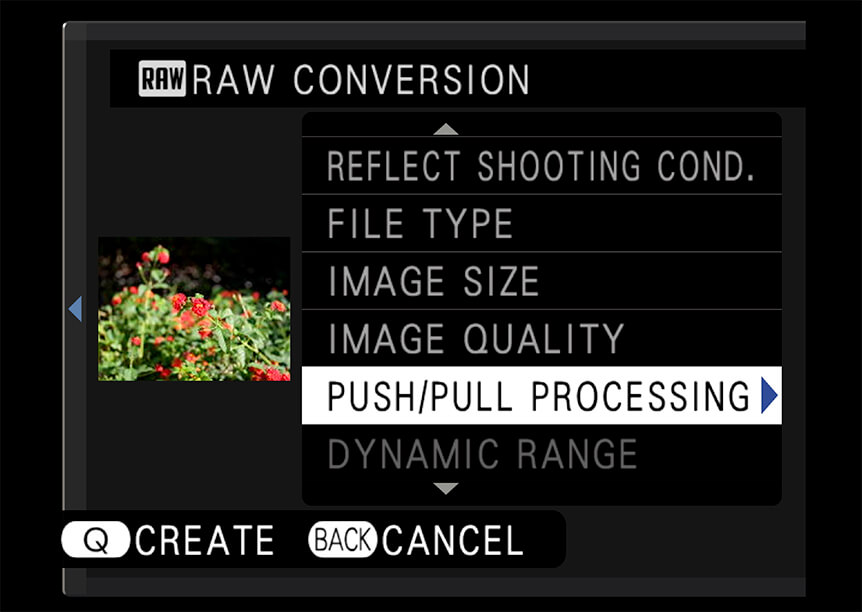
Within the playback menu, you can convert RAW files and make use of the extra flexibility these files allow. When in playback mode, first select a picture shot in RAW, then highlight RAW CONVERSION in the playback menu.

Next, choose a setting you want to apply using the Focus Lever, for instance PUSH/PULL PROCESSING or DYNAMIC RANGE. Scroll right with the Focus Lever to see more options, pick one, and press MENU OK. After applying any other settings you want, press Q for a preview of the effect you’ve applied. If you want to keep it, press MENU OK to save it to the card, where you can then share it just like a regular file.