4 minute read
Get Confident With Slow Sync Flash
Mixing ambient light and flash together is an effective way of giving your pictures a new look and feel that’s quite unlike anything else
You most likely already know that making images with on-camera flash as the only source of light is probably the best way of killing any atmosphere in a photo. The flash tends to take over and become the dominant source of illumination, swamping any ambient light that might have been there – and which was probably the reason you wanted to create the picture in the first place.
The answer is not to let the flash take over, but to blend it with existing ambient light using slow sync flash. This involves using a shutter speed, aperture, and ISO combination that lets in plenty of ambient light, while also using a flash to illuminate subjects in the foreground. The results can look high-end and professional.
The easiest way to create a slow sync flash picture – whether you use the camera’s pop-up flash or an external speedlight flash unit – is by using TTL auto flash, with the camera’s TTL flash mode set to TTL SLOW. To do this, you’ll need to be photographing in Aperture Priority or program mode. The TTL SLOW option can be found in the FLASH SETTING > FLASH FUNCTION SETTING menu.


In this mode, you can compose to create a picture in program, Aperture Priority, Shutter Priority, or manual exposure mode just as if you were using only ambient light. The only difference is that the flash will also activate, and TTL metering will ensure that subjects in the foreground are perfectly exposed using the flash.
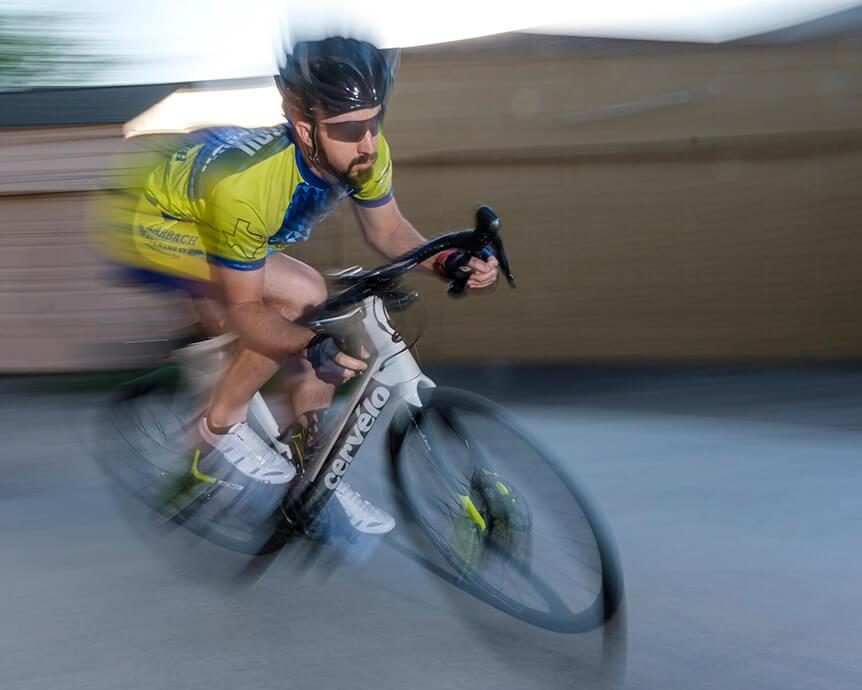
Photo © Matt Weintritt
More consistent exposures can be had by using your flash’s manual mode instead of TTL, though you might need to experiment a bit first to get the power setting just right. Simply photograph as you would normally in program, aperture priority, shutter priority, or manual exposure mode, and let the flash activate in manual mode. If subjects in the foreground look a bit overexposed, then dial down the power on the flash and try again, or move further away.
Choosing an Exposure Mode
Which exposure mode you’ll want to use depends on the scenario you are facing and the look you’re trying to achieve. You need to watch the shutter speed doesn’t sink so low that you end up with camera shake in the ambient-lit parts of the image – Shutter Priority and manual modes can be useful here.
That said, letting ambient-lit parts of the photo blur with a long shutter speed while the flash-lit parts stay crisp and sharp is a really effective way to add some creativity to your images. You can photograph fast-moving subjects like dancers and athletes in this way, but remember to get your flash to activate at the end of the exposure instead of the start in order to get natural-looking results (activate rear curtain sync flash in the FLASH SETTING > FLASH FUNCTION SETTING menu to do this). Also try introducing some intentional camera movement into your slow sync flash pictures – the results can be dramatic!

Photo © Bobbi Lane

Photo © Bobbi Lane
Also try manual exposure mode: if you pick a shutter speed/aperture combination that underexposes the ambient scene by one stop, you’ll darken only ambient-lit parts of the picture by this amount – the flash-lit parts will remain properly exposed. This is a great technique to try outdoors on a sunny day.
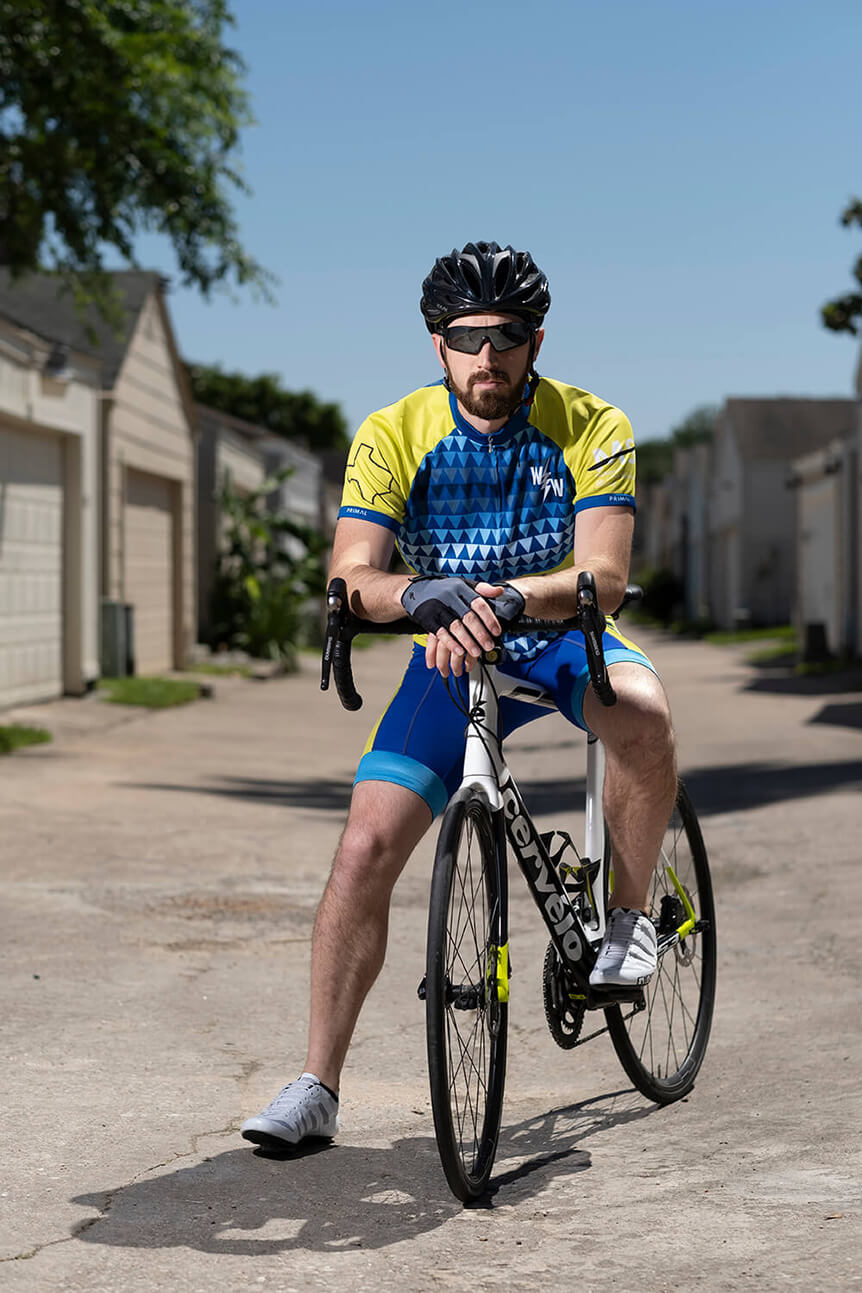

Photo © Matt Weintritt | The first image shown here was made in full sun without flash and the second was made with flash
You can combine slow sync flash with other flash techniques like bounce flash, where light is redirected off walls or ceilings, making it softer and more directional. This is often a great mix and produces superb results.