


Bryan Minear
Bryan Minear is a Midwest-based designer, photographer, father, Star Wars nerd, and pizza connoisseur. From a young age Bryan was inspired by Ansel Adams’ ethereal landscape work, which paved the direction he wanted to go as an artist.
Bryan’s always showed interests in cameras and technology from a young age, but it wasn’t until college where he was pursuing a Bachelor’s degree in Graphic Design that started shooting and developing film in the darkroom. He fell in love with the process and soon picked up a DSLR to supplement his design work.
Before he knew it he was teaching himself to use off-camera strobe lighting for portraits and building a business. After a couple of years, he realized that the business was not something that he enjoyed in the slightest and a creative renaissance started to occur.
In 2015 he decided to pursue fine art photography as a primary creative outlet. Before long, he started gaining some steam on instagram and attracting clients large and small. Since then he has been shooting landscape, lifestyle, and commercial photography as a career while still working a full time job as a Graphic Designer.
His goal is to portray atmosphere and emotion through his work. Whether he is shooting locally in the Midwest or traveling and teaching around the world, Bryan hopes to leave an impact on the world.
Keep your visual skills sharp from home. In this blog post, Fujifilm X-Photographer Bryan Minear shows you how to create amazing colour grading using the powerful photo editing tools in Capture One software. Make sure to share the results of your creativity with us online using the hashtag #Fujifilmfromhome.
Let’s start with a short backstory:
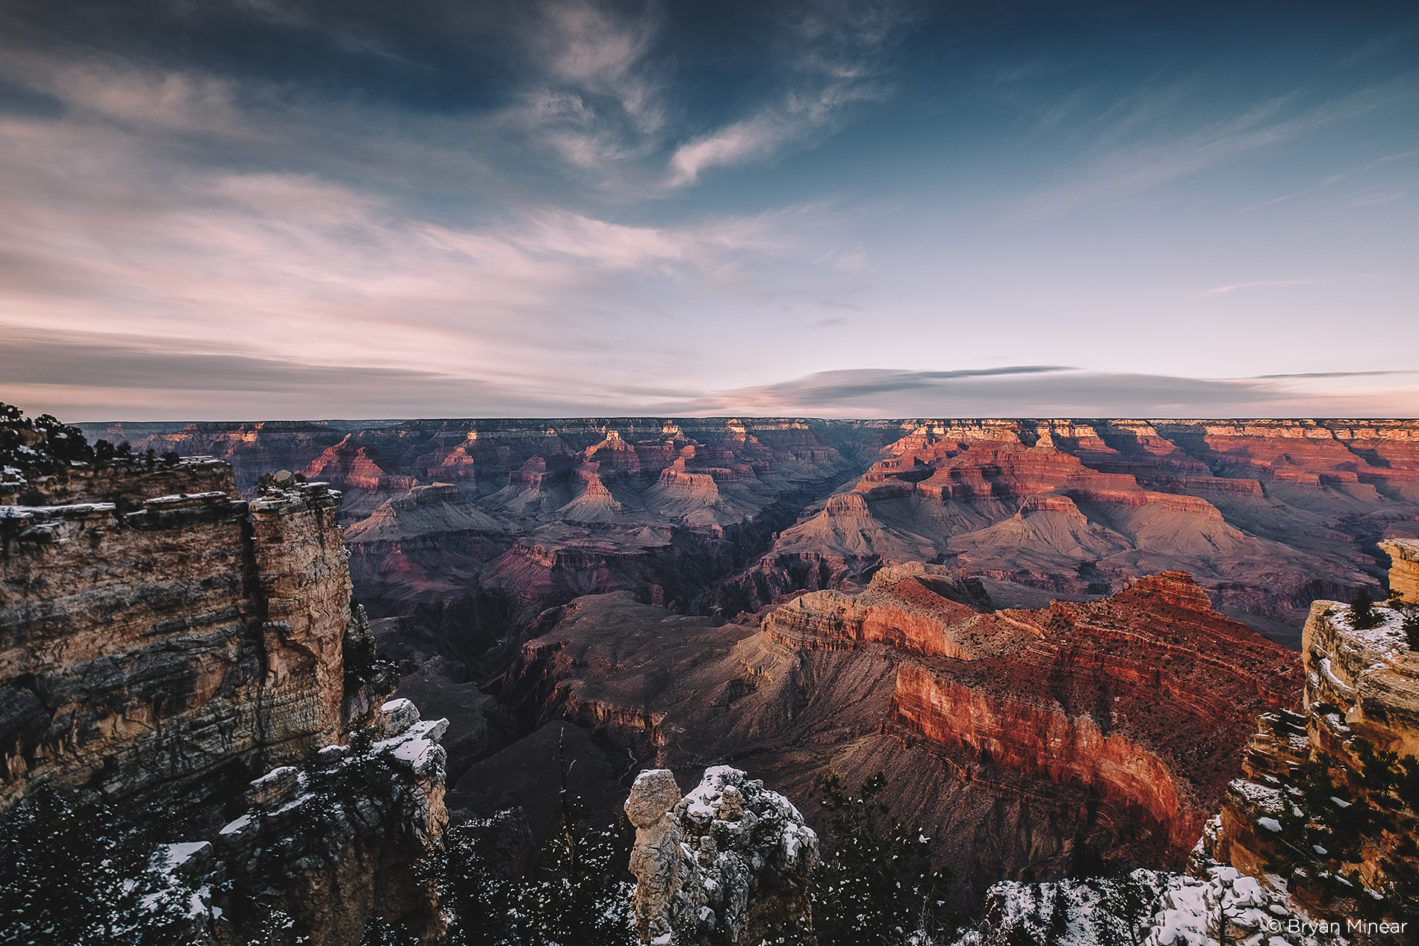
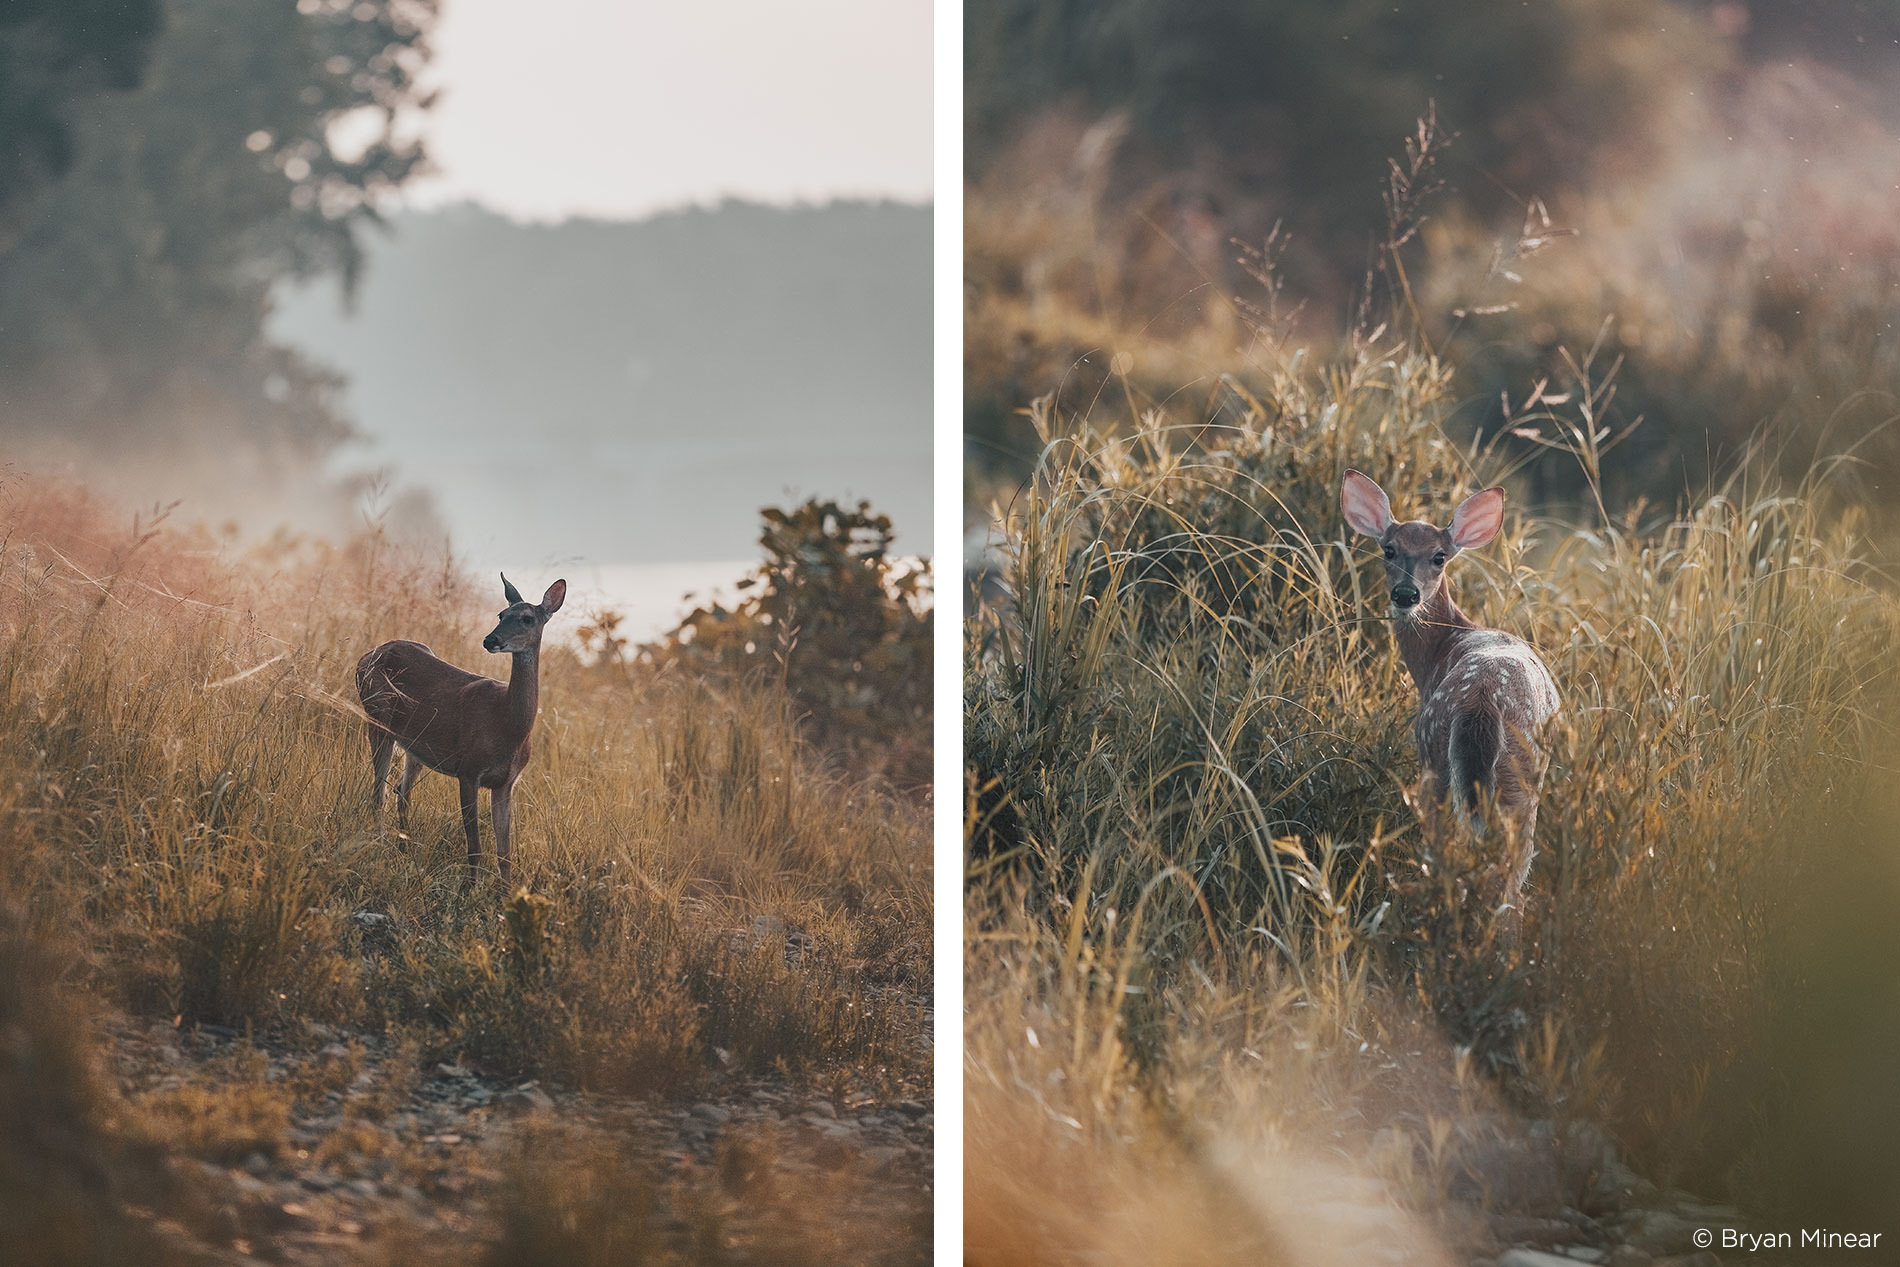
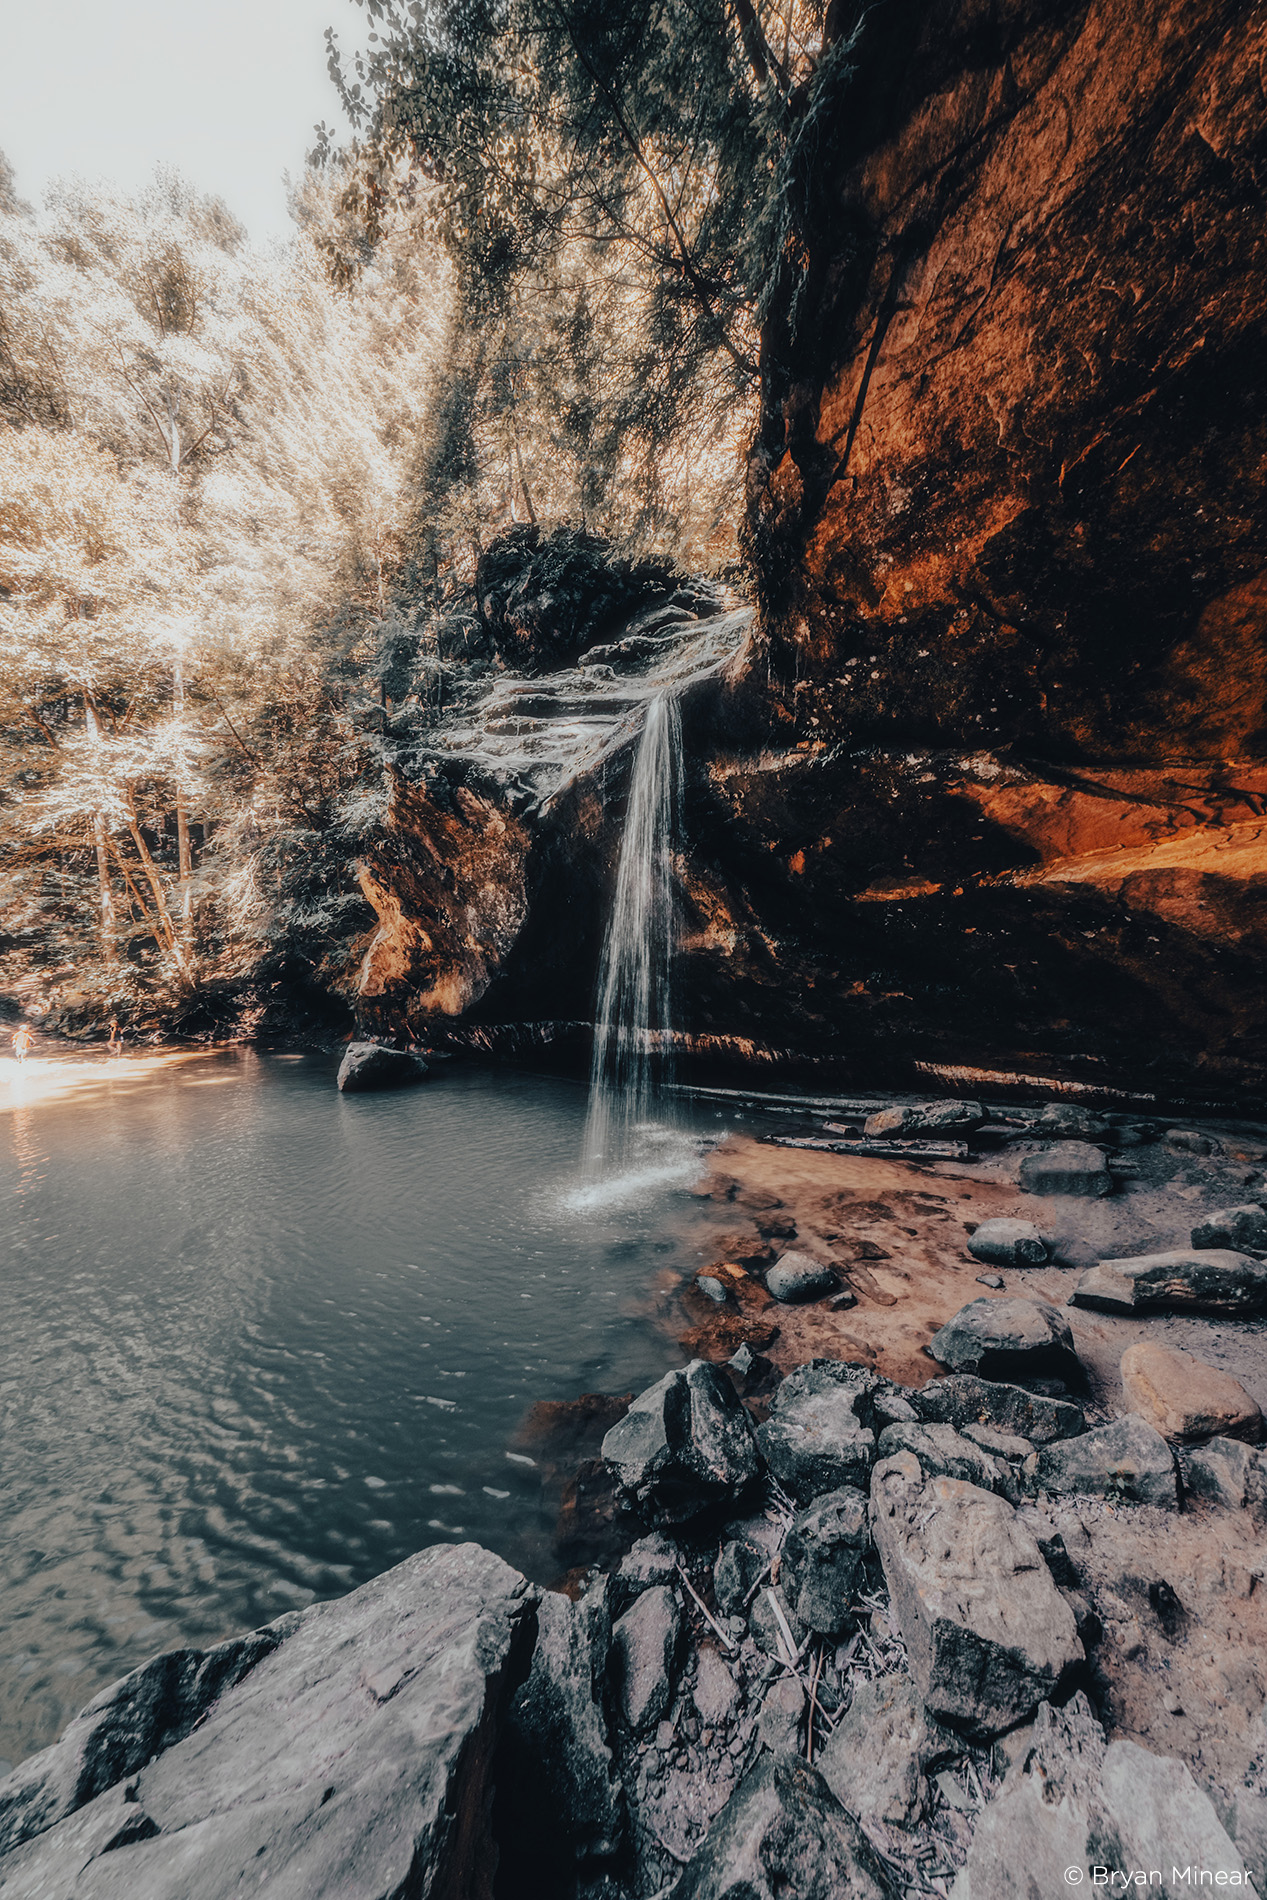
When I made the decision to quit shooting for clients, refocus my art, and pursue landscape photography it was because I naturally gravitated towards nature. I am from a very rural area in Ohio which is considered the foothills of the Appalachian mountains. I grew up with lots of rolling hills, rock cliffs, and waterfalls. Ansel Adams has been my inspiration since before I picked up my first camera. His work showed me not only the raw emotion that you can invoke with a landscape scene, but also the importance of the darkroom in the process.
As a young graphic designer, Photoshop became my darkroom, and the post-processing of my images took on a whole new level of importance. I began to see colour in a way that I never had before. I began developing my style along the way and shooting with purpose.

Process
When it comes to my landscape photography, I live and die by my colour. Part of the reason that I switched to shooting Fujifilm cameras in the first place was their deep history in making film and their wonderful colour science. Similarly, my first experience with Capture One had that same draw. The tools and integration were a perfect fit for my process, and there is no software that renders the X-Trans files as well as Capture One. As a person who prints big often, I need the best detail quality that I can get. Not to mention the inclusion of the Film Simulation modes. Those played such a pivotal part in my “colour revolution” so I was very excited for native support.
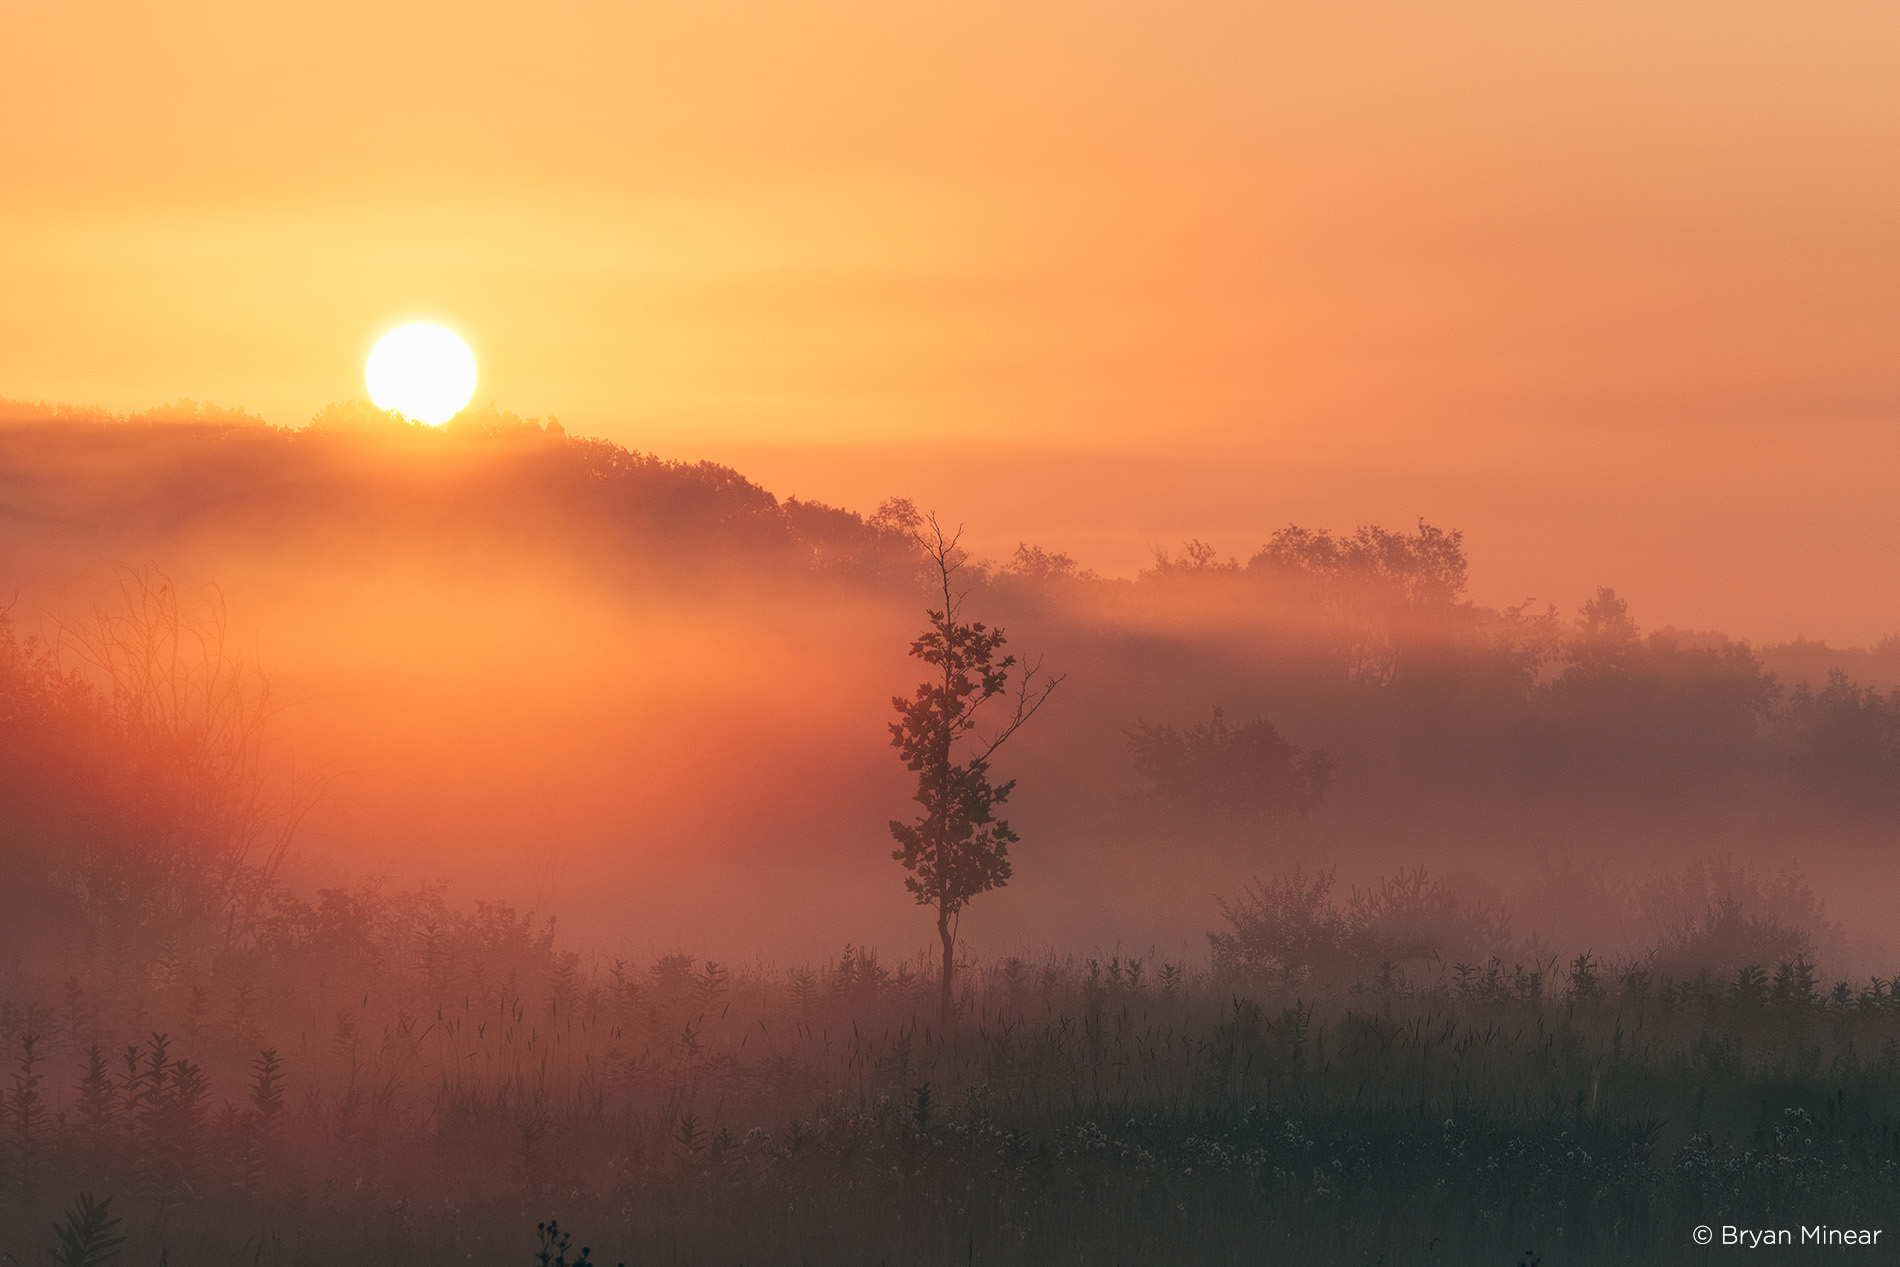
I tend to shoot mostly in the golden hours. So much of what I do depends on that perfect light and cloud combination, and I have to follow through by choosing the right composition to complement the mood.
I begin post-processing my images in my head the moment I click the shutter. I know that I am going to try to draw as much contrast out of the image as I can without over-processing. Typically, this involves pulling the exposure and contrast sliders down a bit, the brightness up, and then balancing out with curves.
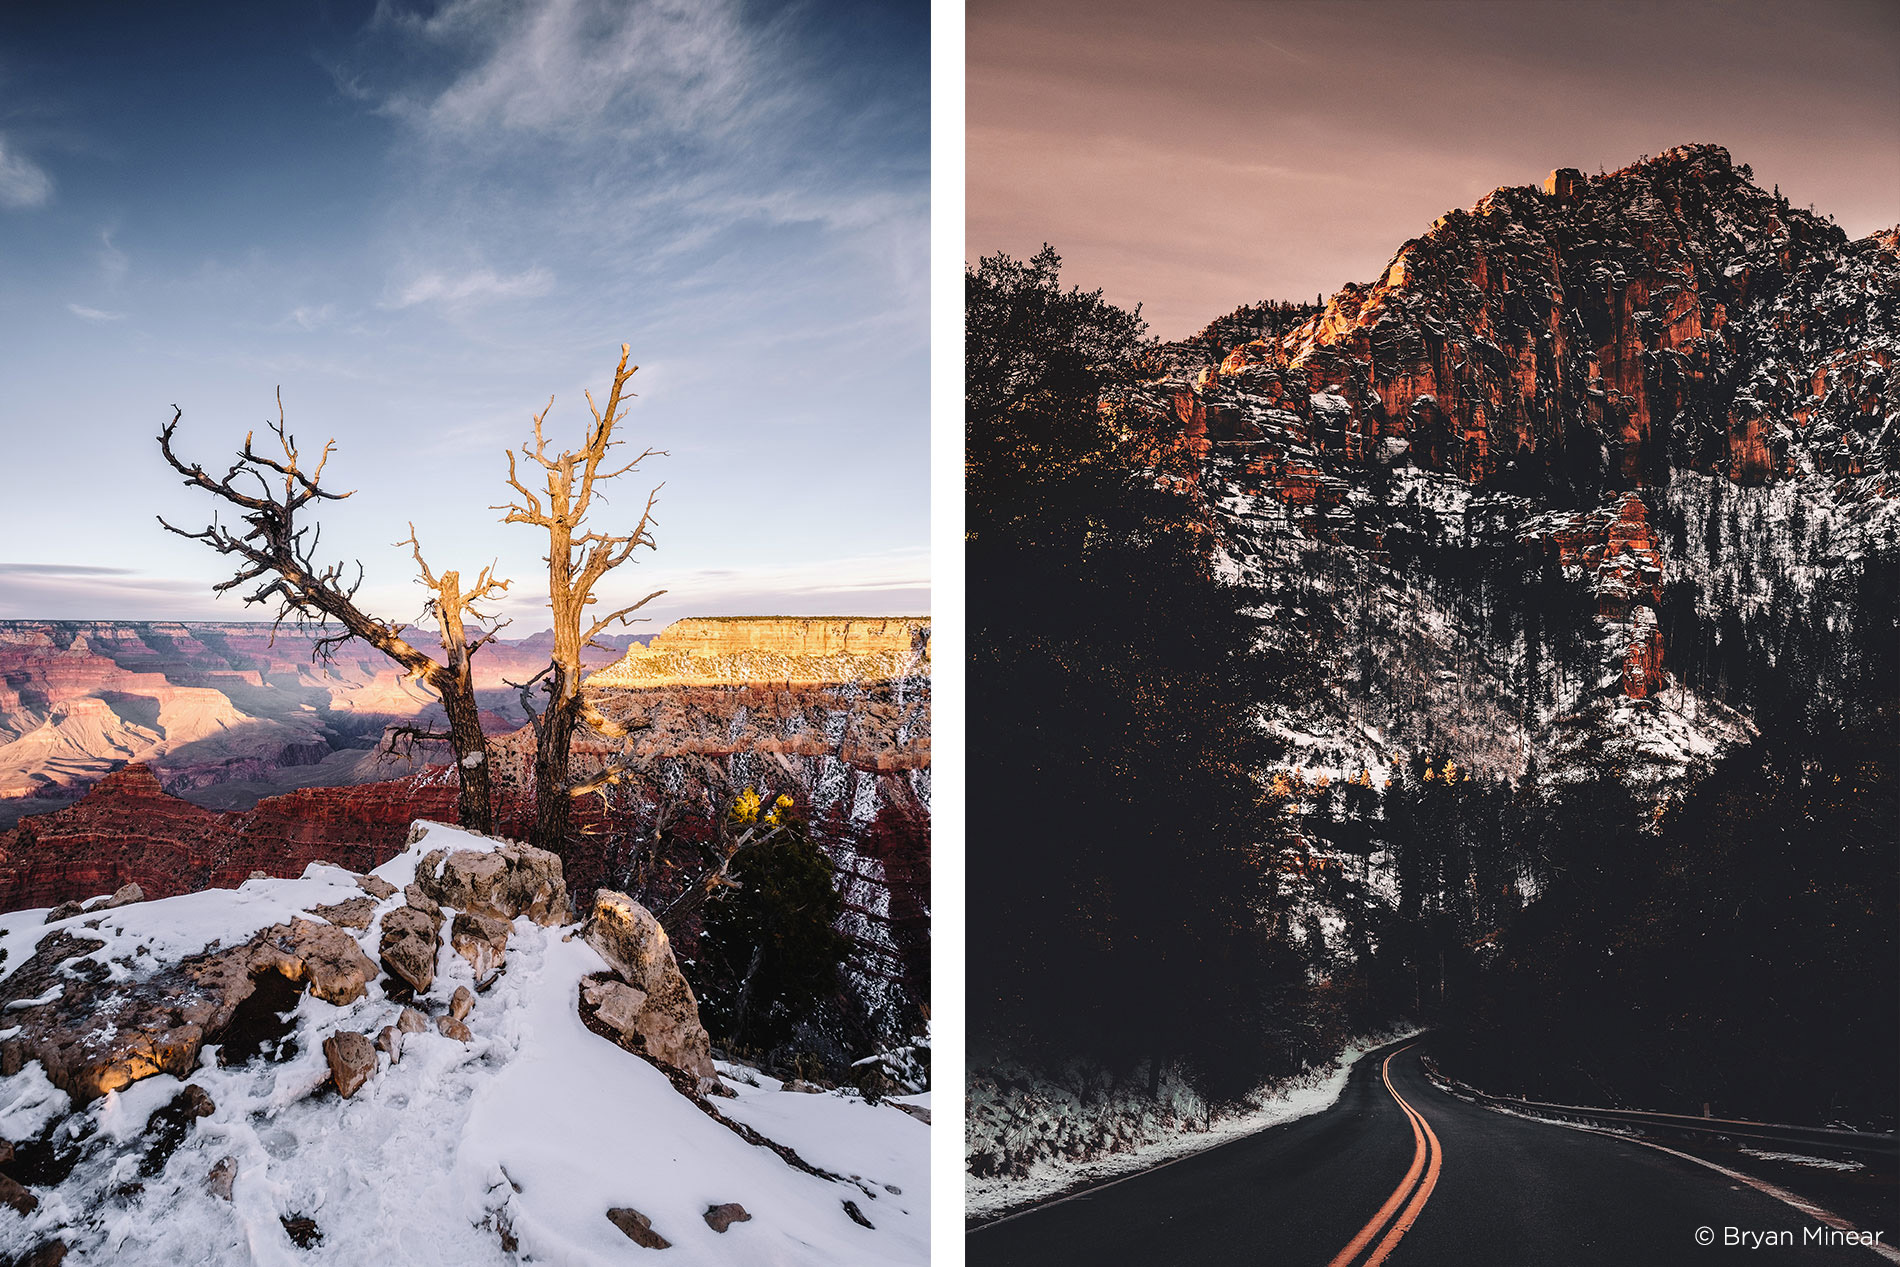
With Fujifilm I shoot my higher dynamic range scenes by exposing for the highlights, knowing that I will be able to recover the shadows as much as I can with the HDR shadow recovery.
Colour
When it comes to colour, I have a very specific artistic palette that I gravitate to. I say artistic because I am not ashamed of taking liberties in certain areas. I am a huge cinema fan and I draw inspiration from film and television constantly. One of my favourite exercises is to take a photo and try to replicate a look that I am particularly fond of, never to imitate, but to understand the process behind doing something new.
I am not a fan of the colour green in the slightest. So I tend to either desaturate and reduce the lightness of my greens, or turn them more to a yellow hue. Along those same lines, I know that I want my yellows to go a bit orange, and my oranges a bit red, and the easiest way to achieve that is by diving into the Advanced Color Editor.
I will pick the colour area that I want to focus on with the eye dropper and increase the smoothness when needed to include hues a bit outside of my selection range. Then adjust the hue, saturation, and luminance until I am satisfied. I don’t shoot a lot of blue skies, but I tend to do the same thing with my blues. I know a lot of landscape photographers that prefer very vibrant blue skies, but I desaturate and darken a bit as it better suits my look.

Sharpening
Capture One has the most effective sharpening tools that I have ever used. I have a 2-3 stage sharpening technique that I use depending on the subject matter of my image. I realised really quickly that regardless of where your work is being displayed or viewed, learning to selectively sharpen plays an extremely important role in what people are drawn to in your images.
Global sharpening alone was not enough for me. I will start with a low amount of global sharpening for my landscapes. Something around 100 for the amount at a 0.8 radius, 1 for threshold, and 30 for halo suppression. (These numbers, of course, are all relative to the resolution of your file – I am working with 24-26mp images from the Fujifilm X-T2 and X-T3 specifically).

Next, I will pull up the focus mask to show the areas of focus in the image to make sure that when I start selectively sharpening that I am doing it in the proper areas. Then I zoom in and paint in the subject or contours of my subject and apply a heavier amount (250-300 amount, 1.5-2 radius, 3 threshold, and 30 halo suppression).
The nice thing about this is that it’s a mask, so right away you will be able to tell whether it’s working or not and which areas you really want to add the extra focus. Once you are happy with the results take the opacity of the mask down to around 50-60%. I find it best to overdo an effect, and then dial it back a bit to maintain a level of subtlety.
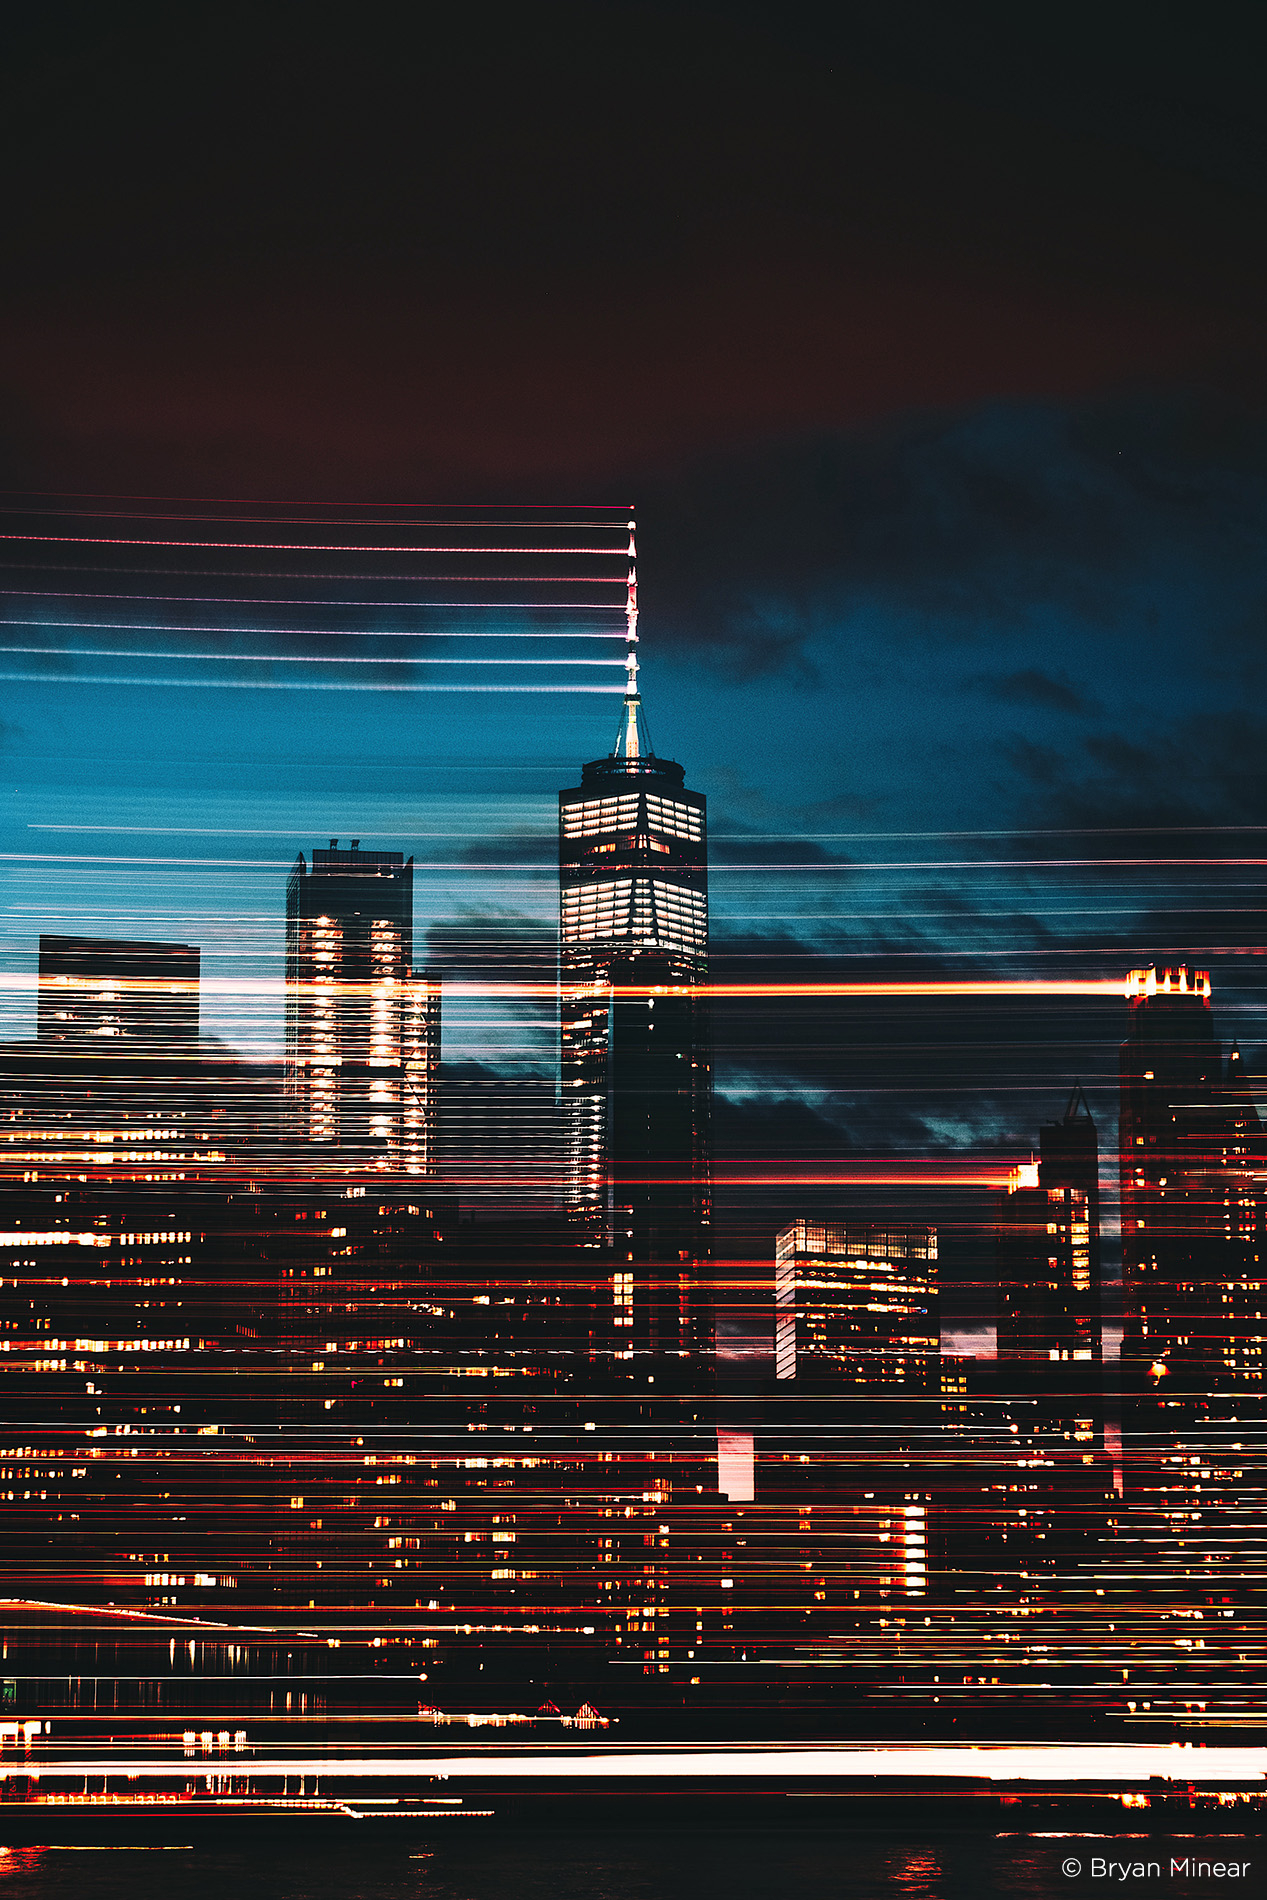
The last stage is really dependent on the image – sometimes you can get by without it. But for an image that I know I am posting on Instagram, I know I want to give it a little extra “zip” to fight the low resolution of the platform. When I am shooting landscapes I am typically at base ISO on my camera for optimum noise performance. I don’t even bother with it if I have any noise to my image as you will just end up amplifying it with this step. I will paint a mask covering the entire image and set the sharpening to around a 100 amount, 2.4 radius, 2.5 threshold, and 30 halo suppression. The last step is to adjust the opacity to something between 15-25%. And that’s it. Nice images that really have a nice pop to them.
Purpose
As a post-processor, my work has gone in a lot of different directions. Like anything, I believe that experimenting is the best way to get acquainted with the tools at your disposal, as well as the best way to grow as an artist. I like to say that I did a lot of things the wrong way before I ever started getting it right, in both shooting and processing. When it came to developing a signature style, it was never something that I set out to do. It just sort of happened over time as my skill set grew. In the same way that my eye for composition and vision became more refined, the processing followed.

I think that one of the most beneficial things that you can do for yourself is to revisit your photo archives often. Whether it is to re-edit a shot in order to utilise new techniques, or finding something that you maybe missed on the first or second pass. I can’t count the number of times that I have looked at my photos from the past and found something I never noticed before that jumped out at me as an obvious keeper shot. I rarely delete any of my photos unless there is really no hope to save it.
I like to tell everyone that attends my workshops something that I learned not so long ago:
Though the image is our ‘prize’, the ‘experience’ is worth so much more. The images we shoot end up being gateways back to experiences that we never want to forget. I can’t even count the number of times I have gotten up early (or just never gone to bed) in order to go out and capture something incredible. More often than not, you get let down and don’t end up coming home with what you had hoped for. But it’s these losses that make the ‘wins’ so much sweeter.
So push yourself often, learn the tools that you have, and create something spectacular.