


With low raking light, crisp clear air, lingering morning mists, beautiful frosts and (hopefully!) a covering of pristine white snow it’s no wonder that winter is a photographers delight. The icing on the cake is that at this time of the year sunrise and sunset are at civilised times of the day so you can enjoy a lie in and be back for a family meal at the end of the day.
What to shoot
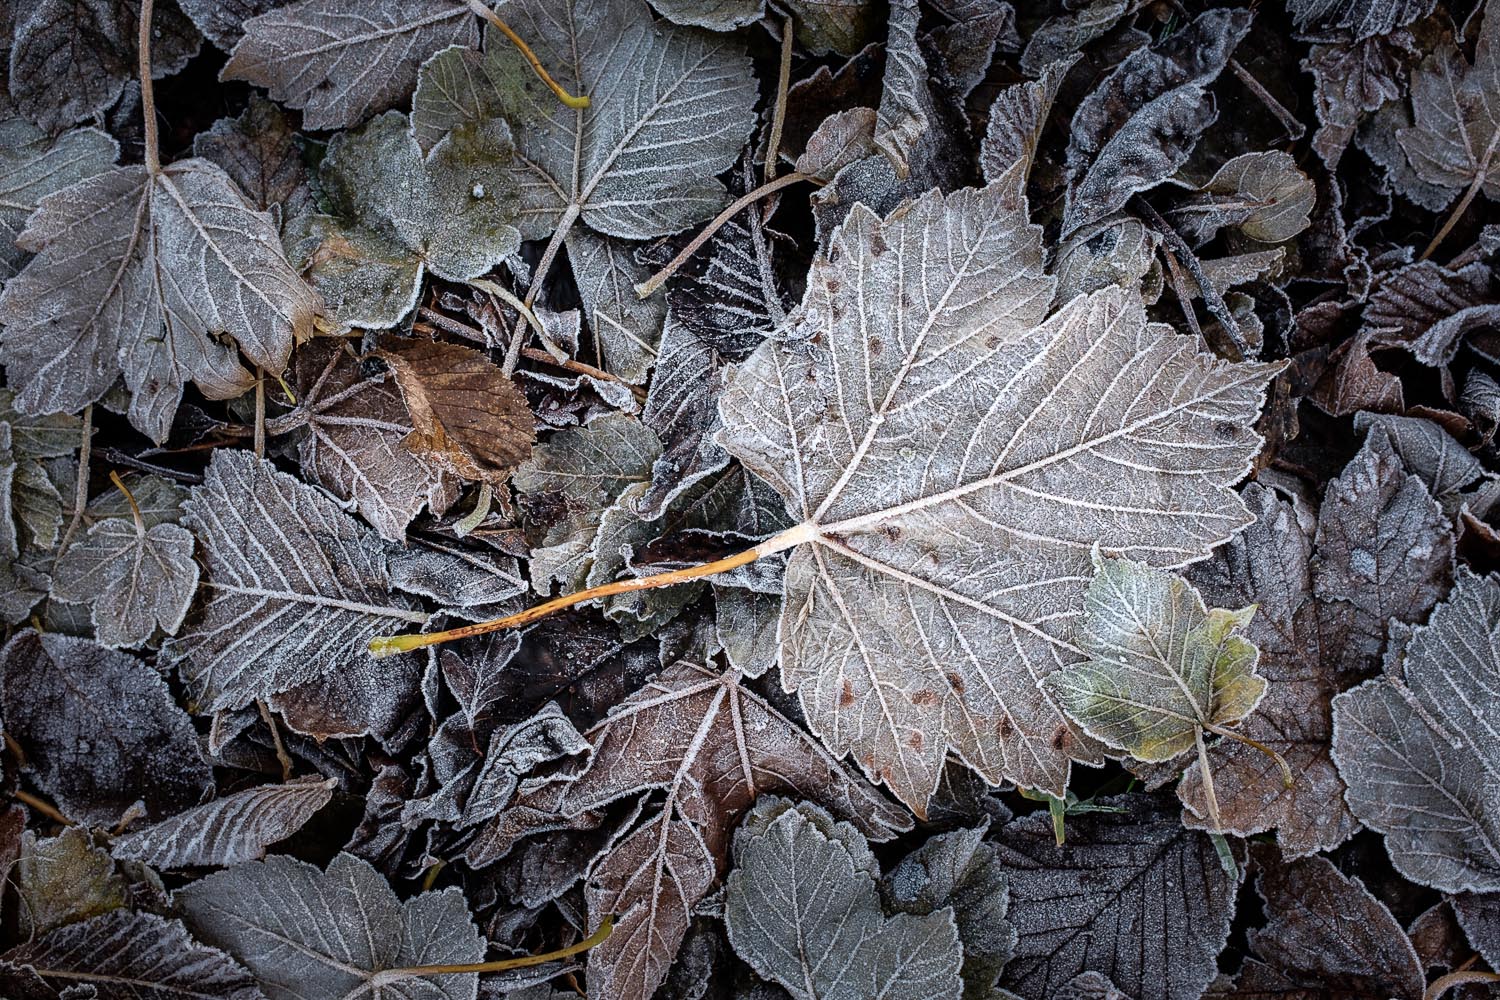
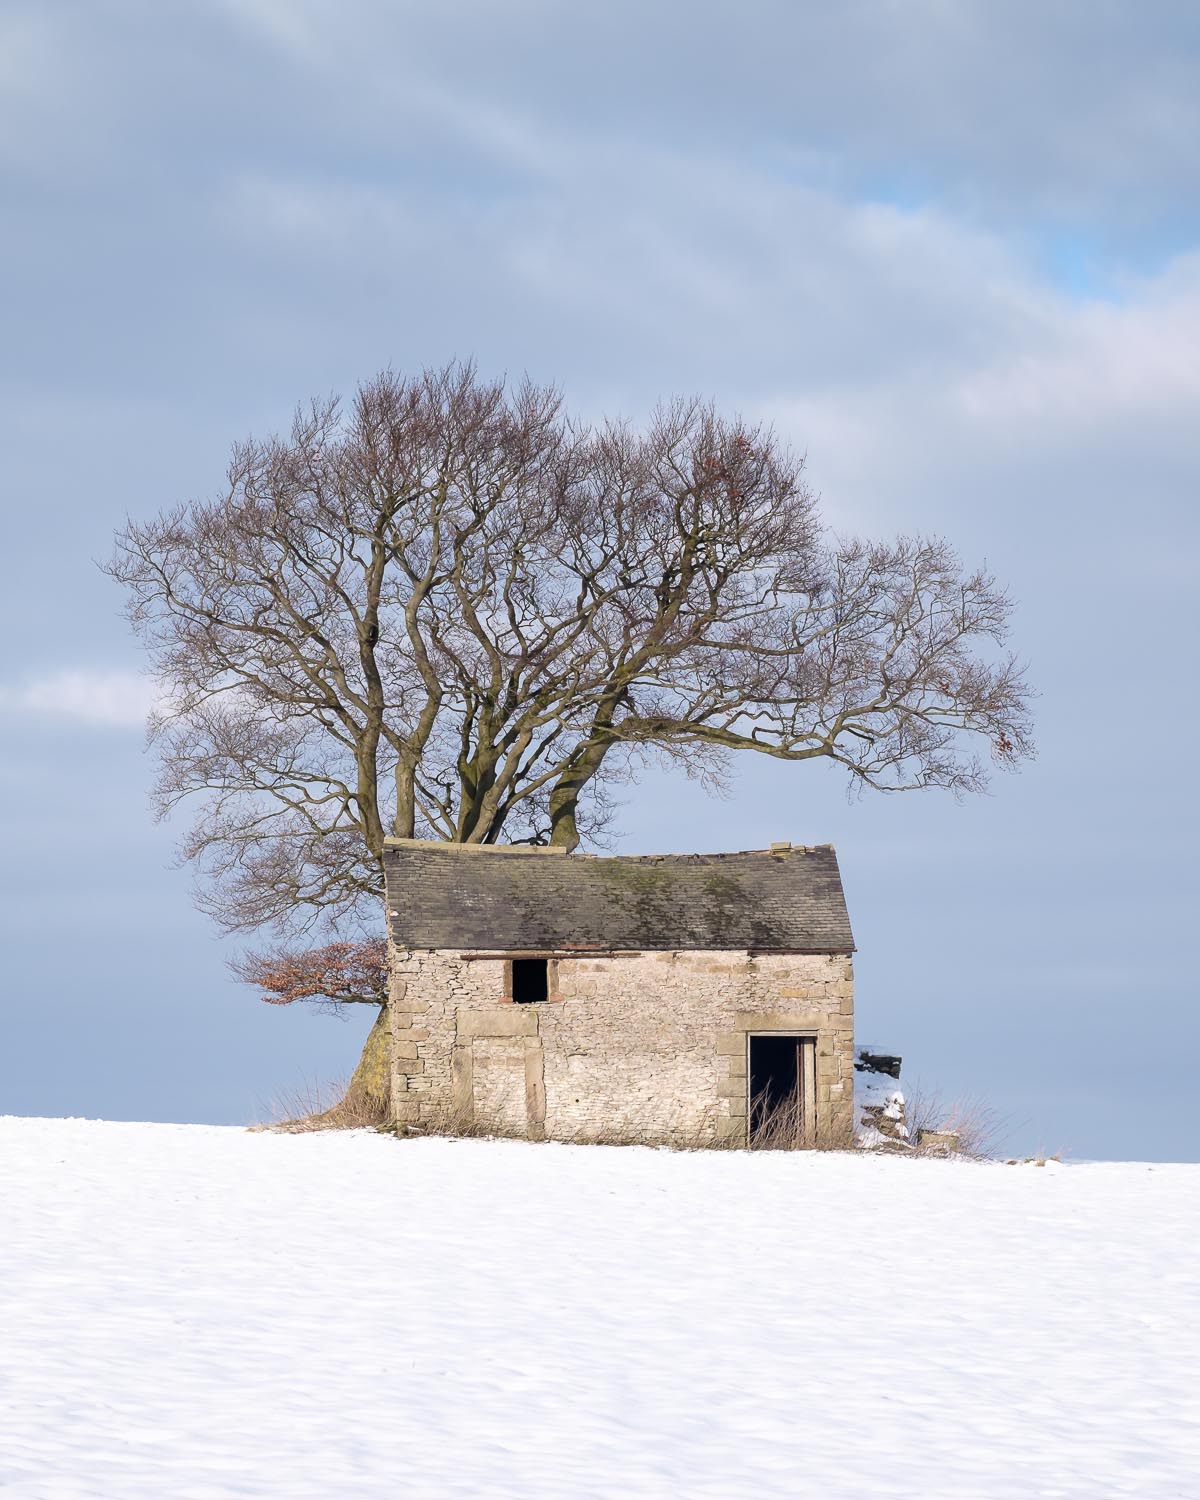
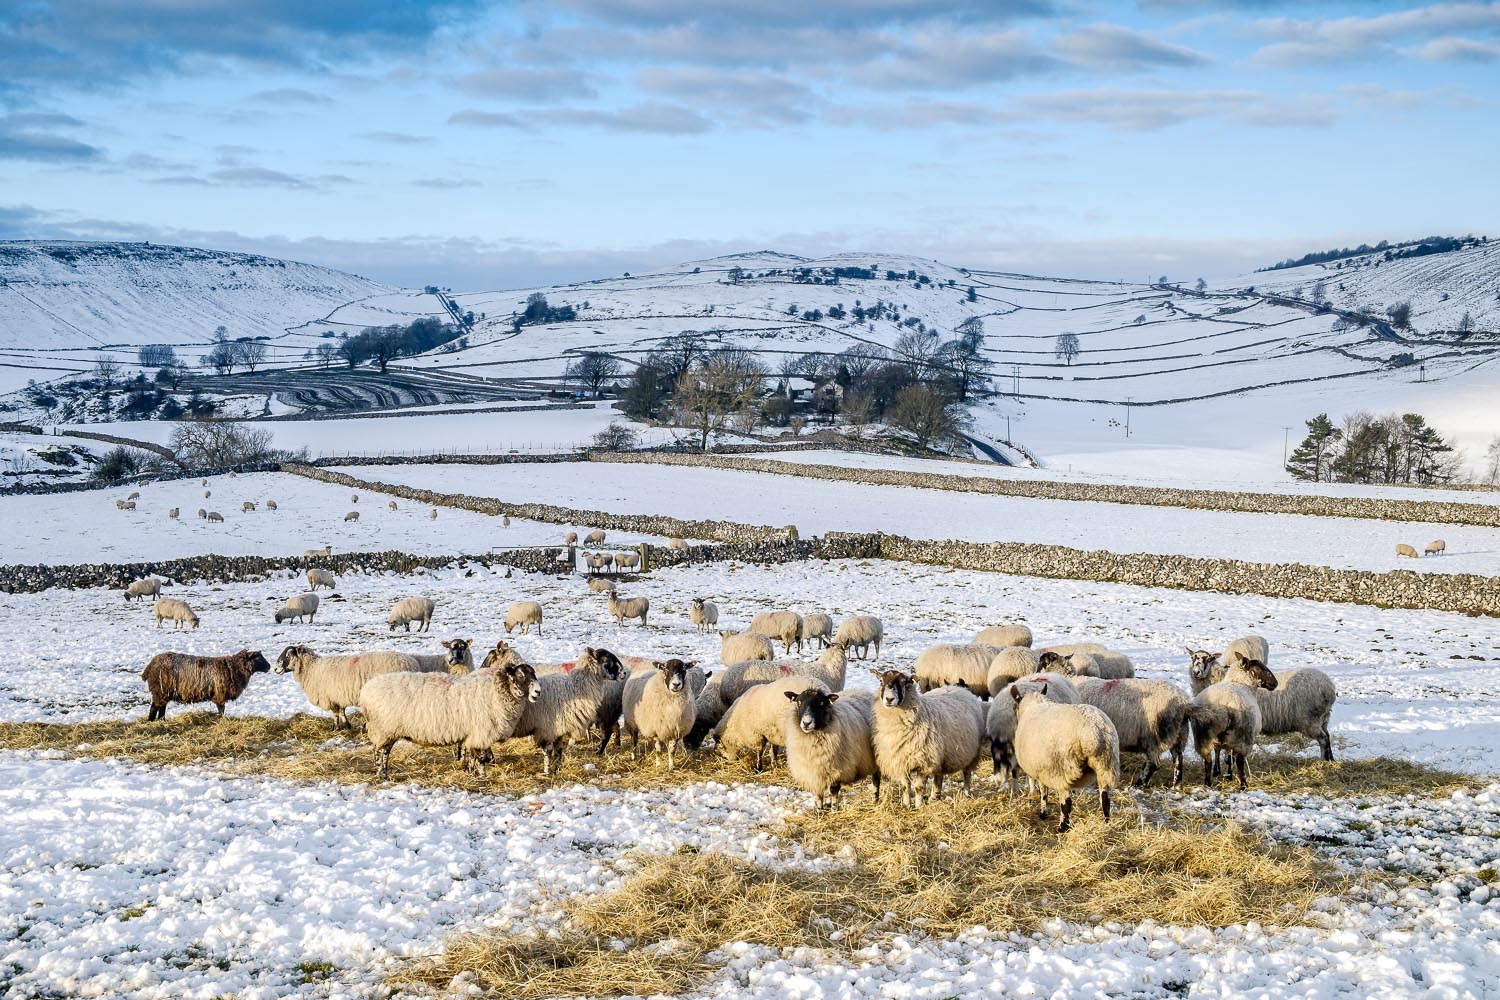
You will not be short of subjects to photograph in these conditions but you may have to be quick as the light or the mist may only be present for minutes or even seconds. From big sweeping landscapes, to isolated trees or barns, to detail shots of frosted grass, icicles or bubbles under the ice there are shots everywhere.
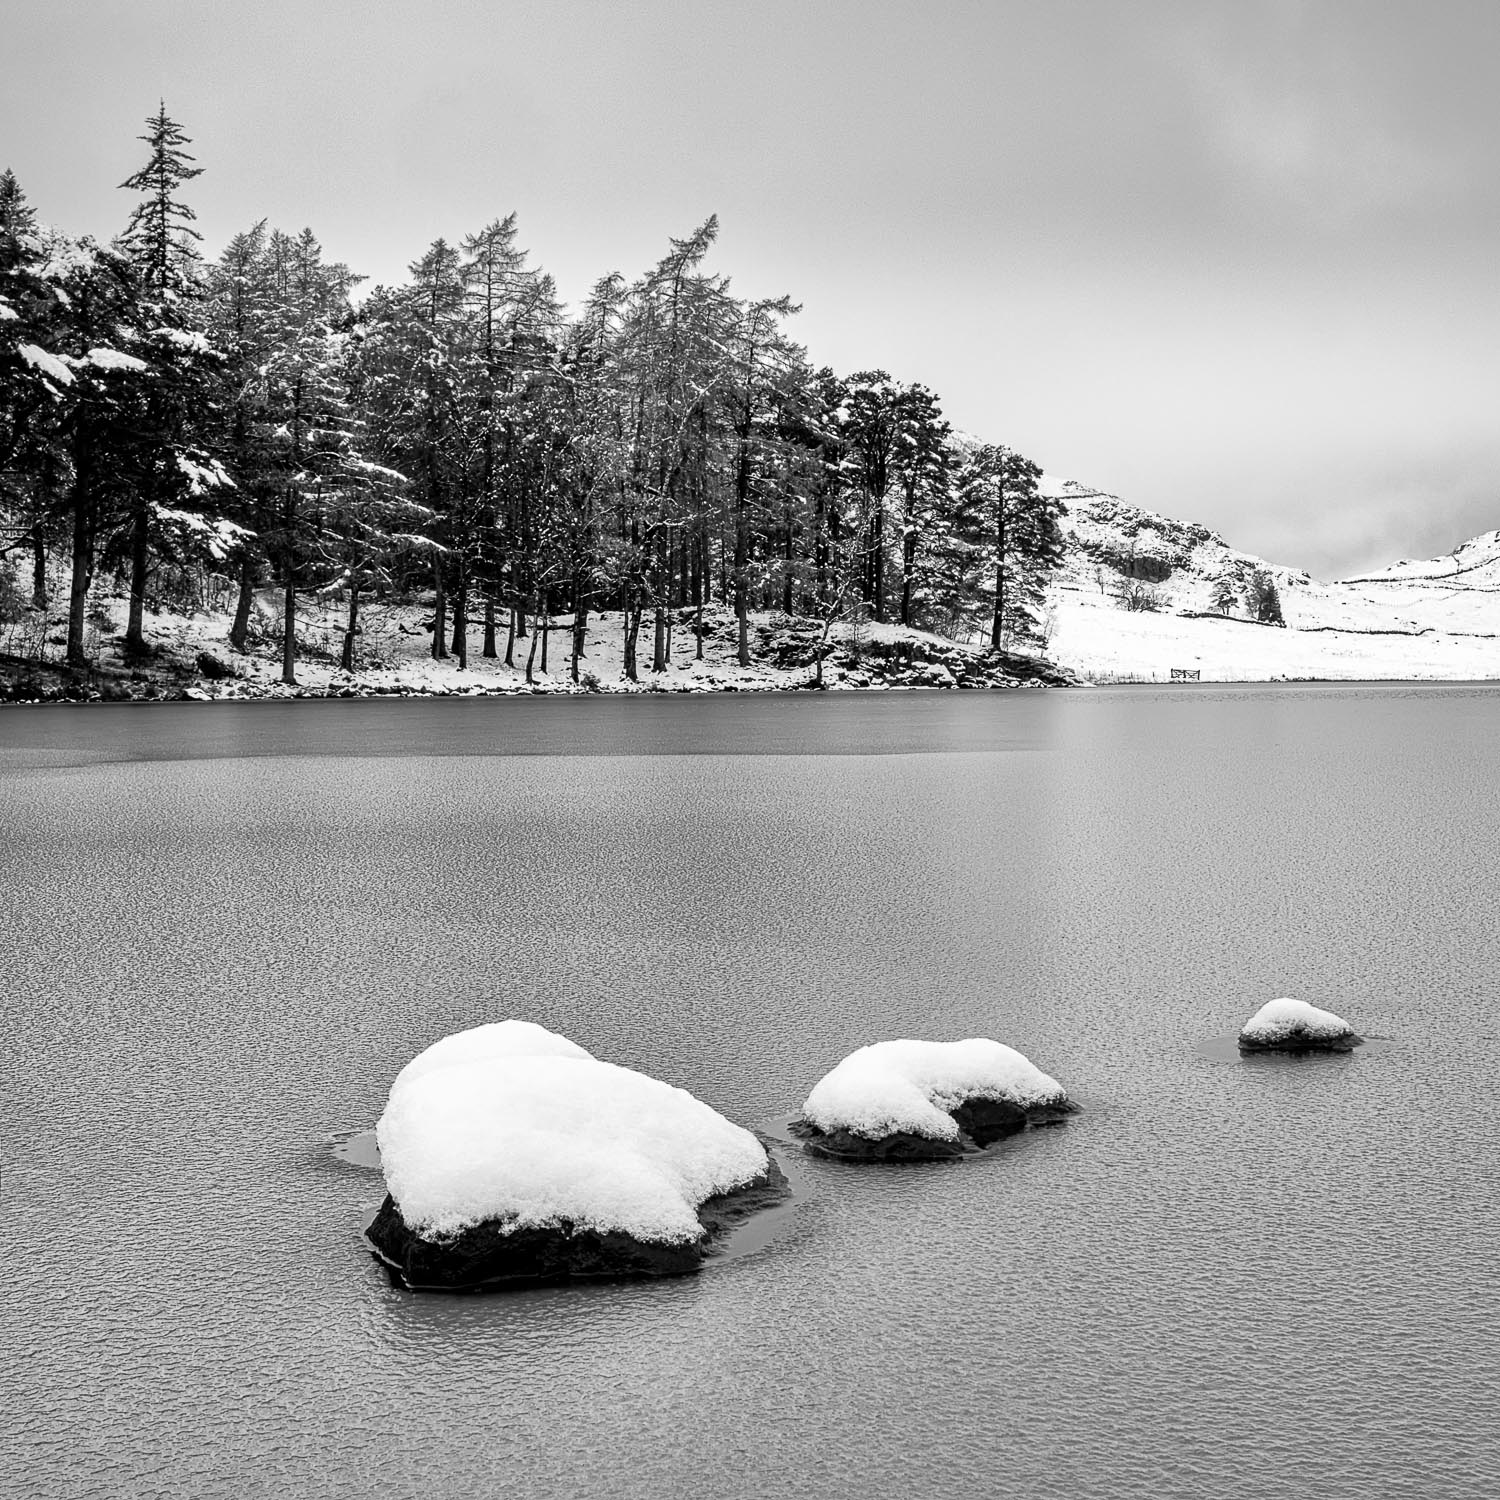
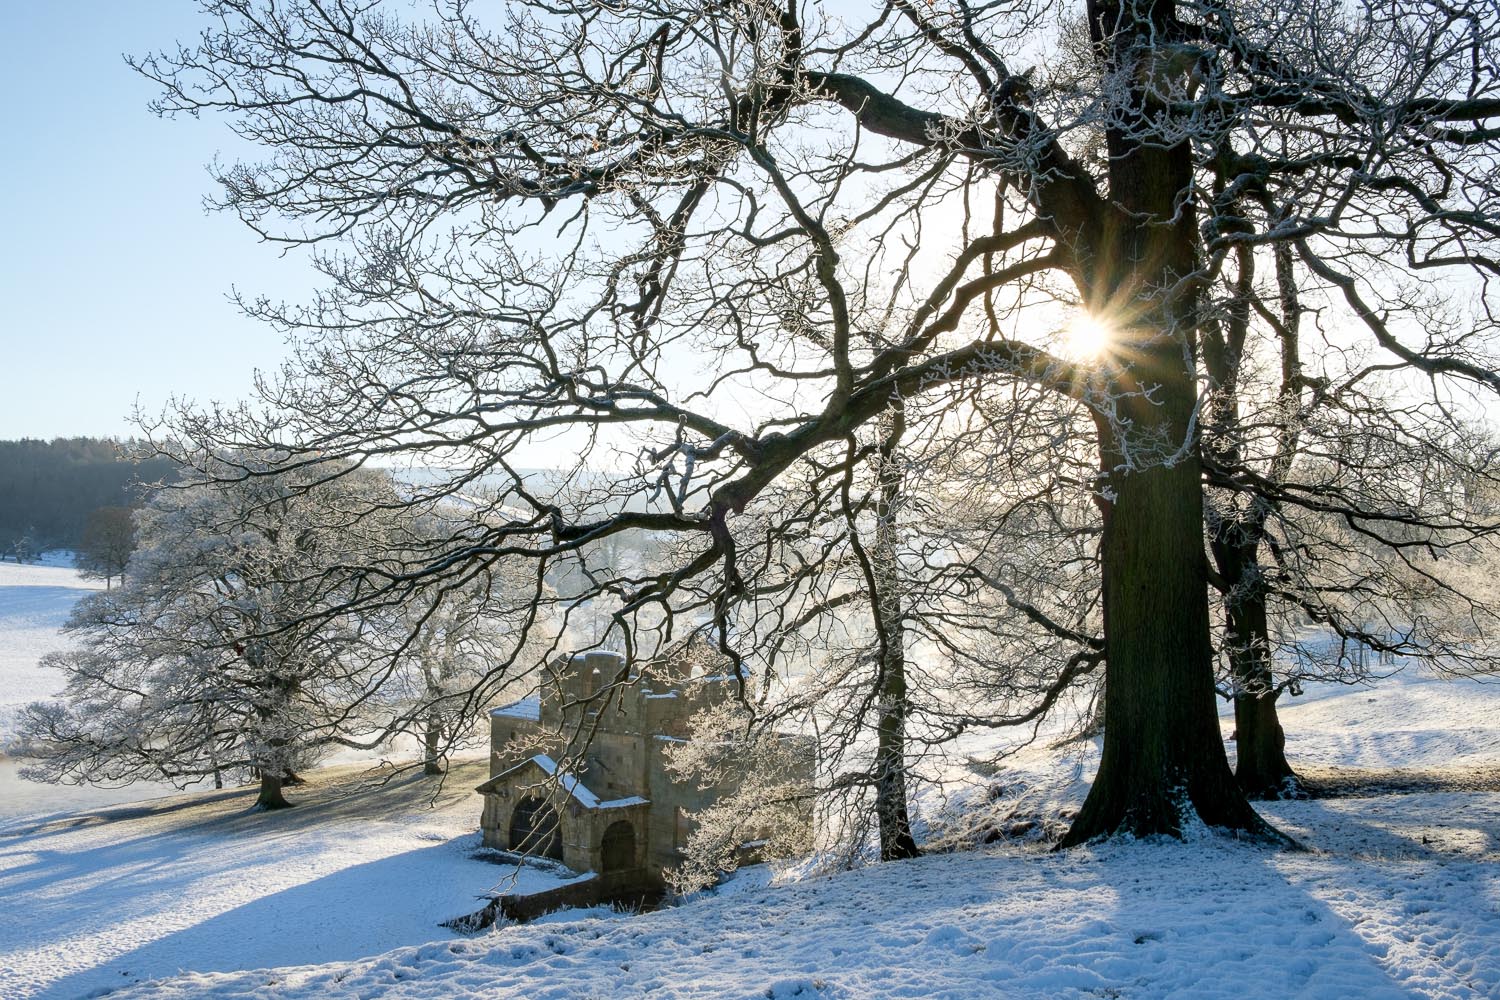
It’s the harsh weather that creates those special moments. Mist and fog separate subjects from their background and bring an ethereal feeling to the scene. Hoar frost on grasses and trees lit by the morning sun look stunning, reflections of a winter sunset in still water and of course the landscape blanketed in snow are all great subjects.
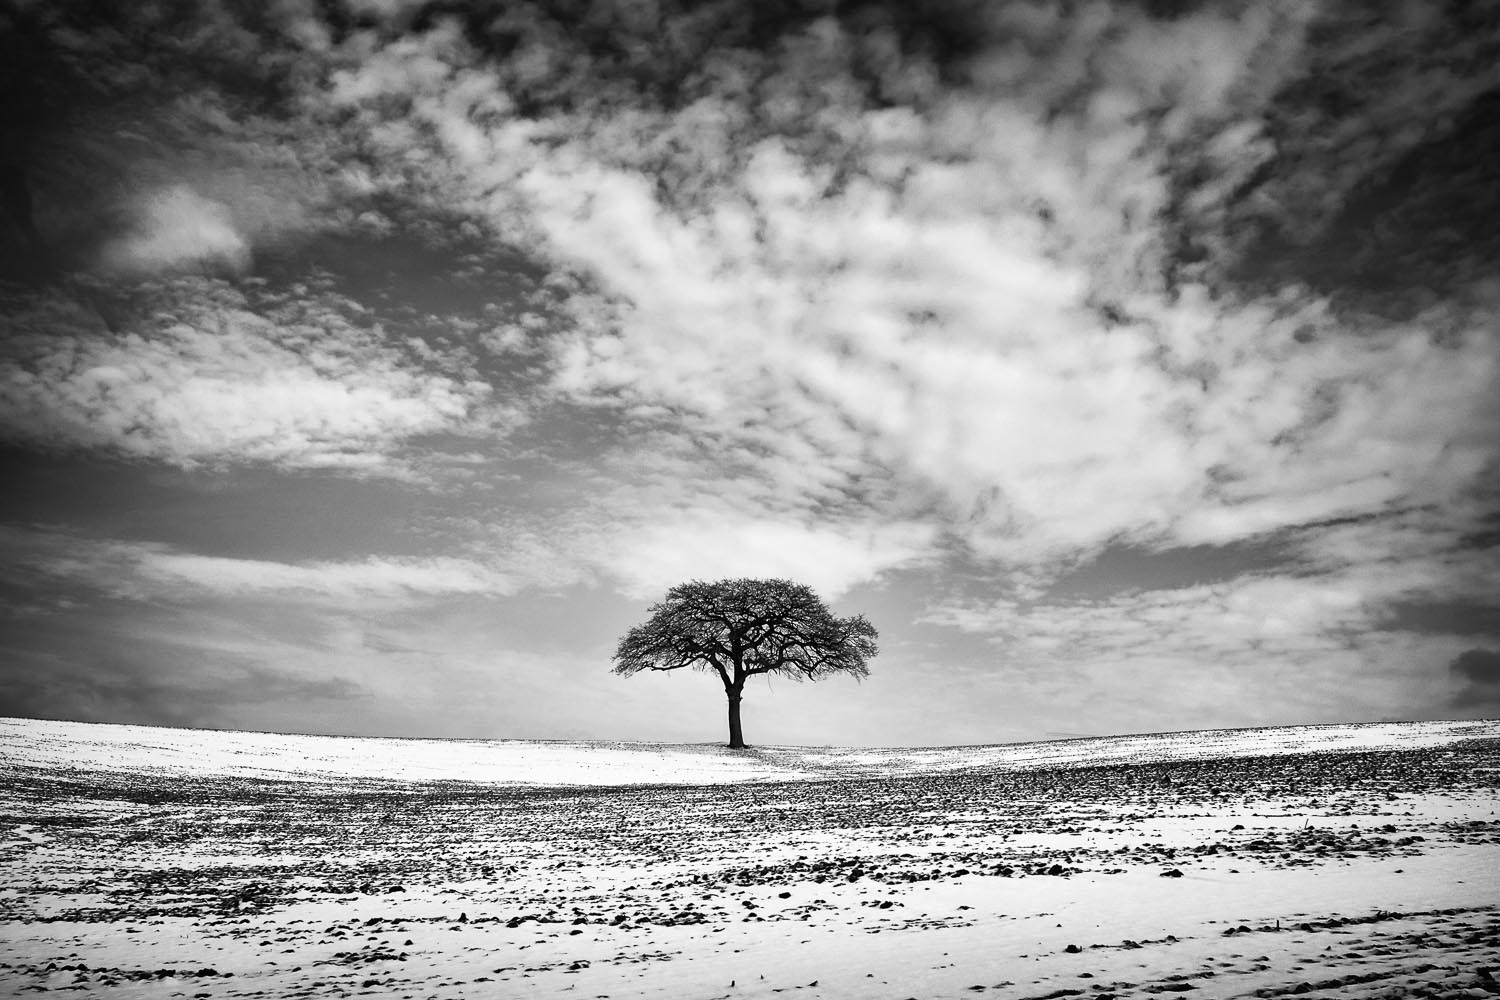
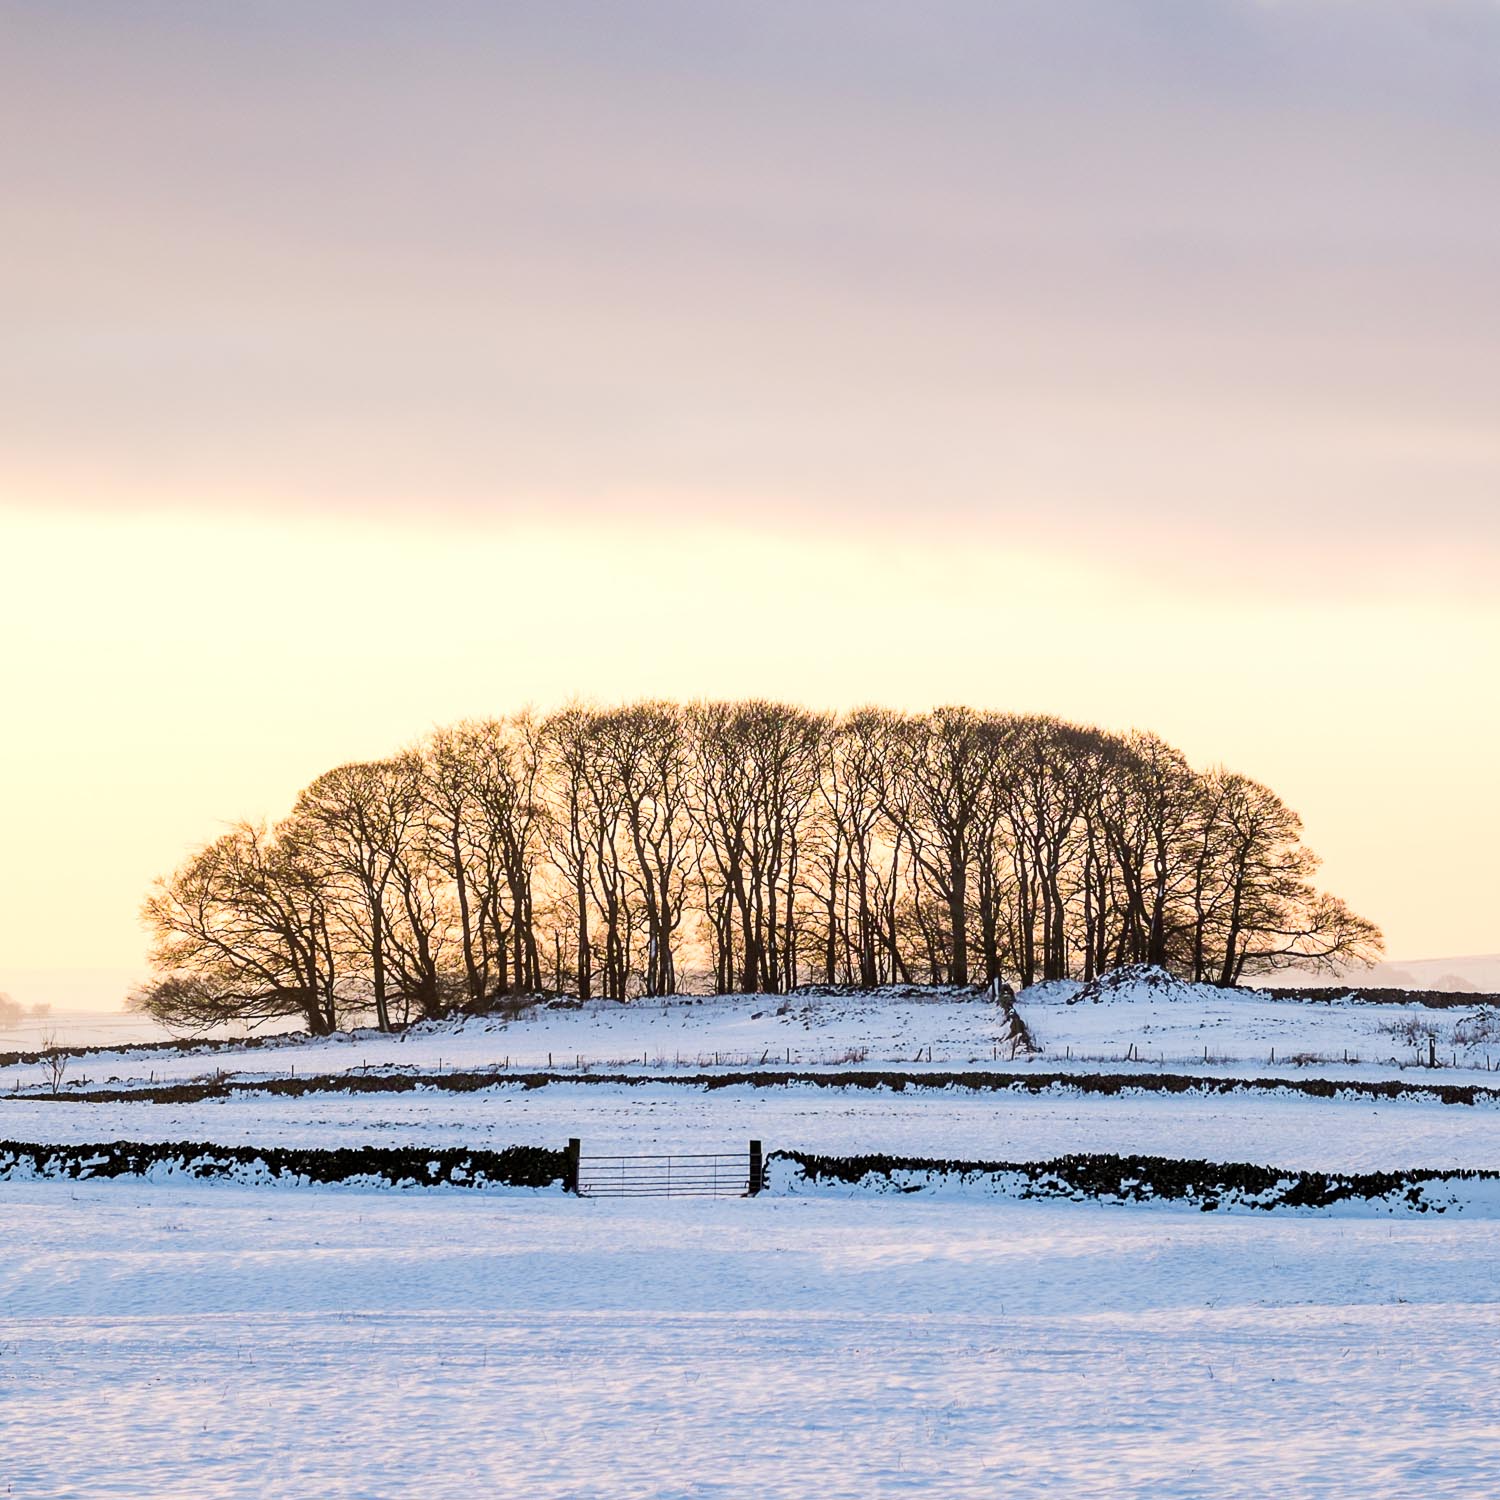
Going for a simple, minimalist, composition positioning your subject against a background of white, can be very effective giving a sense of isolation and cold. Features such as walls and fences stand out in the snow and can be very useful as lead in lines to your main subject.
Look for limited areas of colour to lift the blandness of a winter scene creating a more positive feel to the image. Converting to mono also works very well allowing the subject to stand out emphasising shape, texture and form.
But it’s not all about the landscape think about urban environments too with wet streets reflecting vibrant shop lights, car light trails and people battling the elements, the only limit to the shots is your imagination.
When to shoot
As always, early and late are best but the great thing about winter is that sunrise and sunset are at civilised times of the day. Being out early after a snowfall also means that you can shoot pristine conditions without other peoples footprints spoiling the view. Severe frost can create magical images but you need to shoot early as it will soon melt away when the sun comes up.
FUJIFILM X-T2 - F5.6, ISO 400, 1/40 sec.
How to shoot
Great pictures are possible whatever camera or lenses you have. The most important thing is to protect your gear and know how to overcome the challenges that winter presents.
The most critical factor when shooting snow and mist is getting your exposure right, especially if you are recording JPEGS. Mist and snow will fool your camera into under exposing hence why your images can look dull and grey. To overcome this and bring some white sparkle to your images you need to over expose by between 1.5 to 2 stops. One of my favourite features on the latest Fujifilm X cameras is the Custom setting on the exposure compensation dial. This not only allows you to select +/- 5 stops of exposure compensation but it is dialed in using the front command wheel, a really user friendly feature. Alternatively you could spot meter off a neutral tone such as a grey rock, then use your exposure lock to hold that exposure whilst you release the shutter.
Always use your histogram to check your exposures ensuring that you have collected as much detail as possible in the file without burning out your highlights or blocking up your shadows.
FUJIFILM X-T1 + XF55-200mmF3.5-4.8 R LM OIS - F11, ISO 200, 1/40 sec
If the lighting is very tricky then bracket your exposures by selecting bracketing in the Drive Mode +/- 1 stop. Just make sure you use a tripod and have selected AE bracketing.
Another great feature on some of the recent Fujifilm cameras is the Dynamic Range expansion. This helps you to manage high contrast scenes and works by under exposing the image by using a higher ISO to retain highlight detail and then boosts the detail in the shadows. For one stop of DR expansion you must select 400 ISO and for two stops 800 ISO or be using Auto ISO with at least 400 or 800 ISO selected respectively. It really does work and I recommend you try it out especially if you shoot JPEGS.
FUJIFILM X-T2 + XF10-24mmF4 R OIS - F11, ISO 200, 1/100 sec
The Auto Focus system in our camera works by detecting areas of contrast. Snow and mist are low contrast scenes and therefore our AF may hunt trying to find focus. In these situations I switch to Manual focus and use the manual focus assist feature of Focus Peaking set to Highlights Red. All the highlights glowing red indicate the areas that are in focus, a wonderful aid to perfect focus.
Many landscape photographers shoot in Aperture priority as usually the shutter speed is of little relevance when using a tripod. However if you are hand holding or there is falling snow then the shutter speed is an important factor. Longer shutter speeds will render falling snow as white streaks which you might like for creative effect but otherwise you should shoot at a speed around 1/60 or 1/125 of a second. If it’s a blizzard you may need a faster speed.
If you have filters then your Polariser is your friend. Great for reducing glare and darkening blue skies allowing the clouds to stand out. However take care not to over polarize. I suggest you rotate to the maximum effect and then come back until you have a more realistic look. Also bear in mind that Polarisers work best when the subject is at 90 degrees to the sun. They can also cause vignetting when using extreme wide angle lenses so take care to check your screen.
FUJIFILM X-T1 + XF18-55mmF2.8-4 R LM OIS - F11, ISO 200, 1/17 sec
Other filters that you may find useful are Neutral Density Grads. Available typically in one to three stop densities they are used to hold back the brighter parts of the scene, typically skies or water, and achieve a more balanced exposure. However remember that the sky should usually be lighter than the foreground and it should not be obvious that you have used them.
Protecting your gear
A critical factor when shooting in the depths of winter is protecting your gear from moisture and managing temperature changes to avoid condensation on your equipment.
Even though you may have a weather resistant body and lenses it makes sense to treat your equipment with care to avoid any problems.
Using your camera outside in the cold is not a problem, though you do have to be careful not to breathe heavily on the back of the camera. However you need to avoid subjecting your gear to rapid changes of temperature so don’t be tempted to place your cold camera inside your warm jacket. Instead place it back in your bag or keep it out.
If you do have to go into a warm environment during the day, say for a pub lunch, then either leave your gear locked in your car boot or place the camera and lens inside an airtight bag until the temperatures equalise, ziplock freezer bags are useful for this.
If you do get condensation on your equipment wipe it down with a chamois or microfiber cloth, remove the battery and allow it to come up to temperature naturally.
In sleet, snow or rain using a lens hood will give some protection to the front element but make sure you keep checking it and clean regularly. If you don’t have a purpose made waterproof cover you can always try a good old shower cap – on the camera that is!
Cold weather reduces battery performance so make sure you carry several fully charged spares and keep them inside your jacket to help prolong their life.
FUJIFILM X-T1 + XF55-200mmF3.5-4.8 R LM OIS - F8, ISO 200, 1/150 sec
Personal comfort
You cannot relax and concentrate on your photography if you’re freezing cold or wet. So it’s just as important to prepare yourself for your shoot as it is to look after your gear.
But it’s not easy to get the balance right as we tend to do a lot of stopping and starting, often standing in the cold for extended periods before walking back to our car or off to our next location. The best tip to keep warm is to use layers. A good merino wool base layer that will wick moisture away from your skin, under a quality mid layer fleece with a down or synthetic jacket is the best system together with a waterproof jacket as an outer layer that can be put on when you stop.
Usually it’s your extremities that suffer the most so a good hat, gloves, socks and boots are a must. I use a fleece hat or a mountain cap which has ear flaps and a peak, great for keeping snow and rain off my glasses.
To keep my hands warm I have tried fingerless gloves, mittens and so many different types of gloves. The biggest problem is finding the right combination to keep you warm whilst still allowing you to control the camera. I now have a pair of silk liner gloves which I wear inside a pair of MacWet gloves (used by BBC cameramen). I also carry a thicker pair of gloves with grippy fingers and palms for when it gets colder. Of course carrying a cold metal tripod doesn’t help and whilst some tripods feature foam grips mine doesn’t so to overcome this problem I have a soft neoprene leg wrap on the top section of one of the legs, As a cheaper alternative you can use a piece of pipe lagging from your hardware store. On my feet I wear quality wool socks and walking boots with thick soles to protect me from the cold ground.
Carrying expensive camera gear on snow and ice is always a risky affair so to avoid potential problems I always pack my camera away after a shoot and strap my tripod to my bag leaving my hands free. Some people like using trekking poles to provide additional stability on steep slopes.
FUJIFILM X-T1 + XF18-55mmF2.8-4 R LM OIS - F18, ISO 200, 1/50 sec
Stay safe
When shooting landscapes often the best locations are pretty remote and in the winter weather can change very quickly. A slip or fall in these conditions can have serious consequences so it’s best to be prepared. As well as the items of personal clothing listed above I carry a headtorch, a whistle, map and compass and a survival bag. I always take my phone but usually there’s little point since there’s no signal in many of the locations.
I also carry some snacks and a flask with a hot drink, oh and of course when it’s really cold my Zippo hand warmer which provides a luxurious boost of heat just when I need it. If you are venturing out into the wilds on your own then tell someone where you are going and the time you plan to return.
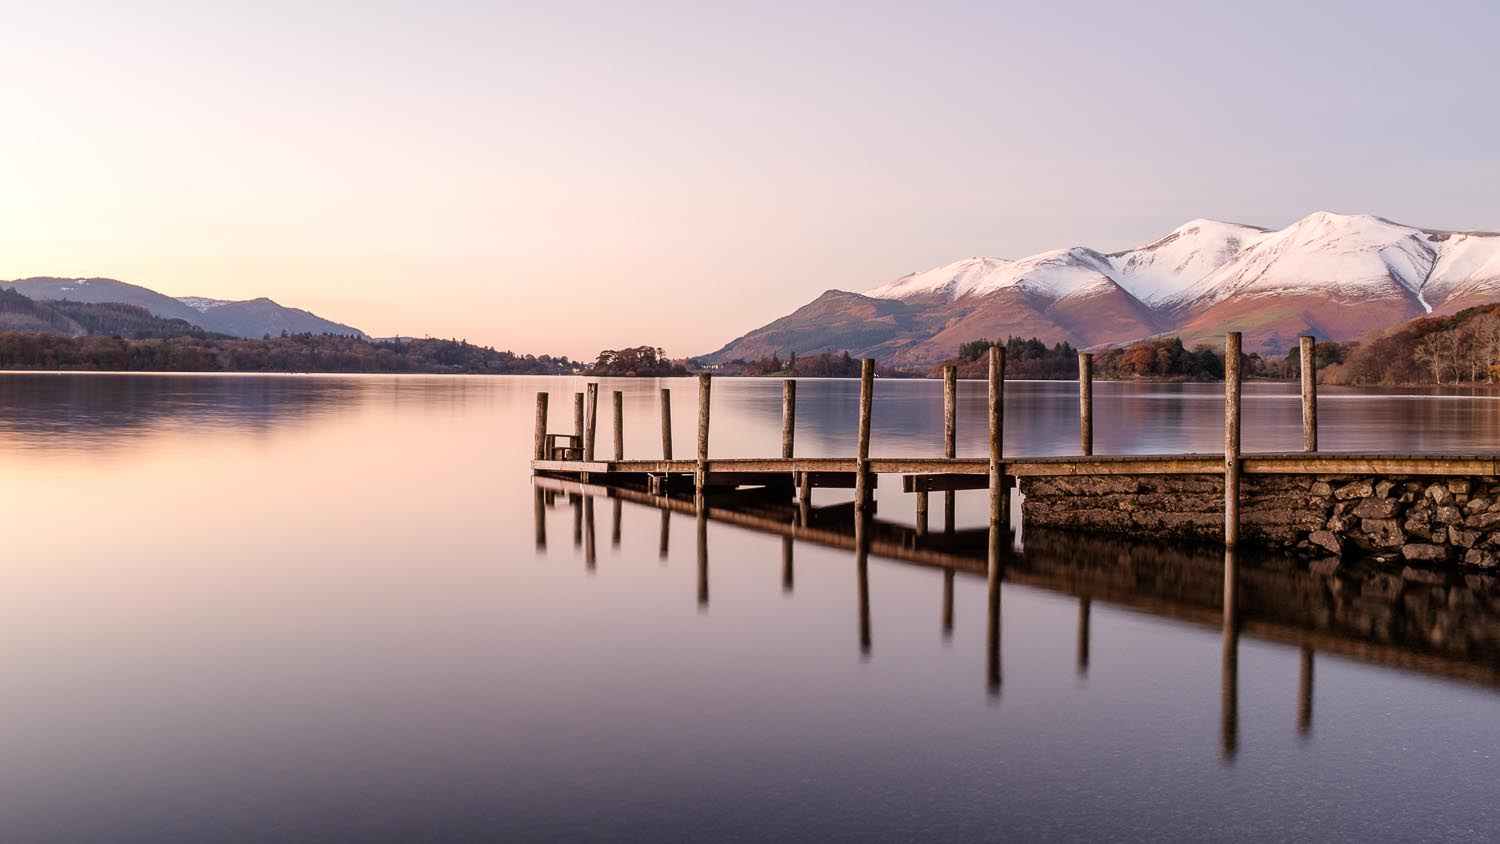
FUJIFILM X-T2 - F11, ISO 100, 10.0 sec
Processing
Finally once you’ve captured your images we can now move inside, grab a cup of coffee, relax and enjoy processing our images.
The key here is to try and communicate how you felt when you took the image or a particular feeling you wish to convey.
Working in Lightroom the first thing I do is check the exposure. Check the histogram to ensure the whites are bright with no clipped highlights. You can then fine tune using your highlights and whites sliders.
Next I check the White Balance. Now I find the WB on Fujifilm cameras very good however mist, snow and ice shots can require some adjustment particularly if there is a bright blue sky or it’s a cloudy day. This can cause images to look too warm, simply moving the WB to the left will bring back a more natural looking colour.
Images that are predominantly light in tone, especially under overcast conditions, can lack colour and depth. You can fix this using the Clarity and Vibrance sliders. The Clarity slider increases mid tone contrast adding some punch and impact to your image. Take care not to increase this too much or you will cause halos to appear around high contrast edges.
Use the Vibrance and Saturation sliders with great care to maintain a natural, realistic feel to your images. I rarely use the Saturation slider which adds saturation to all the colours but a modest use of Vibrance, which increases the intensity of the less saturated tones, can add some impact to your picture.
So whether you are in the landscape or in the city, charge your batteries, wrap up and get out and make the most of the beautiful winter wonderland!
To see more of Chris’s images check out his website www.chrisuptonphotography.com