


After a few summer months of long, warm days and harsh sun, we are longing for misty mornings, low-raking light, and sunrise and sunset at sensible times of day! For many photographers – especially landscapers – autumn is simply the best time of year. Our woods and fells are transformed into a riot of rich, warm colour and with the addition of a tumbling stream or lake, you have a recipe for magic. Here are some tips and tricks on how to use your FUJIFILM cameras and lenses to make the most of this captivating season in your photography.
FUJIFILM X-T2 + XF50-140mmF2.8 R LM OIS WR - 2.6 sec. at F8, ISO 200
Equipment
Let’s start with gear. The truth is, whatever camera and lenses you have, you can capture great pictures in the autumn. However, my preferred set-up is my FUJIFILM X-T3 along with three zooms; the FUJINON XF10-24mmF4 R OIS, XF16-55mmF2.8 R LM WR and XF50-140mmF2.8 R LM OIS WR.
Your choice of lens can have a dramatic effect on your image, and this is why I like to keep my options open. The wide-angle view of the XF10-24mmF4 is great for making the most of foregrounds and for capturing the big vista, while the XF16-55mmF2.8 is extremely versatile and delivers superb image quality, as does the XF50-140mmF2.8, which, as a longer lens, is also great for compressing perspective and isolating detail. Additionally, the fact that the X-T3 and two of these lenses are weather-resistant is reassuring when the conditions take a turn for the worse.
I would always recommend carrying a sturdy tripod with you, which helps to fine-tune compositions, but there is a lot to be said for the freedom of shooting handheld. The superb image stabilisation in some of the FUJINON lenses and FUJIFILM camera bodies – such as the X-H1 – mean that it’s never been easier to capture great images without having to put the camera down – even in low light.
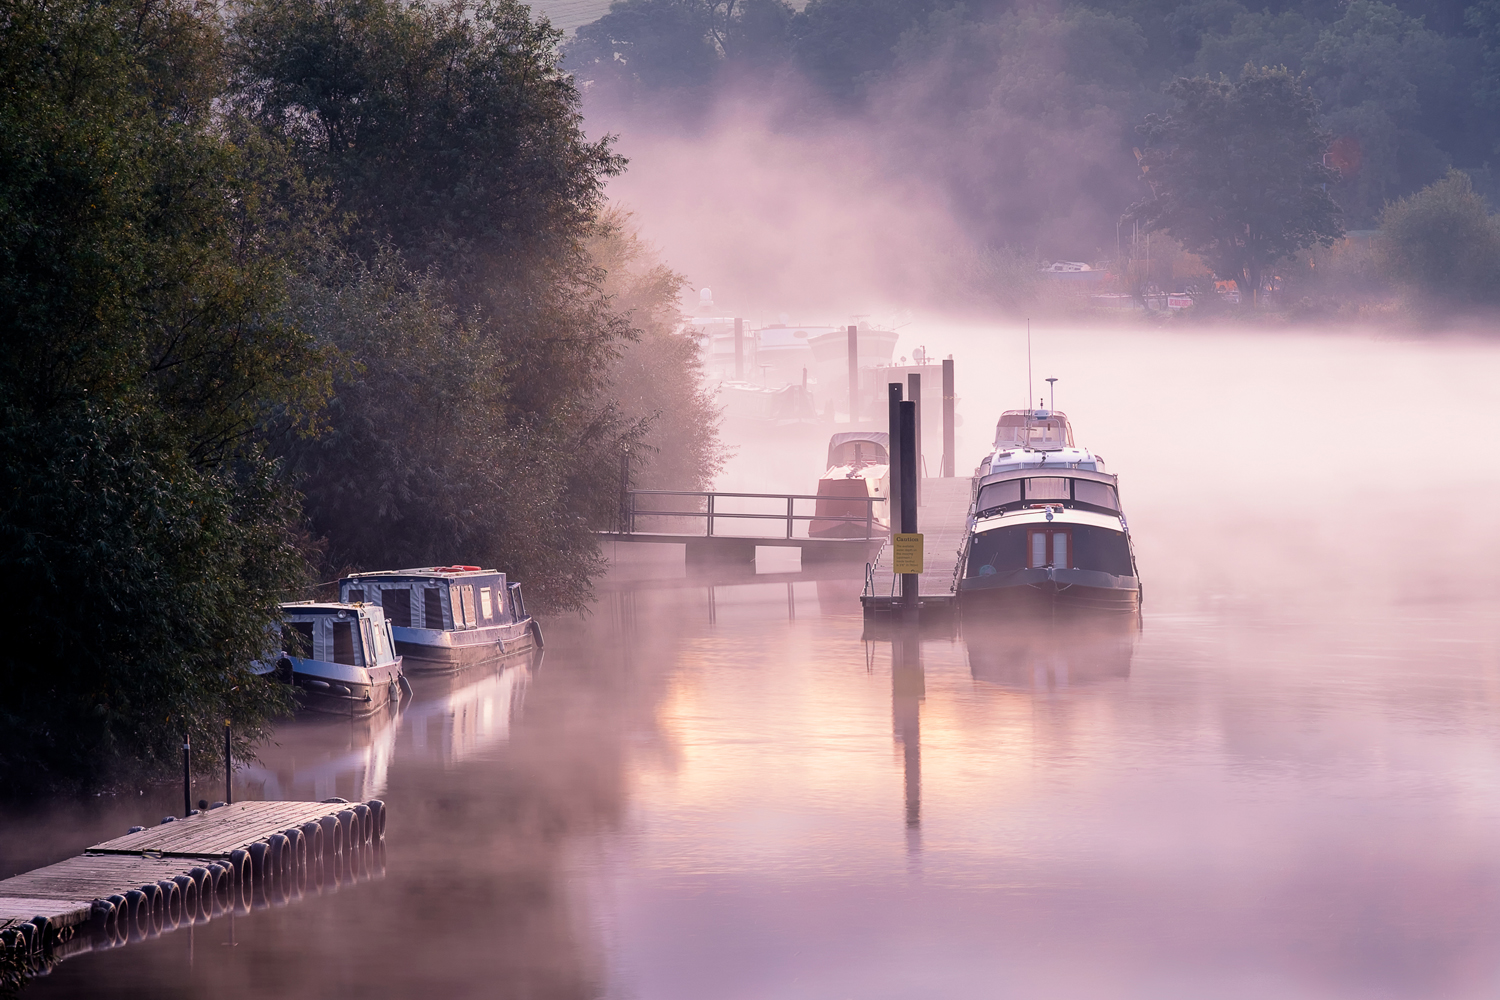
 FUJIFILM X-T2 + XF50-140mmF2.8 R LM OIS W – 1/7 sec. at F5.6, ISO 200
 FUJIFILM X-T2 + XF10-24mmF4 R OIS – 1.4 sec. at F11, ISO 200
As the sun is fairly low at this time of year, ensure that you use your lens hood to cut out any unwanted flare – and make sure your lens and filters are spotless! The one filter you shouldn’t be without is the circular polariser. Polarising filters are great for darkening blue skies, allowing the clouds to stand out, removing glare from water and leaves, and saturating colour, to deliver pictures with impact.
Another one to try is the neutral density graduated filter. These are available typically in one- to three-stop densities and hard or soft graduations. They are used to hold back the brighter parts of the scene, typically skies or water, to achieve a more balanced exposure. However, remember that the sky should usually be lighter than the foreground and it should not be obvious you have used them.
FUJIFILM X-T2 + XF16-55mmF2.8 R LM WR - 1/7 sec. at F8, ISO 200
Camera set-up
Since the aperture controls the depth-of-field – a critical factor in landscape photography – I typically set my camera to shoot in aperture-priority (A) mode. However, I often shoot in full manual when the light is changing fast at the beginning or end of the day. This is so easy to change on FUJIFILM cameras – in most cases, the key dials are readily available on the top plate.
My default aperture is F11, unless I intentionally want limited depth-of-field and, in order to achieve the best quality files, I select my camera’s lowest native ISO, which on the X-T3 is 160. The shutter speed is of little relevance if I am using a tripod, unless I want to introduce some creative effect. When hand-holding I set my ISO to auto, with a base of 160 and a limit of 3200. The shutter speed depends on whether the lens has Optical Image Stabilisation, its size, weight and focal length. It’s best to test your equipment in advance to see which shutter you can safely handhold. Many X Series cameras now feature three options for setting auto ISO, which I find very useful.
For metering, I normally use multi-segment metering, but if the lighting is tricky or if I want a particular look and feel to the image, I will use spot. I switch on the histogram on my camera’s display and typically expose to the right to capture as much detail as possible without burning out the highlights or blocking up the shadows. I fine-tune using the exposure compensation dial. Autumnal misty mornings will fool the meter into underexposing, making your images look dull and grey, so the ability to quickly and easily increase the exposure and bring some sparkle back into your pictures using exposure compensation is wonderful.
Shooting landscapes usually means we are looking to record front-to-back sharpness, so how do we achieve this? The depth-of-field is determined by the focal length of our lens, the aperture and the focus distance. Wide-angle lenses have more depth-of-field at a given aperture than telephoto lenses and smaller apertures, like F11 or F16, have a greater depth-of-field than wider apertures.
 FUJIFILM X-T3 + XF10-24mmF4 R OIS – 0.7 sec. at F11, ISO 160
  FUJIFILM X-T3 + XF16-55mmF2.8 R LM WR – 1/10 sec. at F11, ISO 160
The focus point to maximise the depth-of-field varies with different lenses at different apertures, but as an example, using a small aperture (eg F11) and a wide-angle lens (eg XF14mmF2.8 R) focusing at 1m, everything will be sharp from 47cm to infinity.
Having said this, you will probably find that focusing around a third of the way into the scene will achieve the desired result. Alternatively, if you don’t have any foreground close to the camera, focusing on infinity (the furthest object) will also work. The touch focus feature available on most FUJIFILM cameras really helps to select your AF point easily.
Finally, remember to use your flip-out screen to get a low viewpoint for creative impact, use your two-second timer when shooting on a tripod and try different in-camera crops by selecting IMAGE QUALITY SETTING > IMAGE SIZE from your camera’s main menu. My favourite for social images is 1:1 square.
I hope this has given you some inspiration to get out shooting!

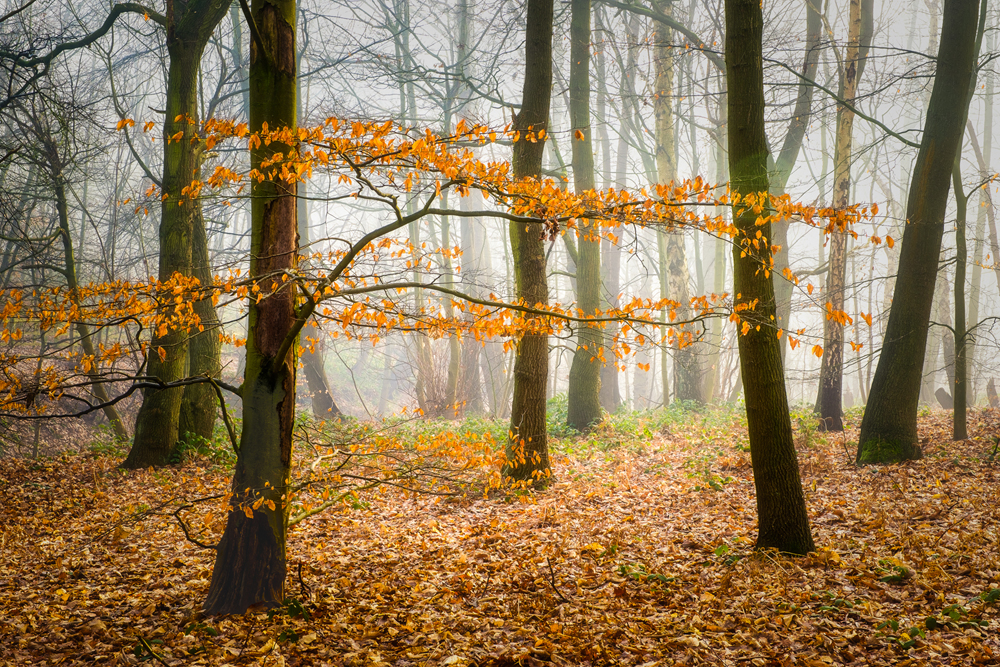
FUJIFILM X-T2 + XF10-24mmF4 R OIS - 1/5 sec. at F8, ISO 200