


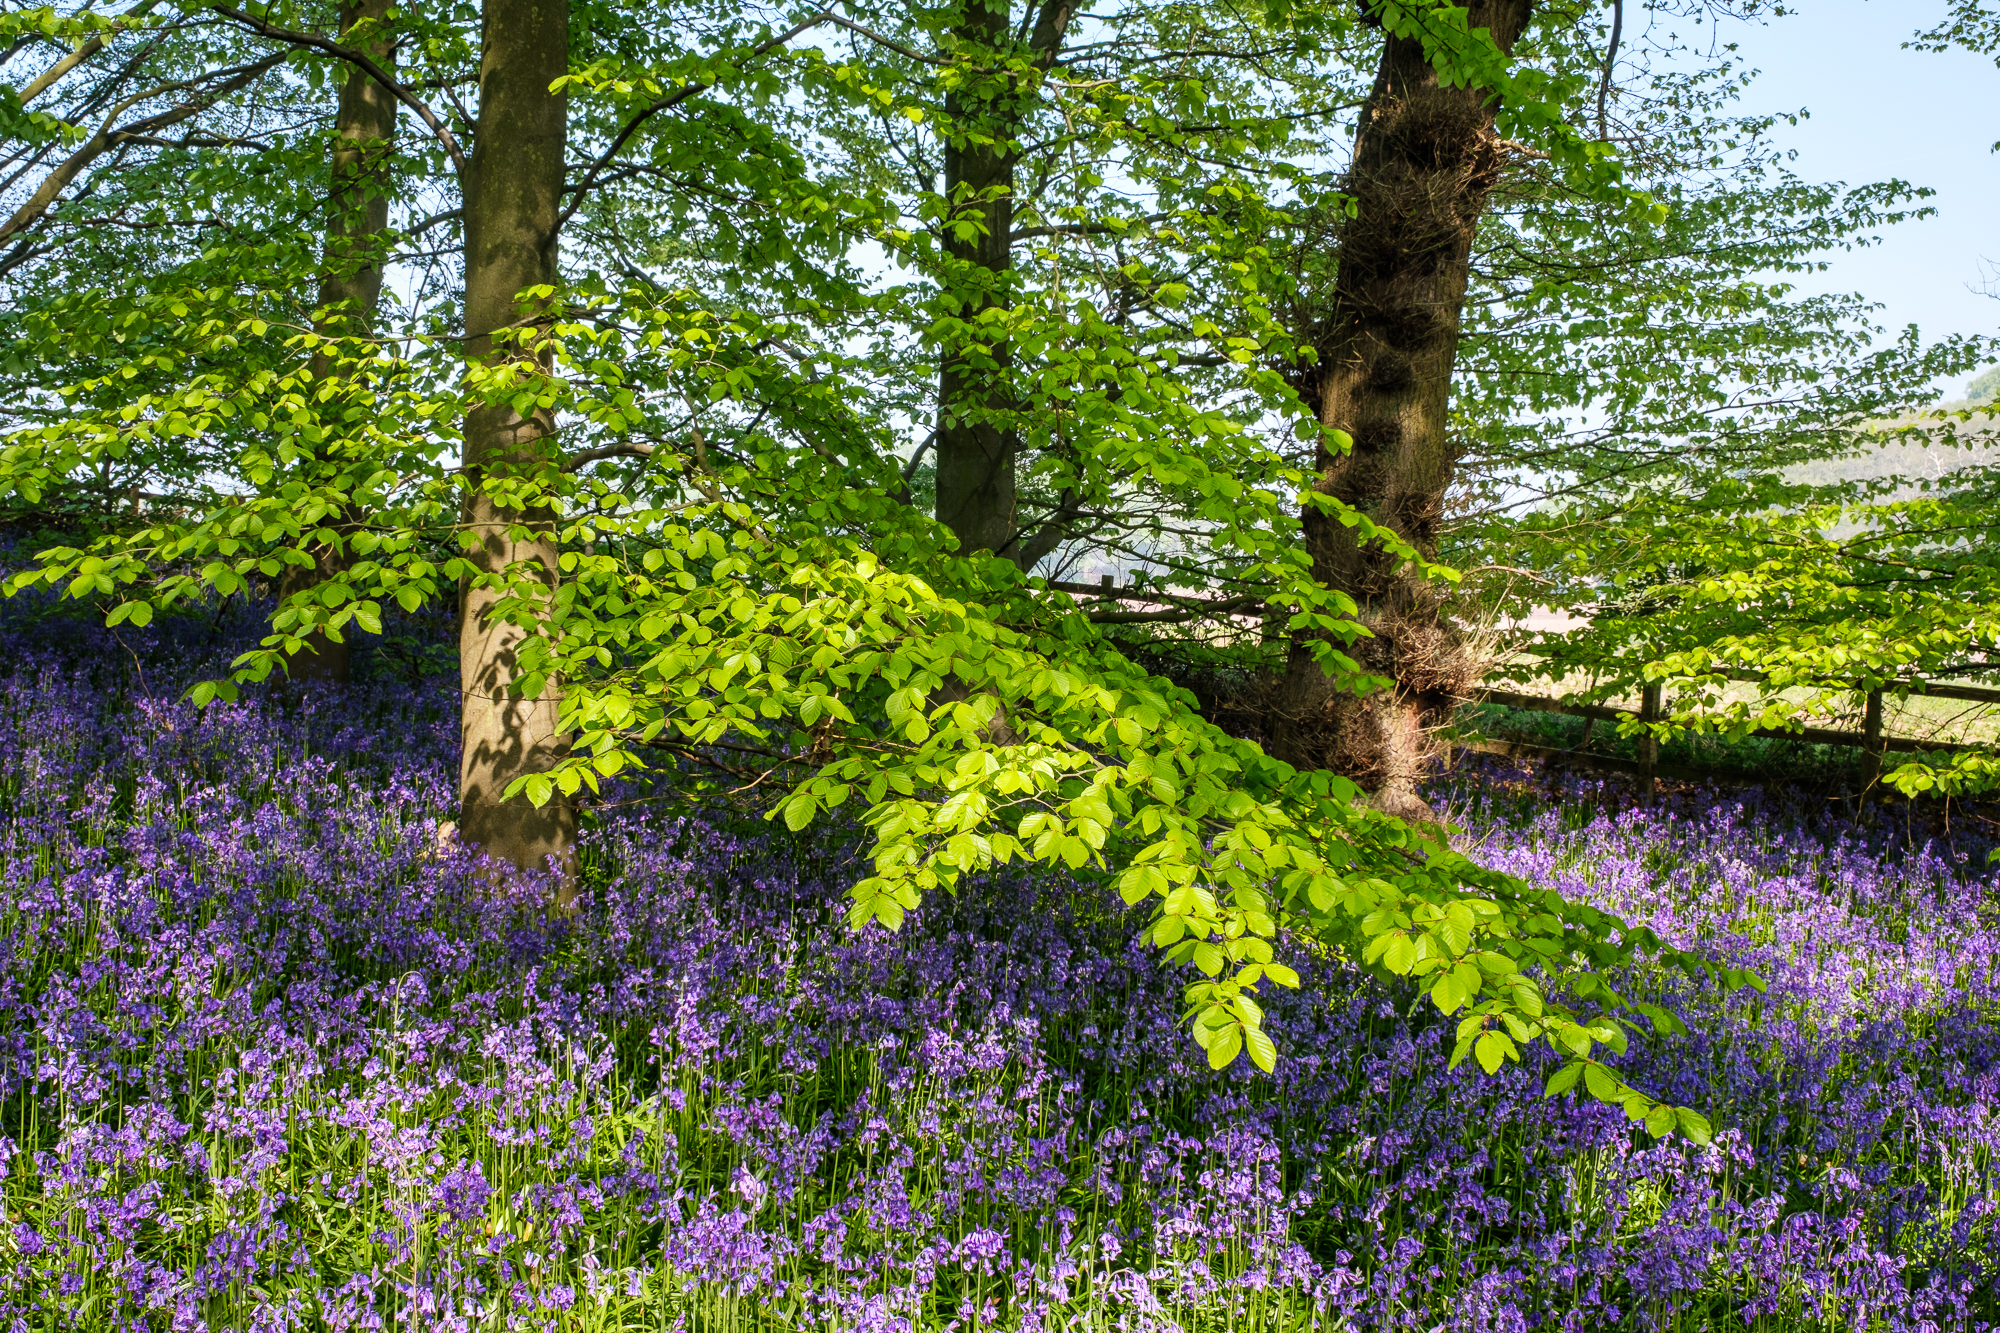
Spring is sprung and nothing signifies that more obviously than a rich carpet of bluebells under a vibrant canopy of lime green beech leaves. Walk into a forest early in the morning and the wonderful fragrant smell hits you – it’s a scene that simply begs to be photographed. Here’s how:
PLANNING
Time of year: Bluebells typically appear any time between mid-April and mid-May. However, the peak time is usually around the first week in May. The timing is critical and local knowledge is key. If you visit too soon, the display will be patchy, and if you leave it too late, the flowers will be past their best and may have been flattened.
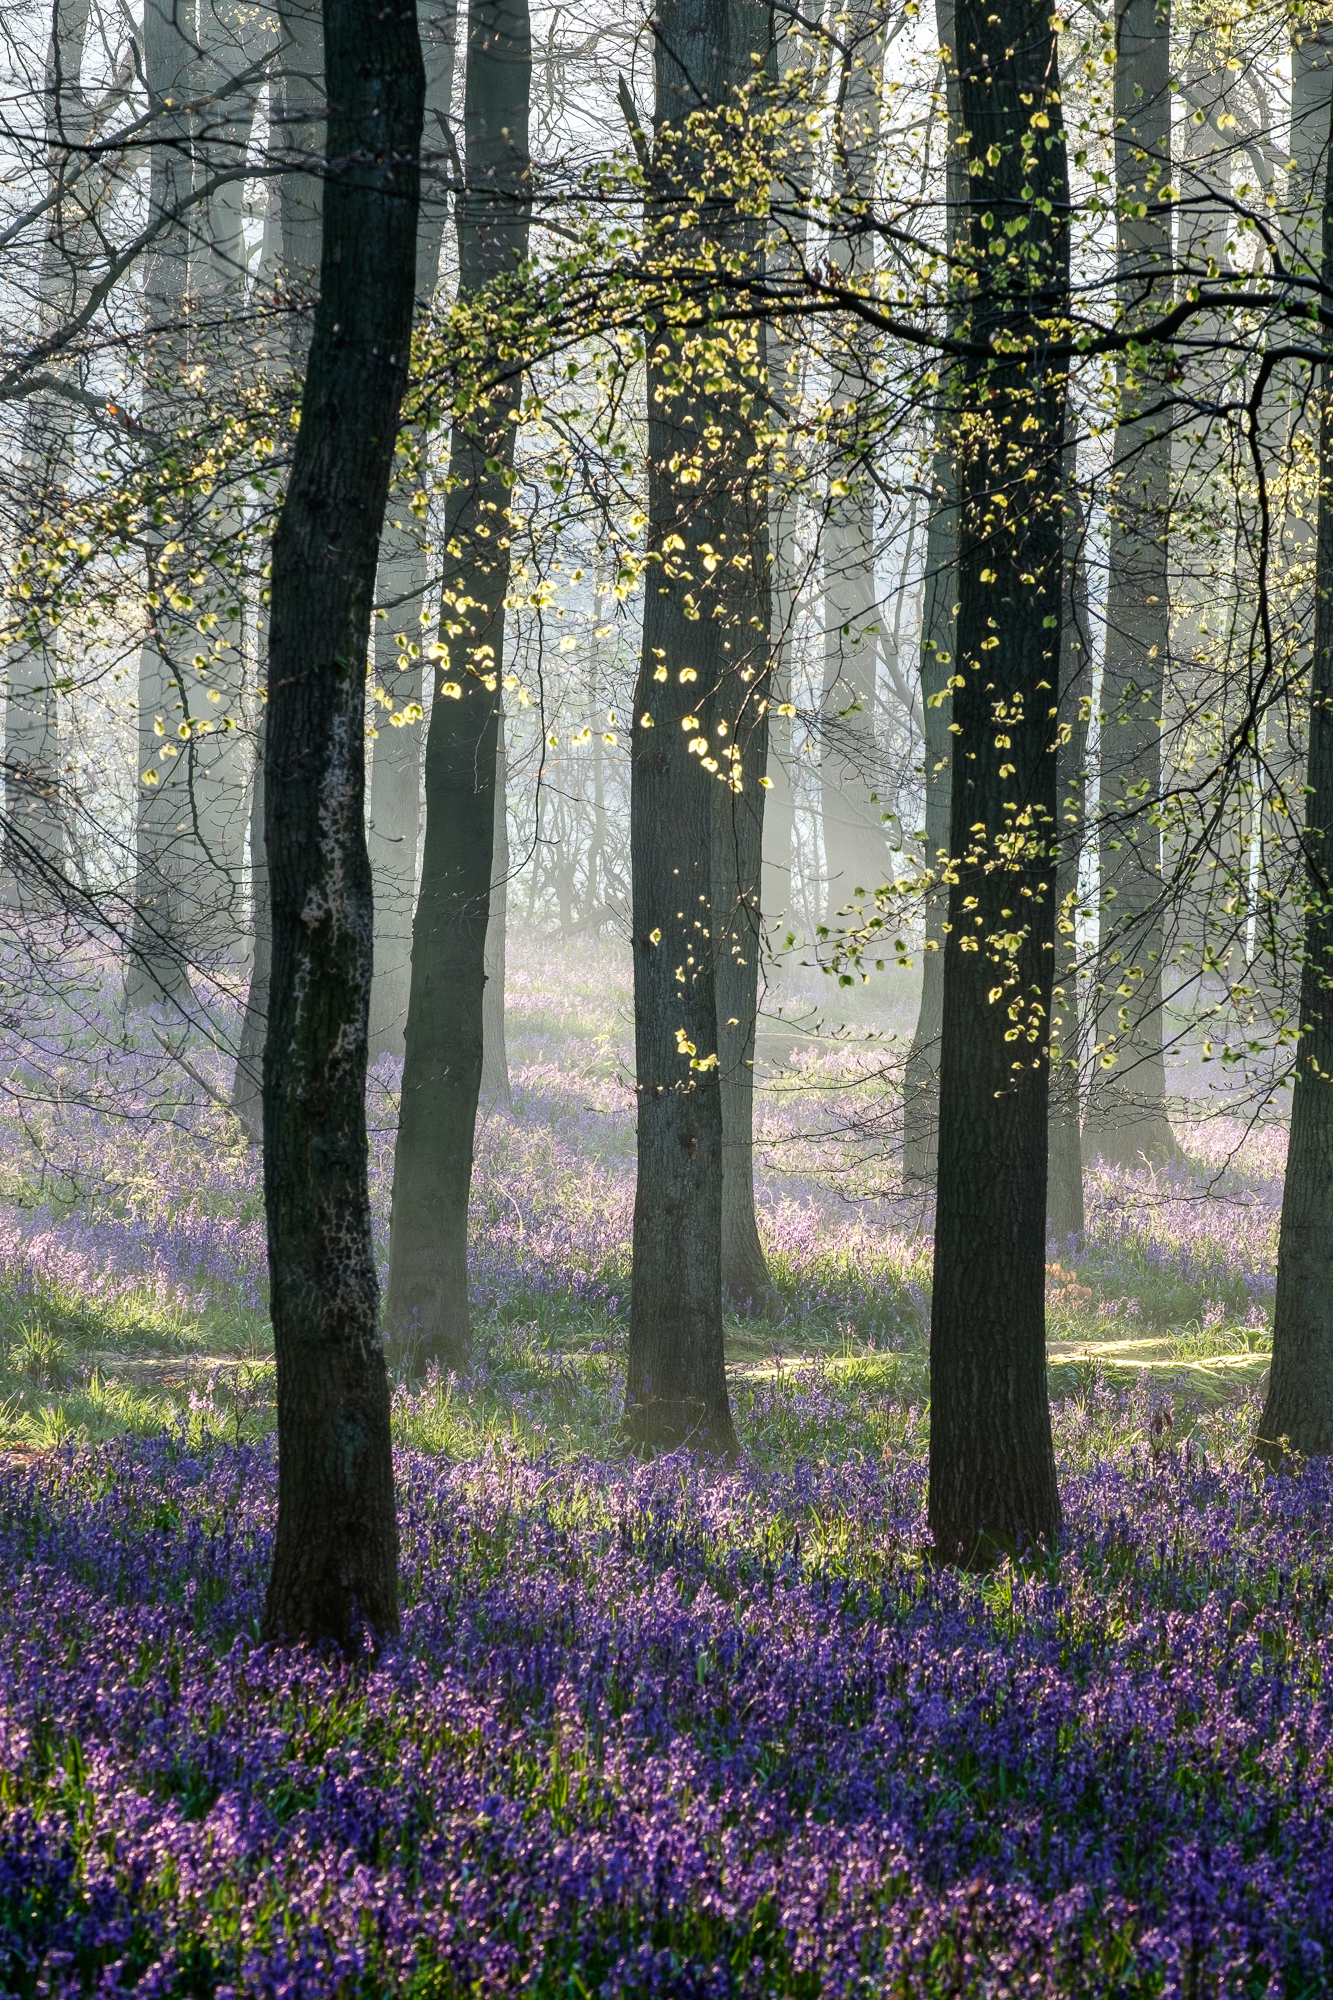
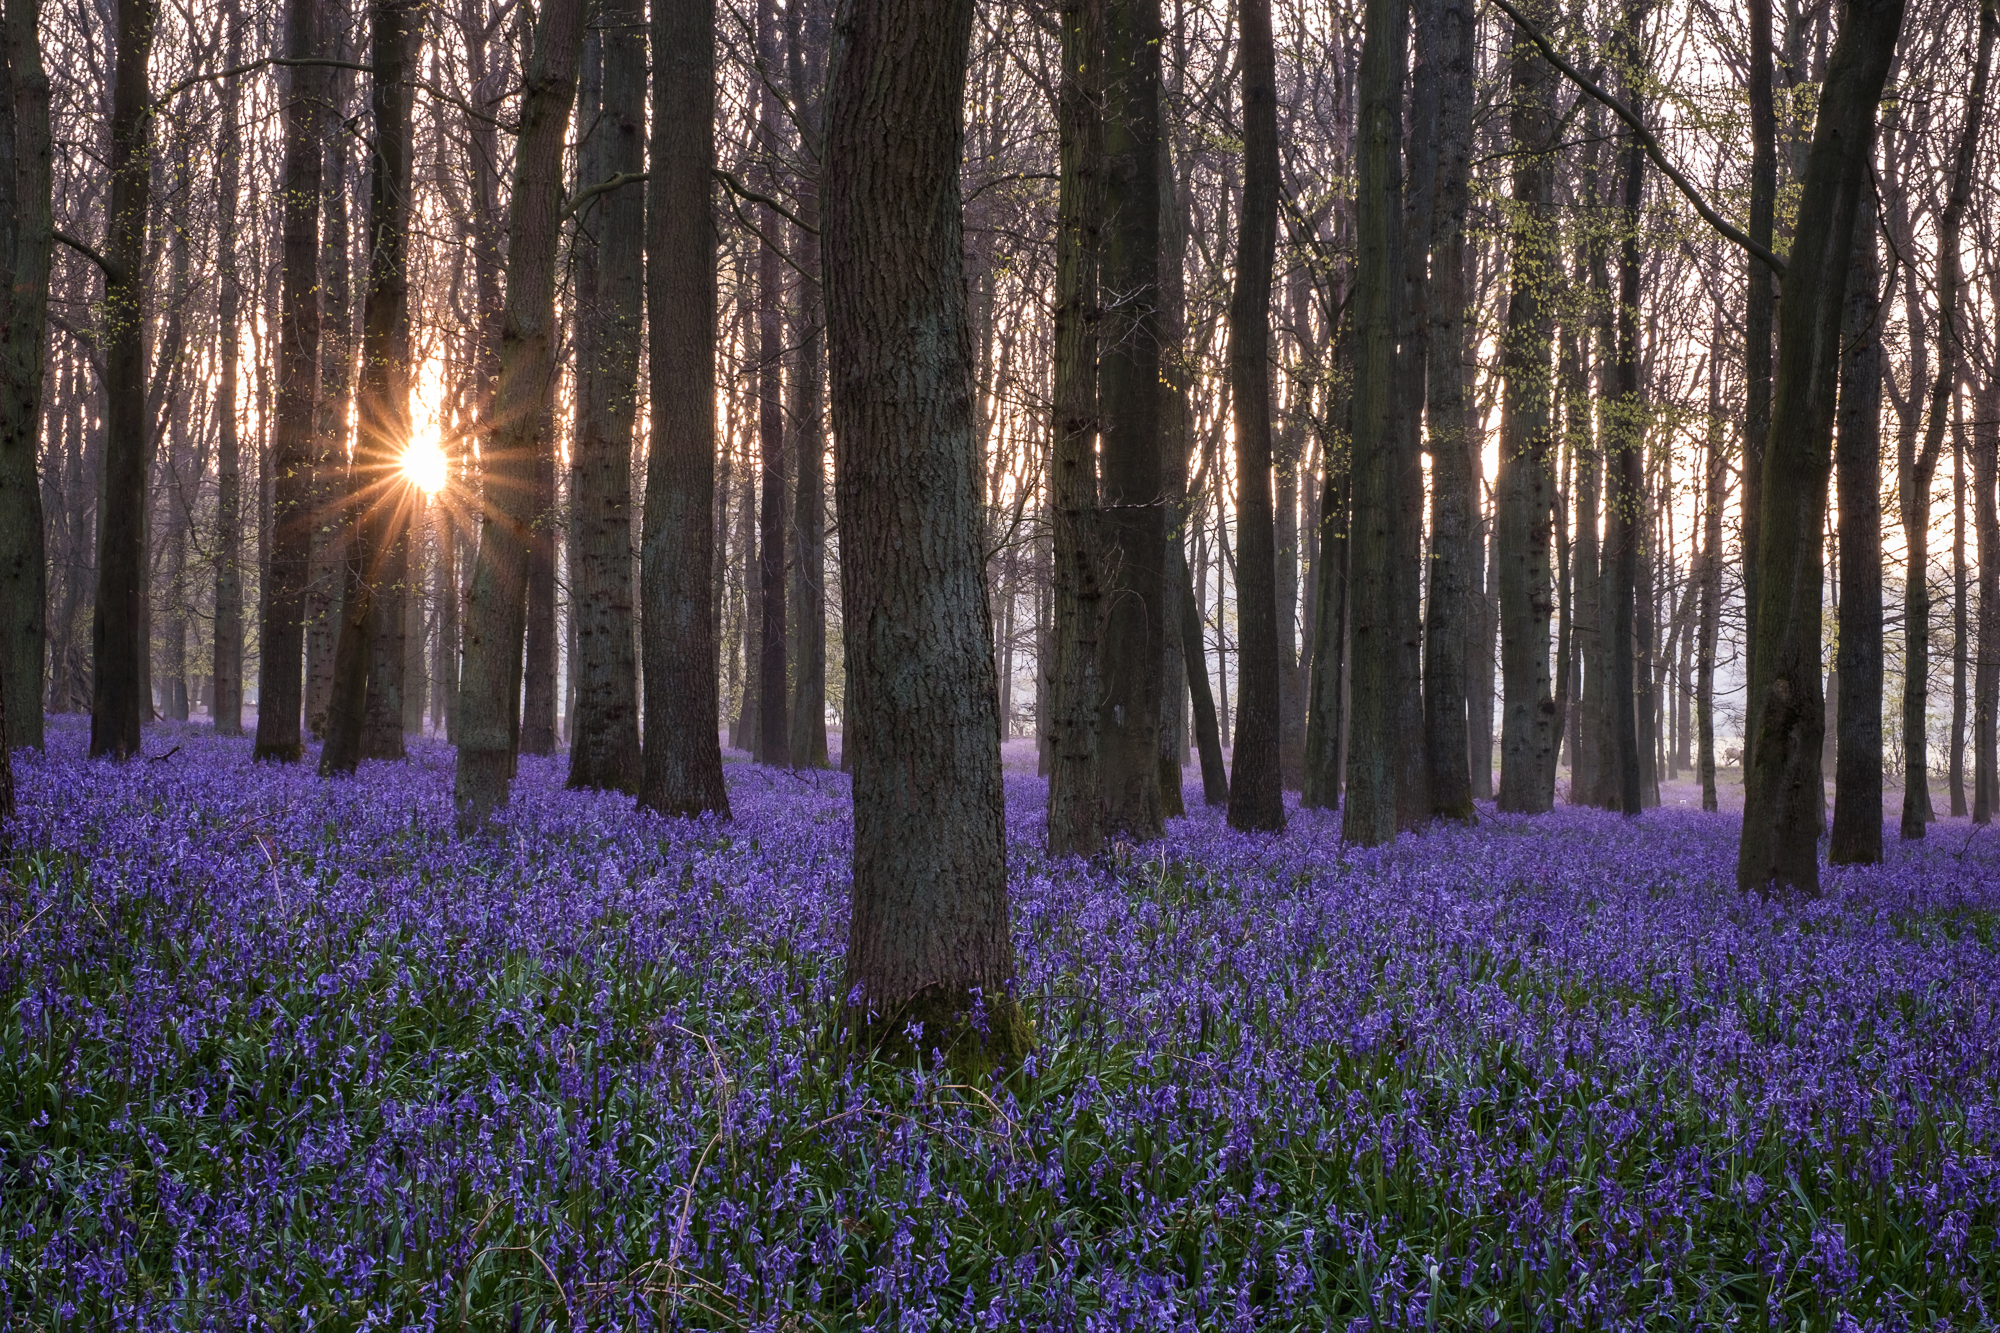
When to shoot: Bluebells can be photographed in most conditions and bright sunshine can give pleasing dappled effects. However, technically, this is quite challenging, especially in managing the contrast and colour. Bright overcast conditions result in more natural colours and certainly present fewer problems in controlling the exposure. My favourite time is early morning when conditions are still and the mist, which is often around at this time of year, adds wonderful atmosphere to your image. Getting up early means that you can capture the sun as it rises through the trees, producing long-raking shadows. Sunset is also a good time to shoot, as it makes the most of the dramatic lighting.

FUJIFILM X-E2S + XF55-200mmF3.5-4.8 R LM OIS - F11, ISO 200, 1/75 sec
EQUIPMENT
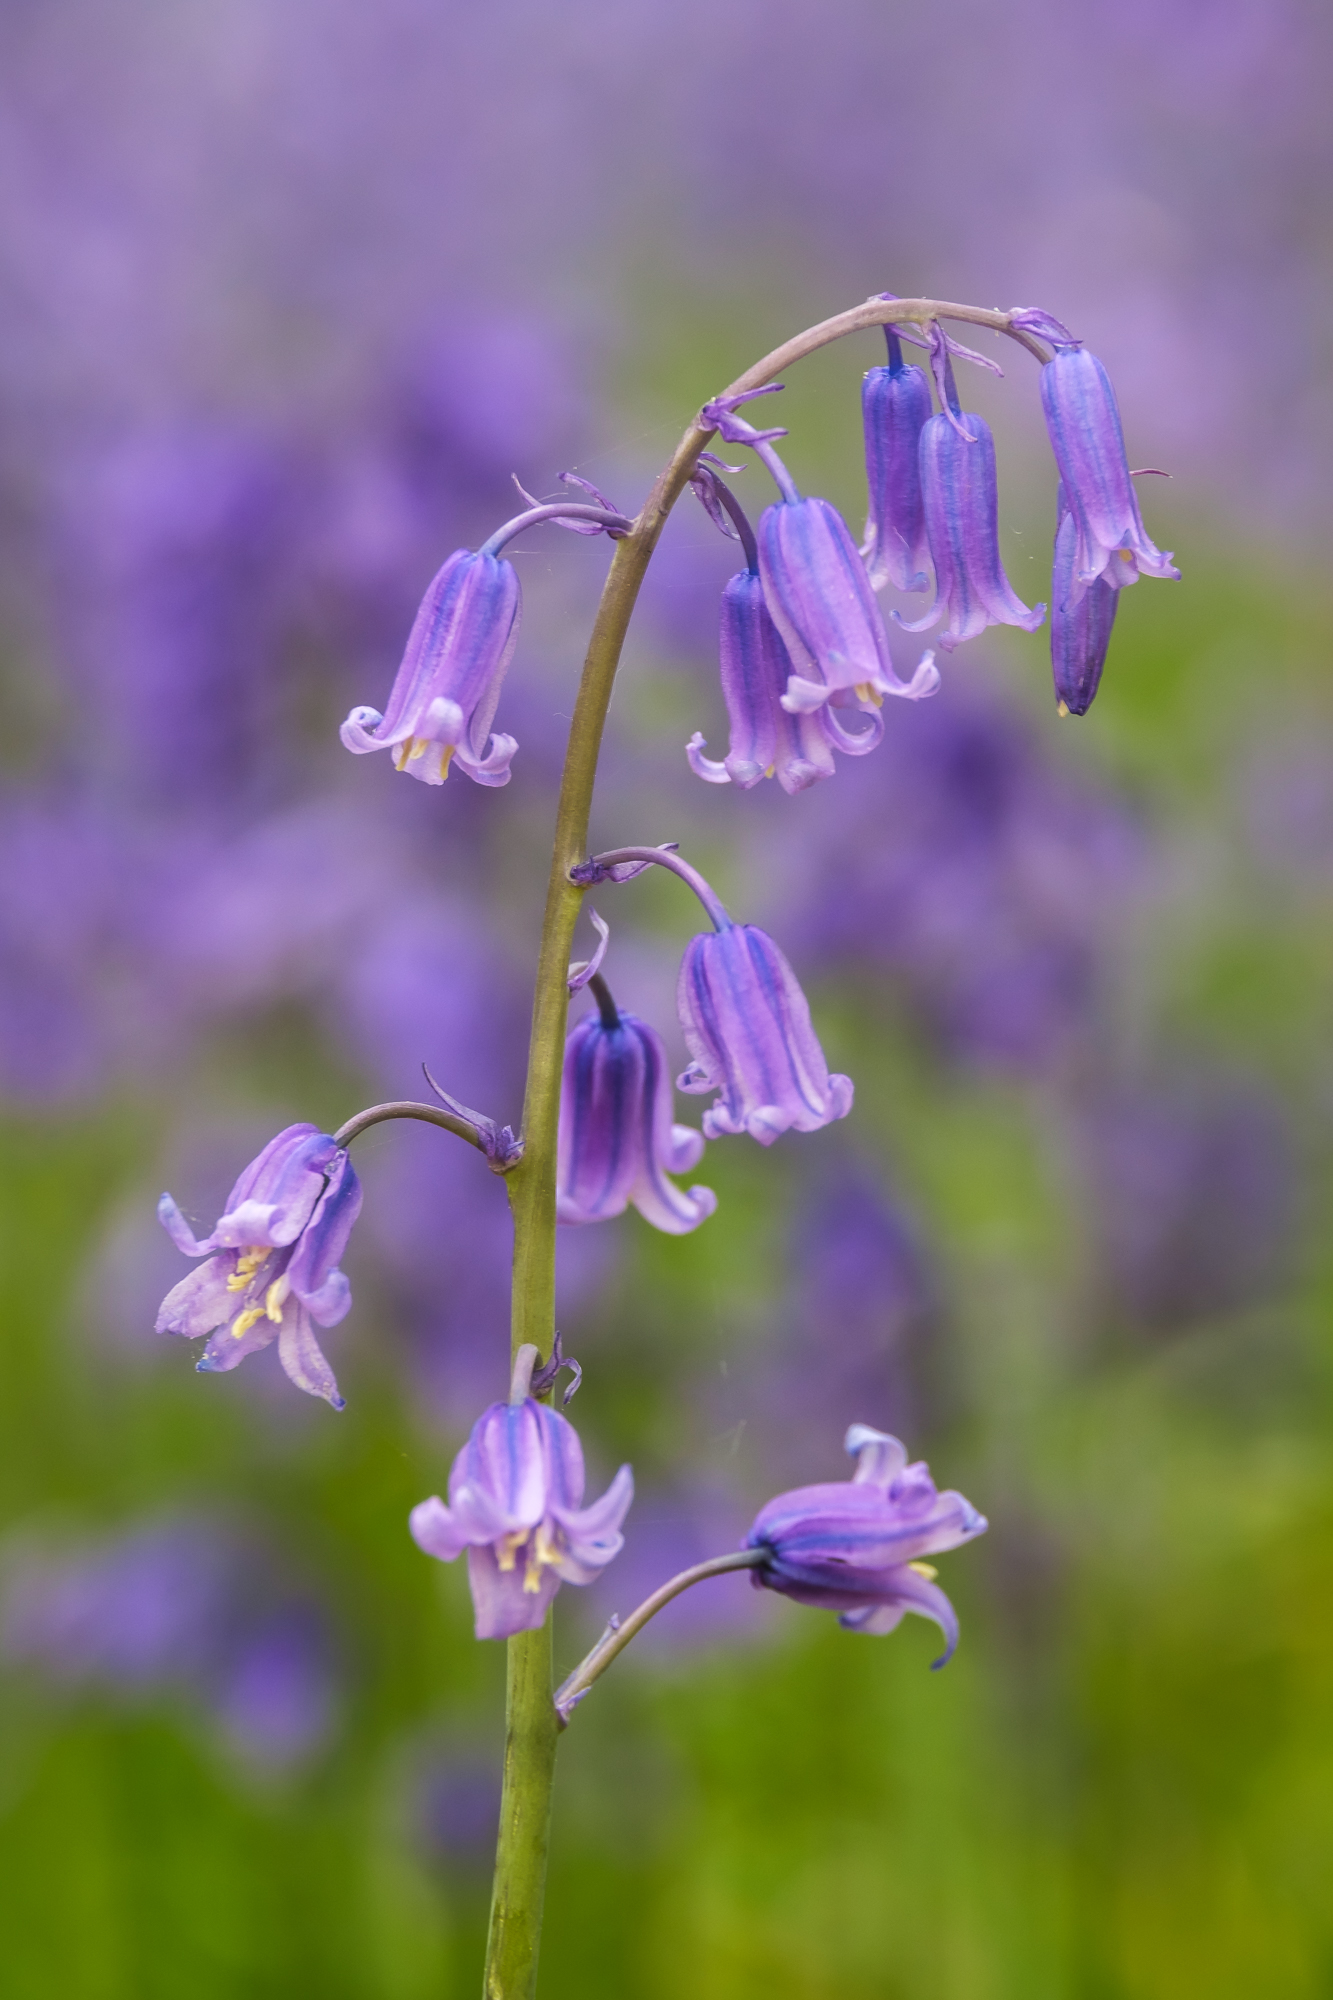
You can use any lens to capture the bluebells, though my preferred lenses are at either end of the focal range. I use the FUJINON XF10-24mmF4 R OIS wide-angle zoom to capture the forest and carpet of bluebells, then use the longer XF50-140mmF2.8 R LM OIS WR to compress perspective or isolate detail. Of course, if you have a macro lens, this opens up more opportunities for some delightful close-up shots of single heads and other detail.
Shooting in the forest with typically low light levels means that a tripod is a necessity, unless you are looking to produce more creative effects. You’ll also need a remote release, or use the self-timer, to reduce camera shake. You may find a reflector useful, too.
A polarising filter helps to reduce glare from leaves and saturates the colours, but remember, they are most effective at an angle of 90° to the sun. Neutral density graduated filters can also help to reduce the highlights in a bright canopy to achieve a more natural effect.
FUJIFILM X-E2S + XF55-200mmF3.5-4.8 R LM OIS - F11, ISO 200, 1/8 sec
TECHNIQUE
I favour shooting in Aperture Priority where I can control the depth-of-field by using either F8 or F11 to maximise the area of sharpness or a wider aperture, say F2.8 or F4, to minimise the depth-of-field and throw the background out of focus. Remember, your wide-angle lens inherently has a greater depth-of-field at a given aperture than your telephoto zoom.
Focusing is critical for achieving maximum depth-of-field and there are a number of ways to help accomplish this. When using a wide-angle lens at F8 or F11, simply focusing a third into the scene can often work. If your foreground isn’t sharp, either move back slightly or select a smaller aperture.
I often switch to manual focus and use focus peaking to help confirm sharpness by setting my highlights to red. Using the blue depth-of-field bar at the base of your viewfinder (or LCD touchscreen) to show the near and far points of focus is another option. Although I find this useful as a guide, it’s not as critical as focus peaking.
FUJIFILM X-Pro2 + XF55-200mmF3.5-4.8 R LM OIS - F8, ISO 400, 1/20 sec
To achieve the best file quality, I use the lowest ISO possible. Providing you are using a tripod, the shutter speed doesn’t matter unless there is a strong breeze. Here you have a choice: to increase the shutter speed by increasing ISO to reduce motion blur, or to work with the conditions, capturing the bluebells and grasses swaying in the breeze, for a more dreamy, soft image. Remember to switch off your image stabilisation when shooting on a tripod and use a remote release or the two-second timer to eliminate camera movement.
Use your lens hood to eliminate flare, although sometimes you may need to further shield the lens by standing at the side of your camera or by holding up your coat.
Bluebells can appear too purple in bright sunlight and colour casts can be a problem from a vivid green canopy, so selecting the correct white balance is critical. If you shoot JPEGs, I suggest using Daylight or 5500K. For maximum control, I recommend shooting in RAW, which allows you to correct any colour balance issues in post-production.
FUJIFILM X-Pro2 + XF16-55mmF2.8 R LM WR - F11, ISO 200, 1/13 sec
COMPOSITION
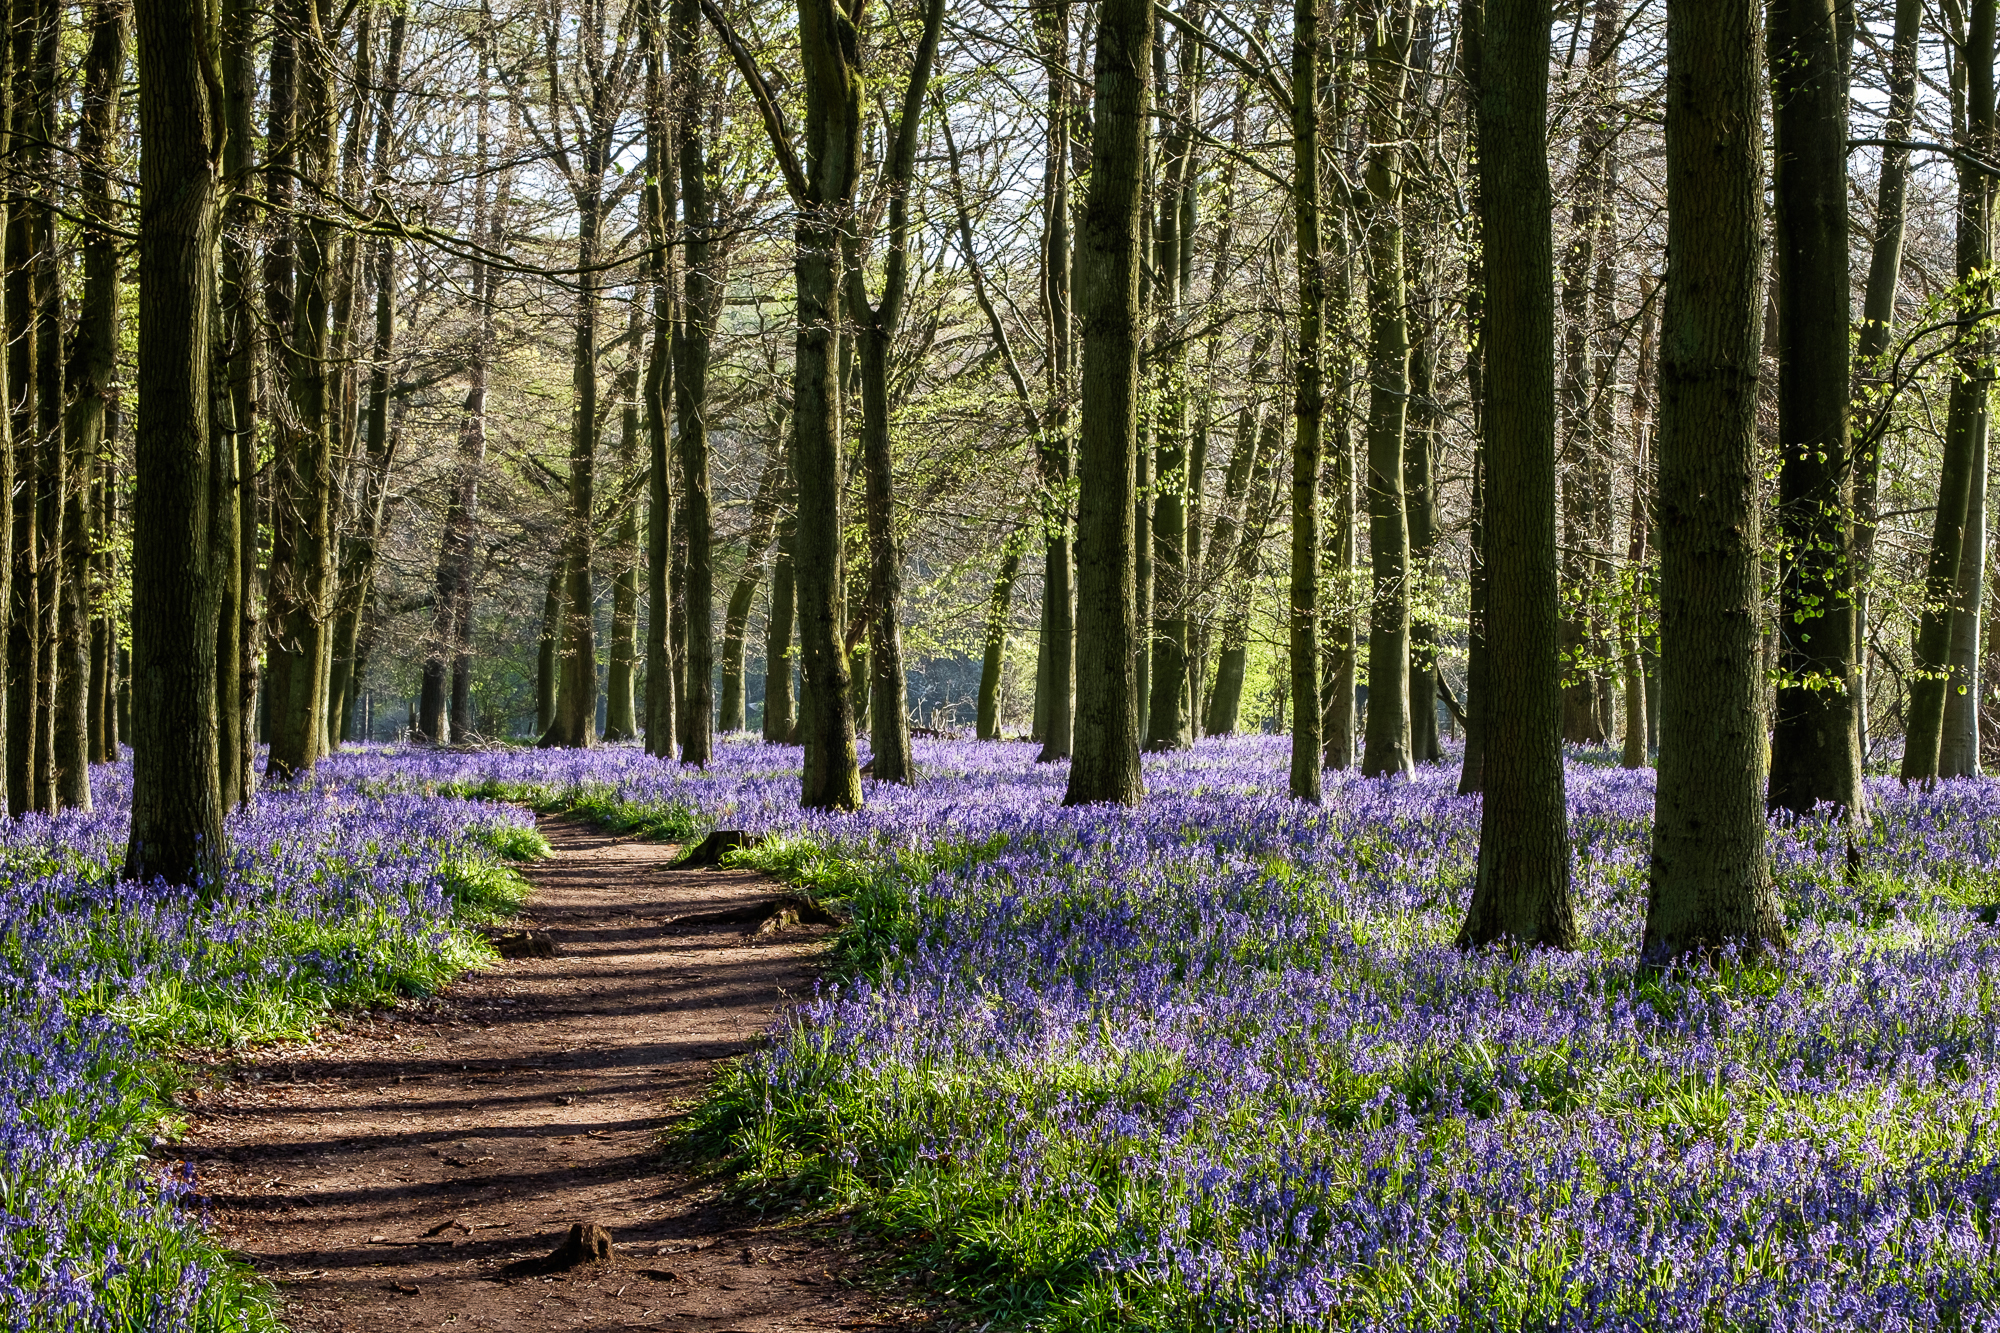
Can’t see the wood for the trees? It’s not easy trying to sort order from what, at first, may seem like a chaotic woodland scene. I usually start by taking the wider views and then move in closer.
Look for lines like paths, especially winding ones, which lead the viewer into the picture. Move around to achieve separation between tree trunks and watch out for fallen branches, which are easy to miss and often difficult to remove in post-production. A sun star peeping from behind a tree as the sun rises or sets can look great. Simply select an aperture of F16 to achieve this effect, but be aware of flare that you may wish to emphasise or try and eliminate.
Use your longer lens to isolate detail like a group of tree trunks against a floor of bluebells, a moss-covered tree stump or a single flower head. It’s very much a case of less is more. A long lens also gives the impression of a thicker carpet, but watch out for distracting backgrounds such as highlights or other objects, and move your viewpoint up and down for a variety of shots.
FUJIFILM X-T1 + XF16-55mmF2.8 R LM WR - F16, ISO 200, 0.6 sec
CREATIVE
Of course, there are many other creative options to consider, too, such as moving the camera while exposing (intentional camera movement), multiple exposures or using the Advanced Filters on your camera. Panoramic images of the forest can look stunning. There are so many options, just let your creative juices flow!
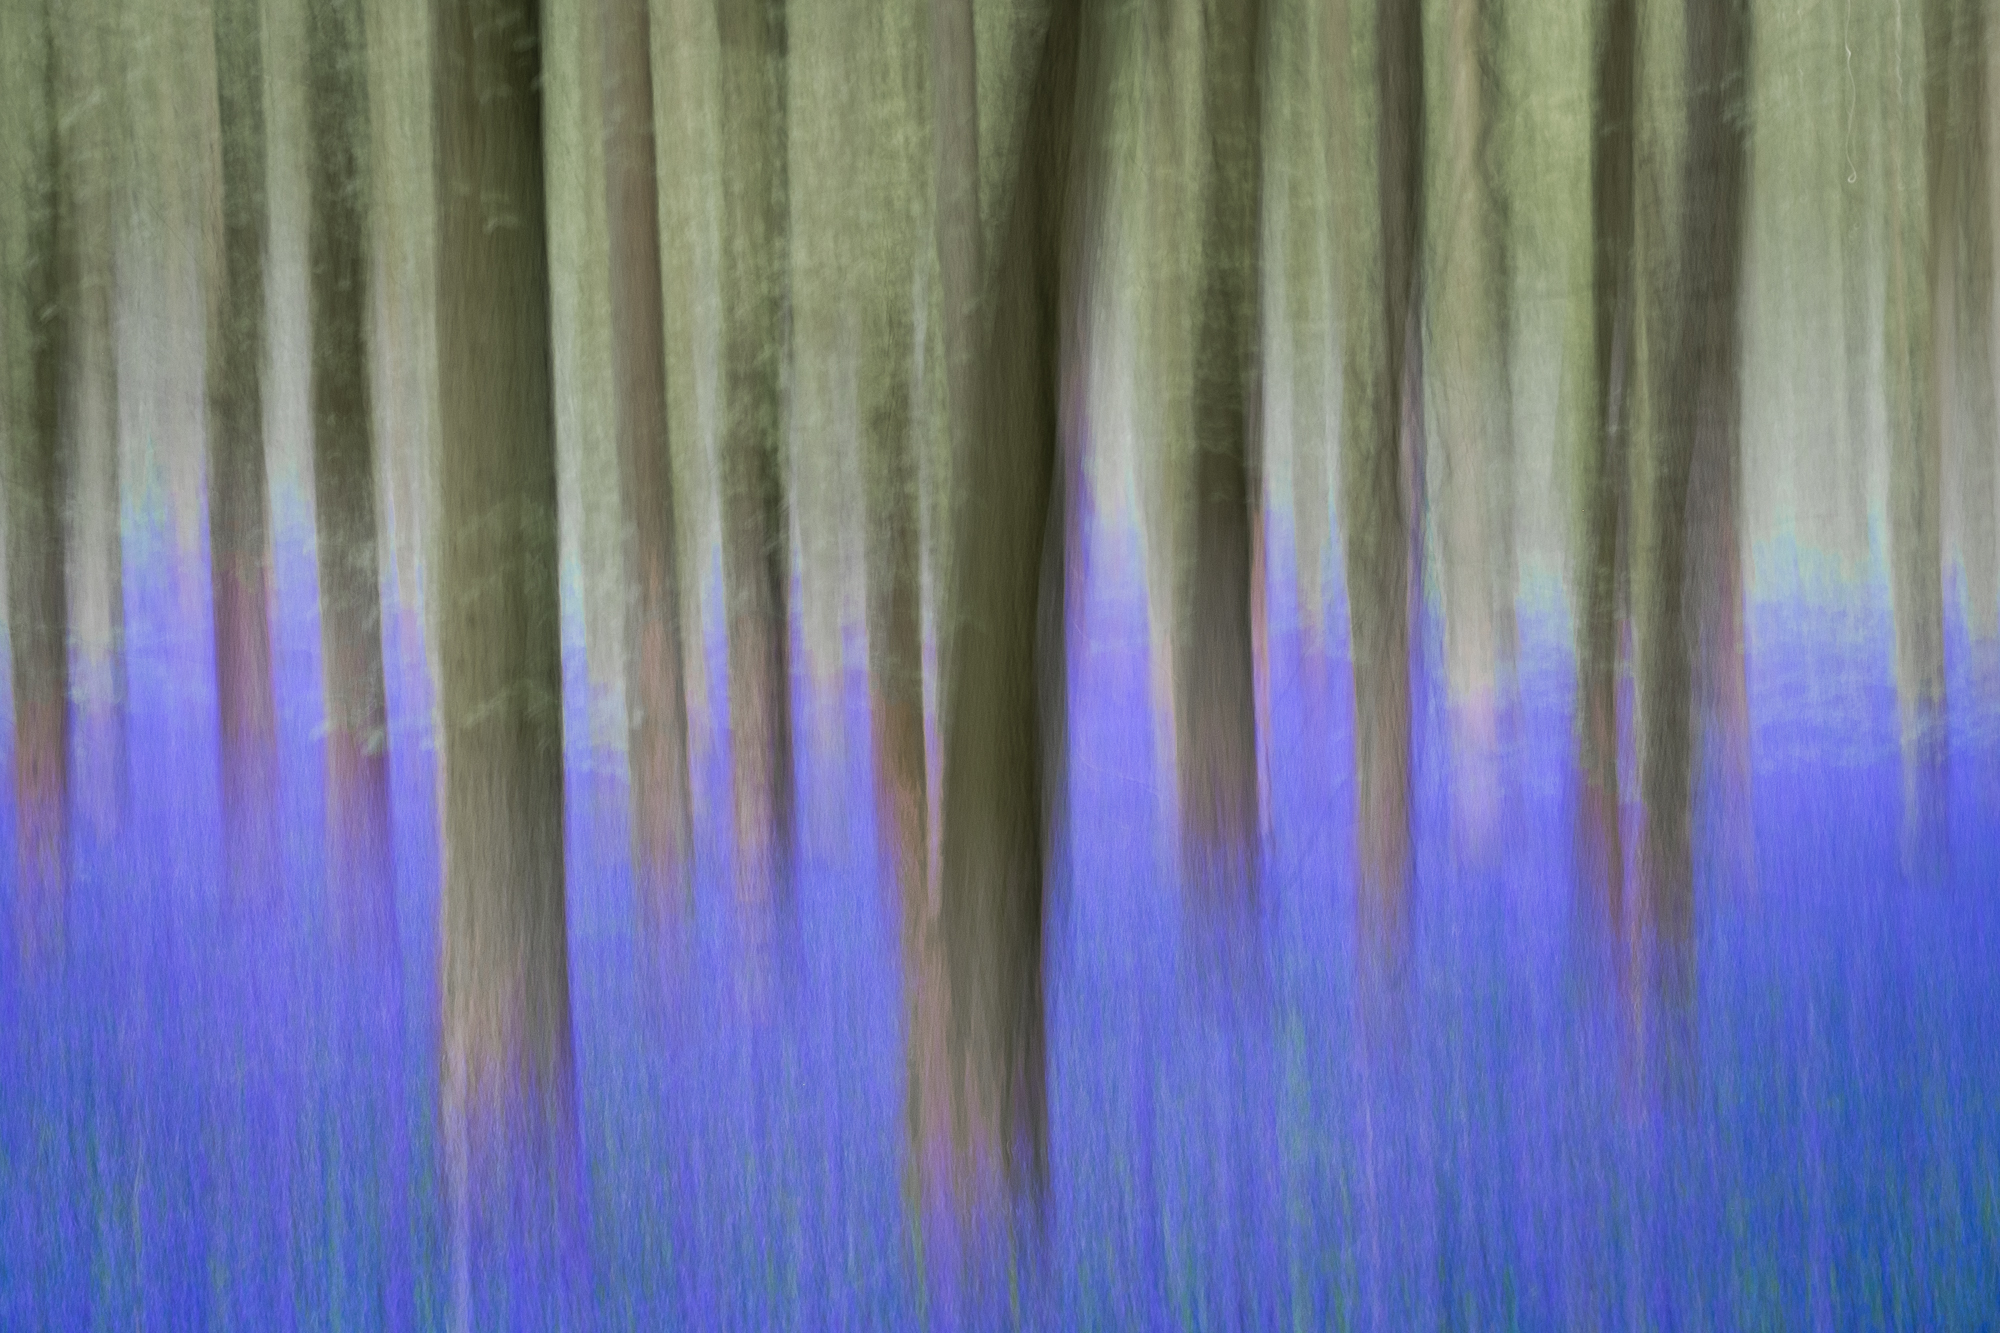
FUJIFILM X-E1 + XF55-200mmF3.5-4.8 R LM OIS - F9, ISO 200, 1.0 sec
POST PROCESSING
Your first objective in post-processing is to correct any colour casts using the white balance and tint sliders. Of course, these are global changes and specific colours such as the bluebells, tree trunks and leaves can be adjusted locally in Lightroom or Photoshop. Check your exposure for lost highlight and shadow detail, and adjust the contrast with Levels or a tone curve. Finally, cropping your image can add impact to the shot by excluding distracting elements and concentrating on the important ones.
FUJIFILM X-E2S + XF55-200mmF3.5-4.8 R LM OIS - F11, ISO 400, 1/40 sec
RESPECT
Our bluebell woods are so beautiful and many people want to enjoy them, so please don’t spoil this for others just to get your shots. Keep to paths and take care not to trample over the bluebells.
We really are so fortunate to have this annual display each year – they don’t last long, so make sure you get out there and make the most of one of nature’s wonders!