

You don’t always need expensive studio lights and bespoke backgrounds to shoot powerful portraits, you can create stunning people pictures in your own home using nothing more than a window. Find out how it’s done…

Lighting is often what separates a good portrait from a great one. The smallest of tweaks to the direction or softness of your light source can transform your subject’s face and give you a portrait you’ll be proud of. Professional photographers usually do this in a dedicated photographic studio, with powerful flashes that can be positioned anywhere and are fitted with all kinds of light-modifying accessories – but this is not the only way.
If you’re not lucky enough to own a huge photography studio with high ceilings and a collection of bespoke backgrounds (who is?) you’ll be pleased to discover you can shoot superb portraits with nothing but the light from a window, and perhaps a reflector. There are plenty of spots around your home that can make great locations. Here are a few tips to get you started.
Choosing a window
Almost any window in your house will make a good light source, as long as there’s enough space for your subject to stand next to it. It’s important your subject isn’t illuminated by direct sunlight, which is too harsh for natural portraiture; diffused, indirect light is much better.
For this reason, a north-facing window is best, since it will never have the sun beaming directly in through it. But you achieve the same effect with a west-facing window in the morning, or an east-facing window in the afternoon. Of course, on a cloudy day you can choose any window you like.
Positioning your subject
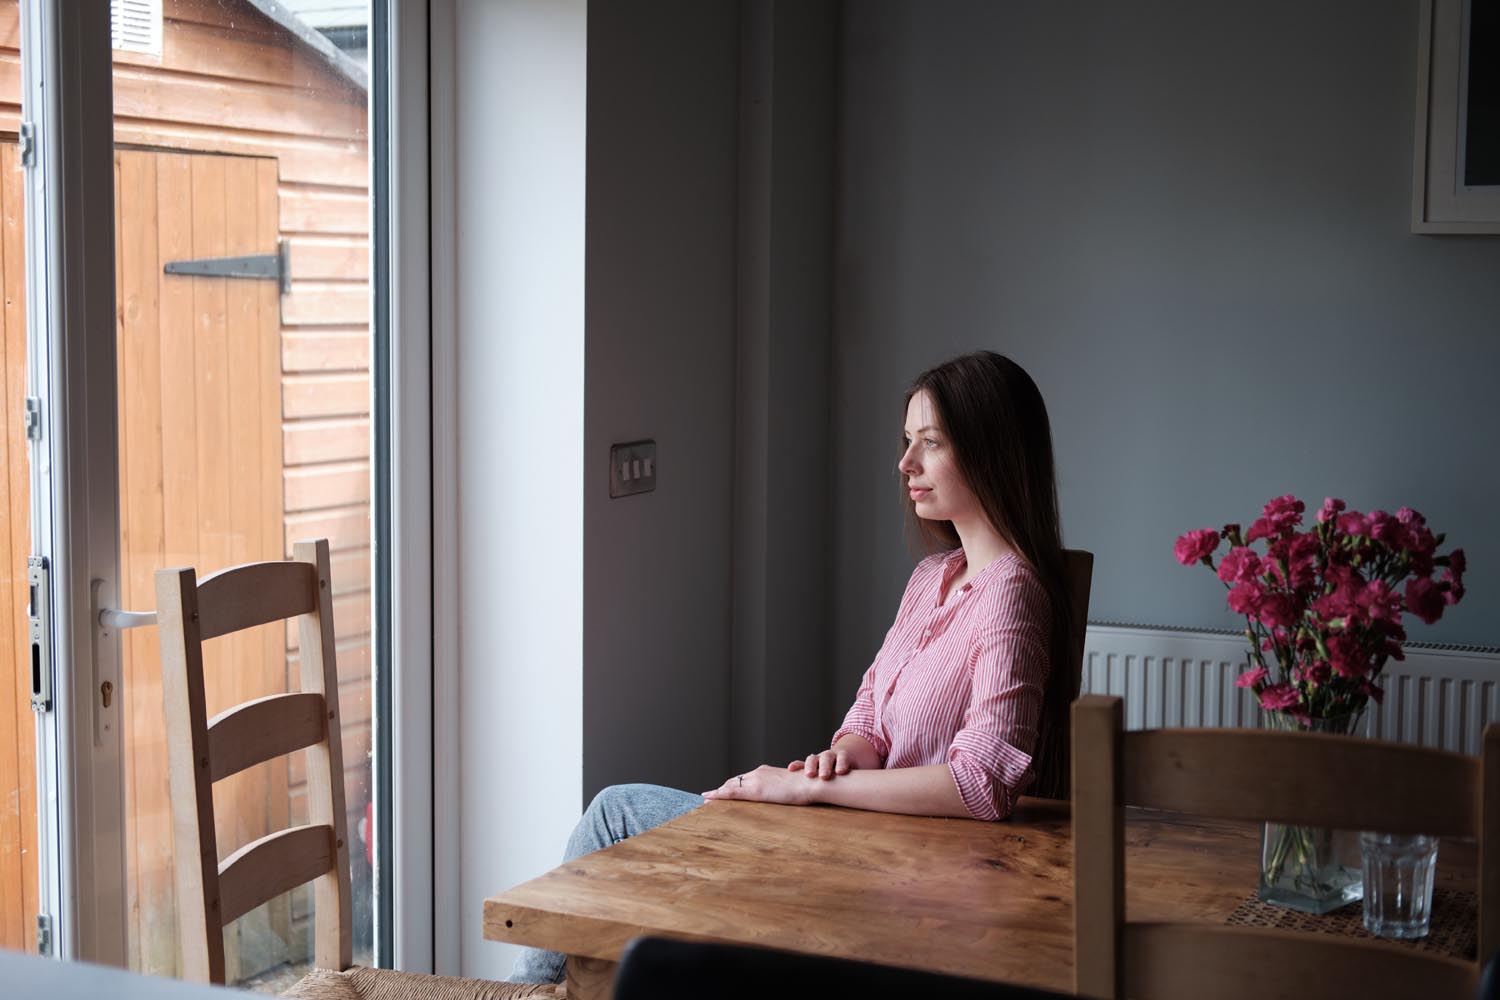
Start out with your subject sitting or standing next to the window, so it illuminates them from the side. If your window is low down, have your subject sitting; if it’s higher up then they might be able to stand. But avoid a situation where the light is falling on their body, rather than on their face.
The distance between the window and your subject also makes a difference: light ‘falls off’ (i.e. gets darker) more over short distances than it does after it’s travelled longer distances. This affects the contrast across your subject’s face: the face of a person sitting close to the window will be much lighter on one side than the other; but this effect will be less pronounced when they’re moved away a little.

This isn’t to say that lots of contrast is a bad thing – it can look very good. Also remember that if you move a subject too far from the window, they might be too dark for a good image.
Adding a reflector
If the side of your subject’s face that’s in the shade is looking a little too dark, you can brighten it up by bouncing some light back with a reflector. Position this as close as possible, without getting it in the shot.
There are some great purpose-built reflectors out there, which fold up into a handy carrying case, but if you don’t have one of these you can make one yourself from a sheet of white card or silver foil.
Camera settings
You’ll want to shoot with a wide aperture, since the light next to a window is not always as bright as you’d think. F2.8 or wider is preferable. This is best done in aperture-priority mode, so that the camera can adjust the shutter speed for you if the light outside changes – which it often does when shooting in this way! Pick an ISO that gives you a shutter speed of at least 1/125sec.
It’s also helpful to look at white balance: if the auto white balance (AWB) setting is getting confused by the conditions you’re shooting in, set the daylight preset instead, which will give you more consistent results. There are also several Film Simulation modes on your FUJIFILM camera that are superb for this kind of work. Try the PRO Neg. Hi and PRO Neg. Std modes, as well as CLASSIC CHROME.
Step by step
We put these tips into action shooting some portraits in a standard 1930’s ex-council house typical of millions of homes all over the country. We tried out a trio of locations and shot with a FUJIFILM X-T3 using XF90mmF2 R LM WR, XF50mmF2 R WR and XF35mmF2 R WR lenses.
Step one: location, location, location
Of the three locations, the most versatile was a window at the top of the stairs. There was plenty of unlit space behind, which made for a great-looking neutral background. However, the window was pretty low, so we made sure Emma either sat on the floor or stood a few steps down the stairs.
Step two: test shots
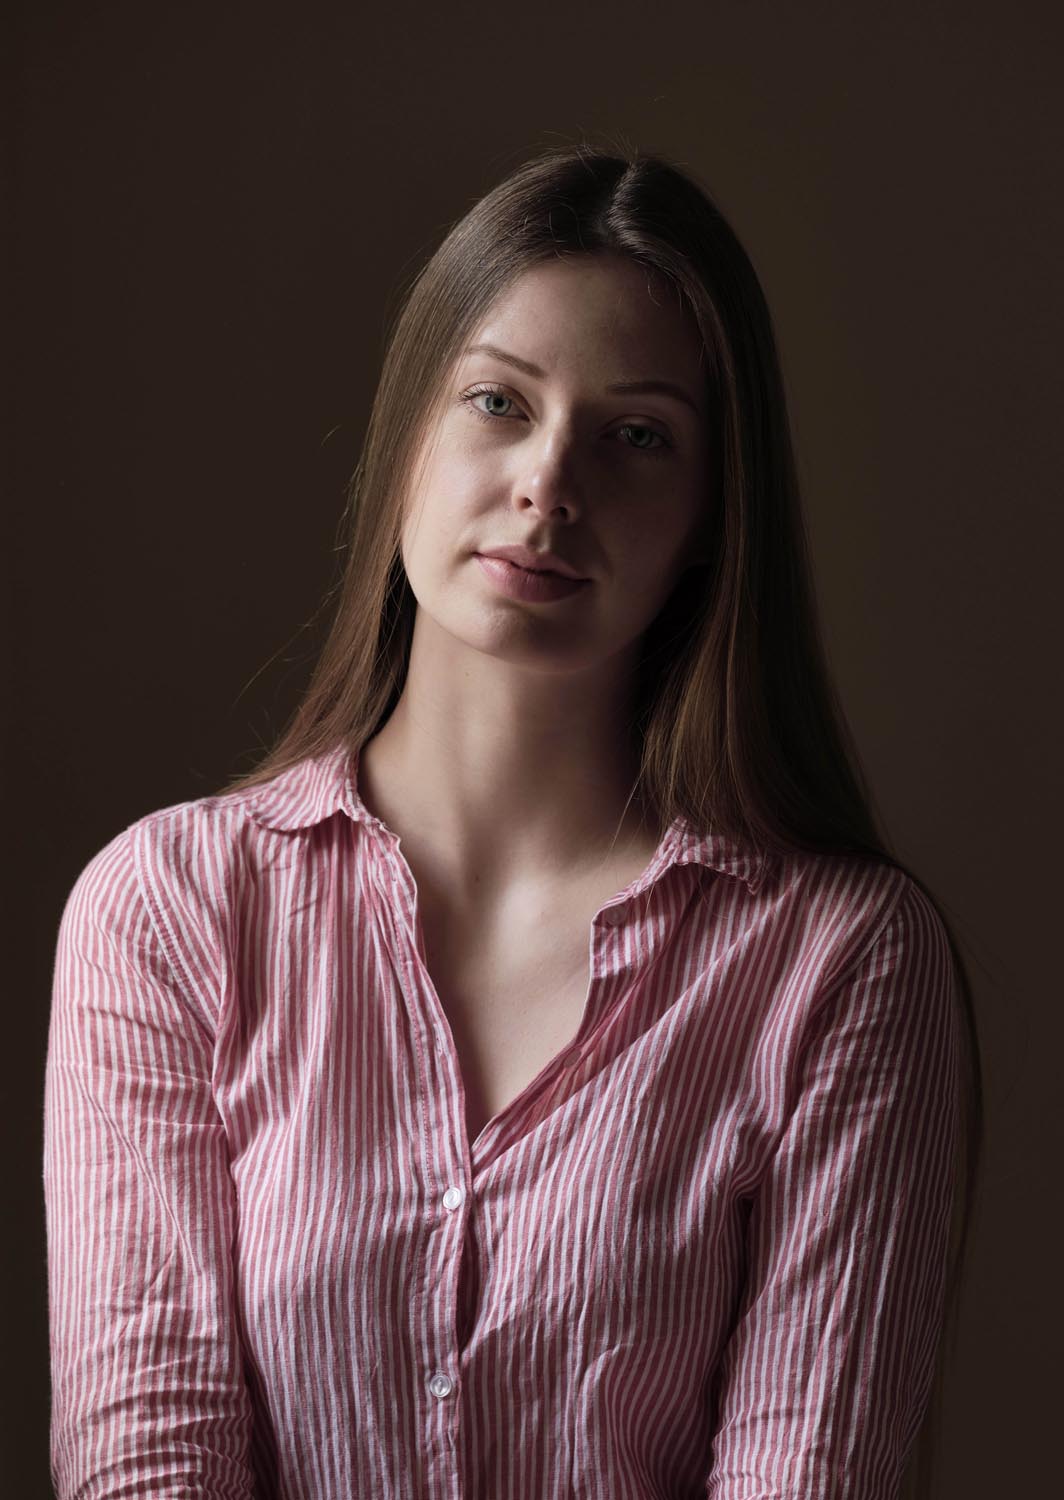
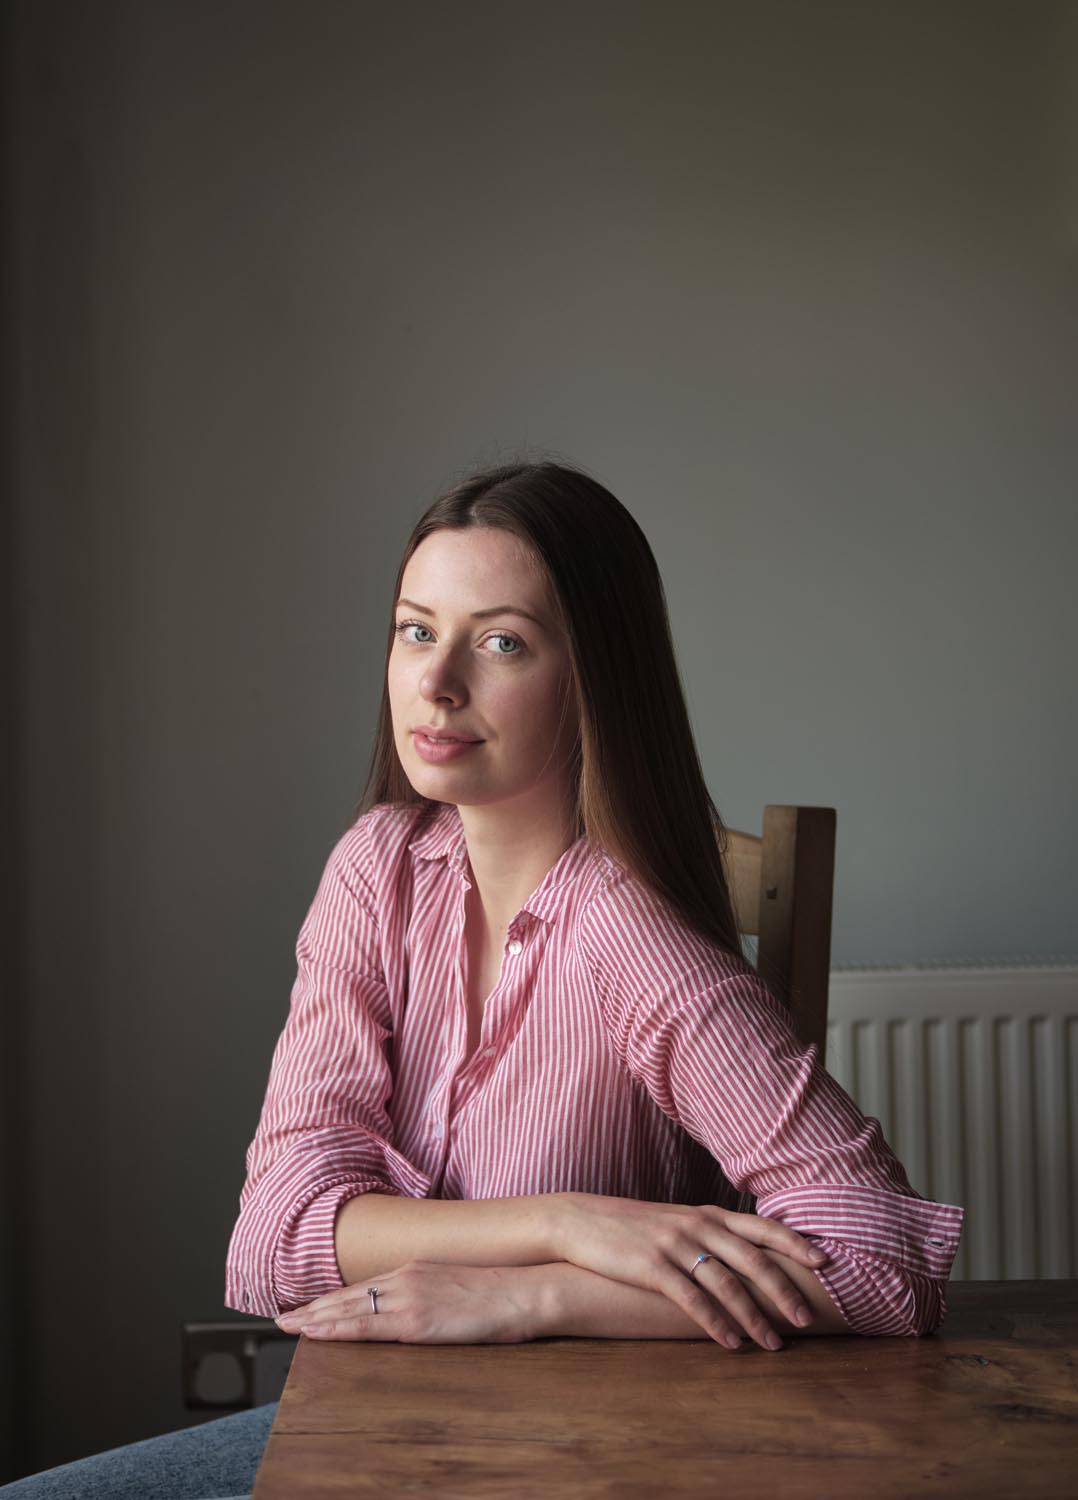
The first few shots looked great! Often with window-light portraiture, you know if a location is working well pretty much straight away. If you don’t see good results, move on to another spot. We shot with the XF50mmF2 R WR lens wide open to get a decent working shutter speed of 1/250sec at ISO 640. This also had the added benefit of blurring the background.
Step three: natural conditions

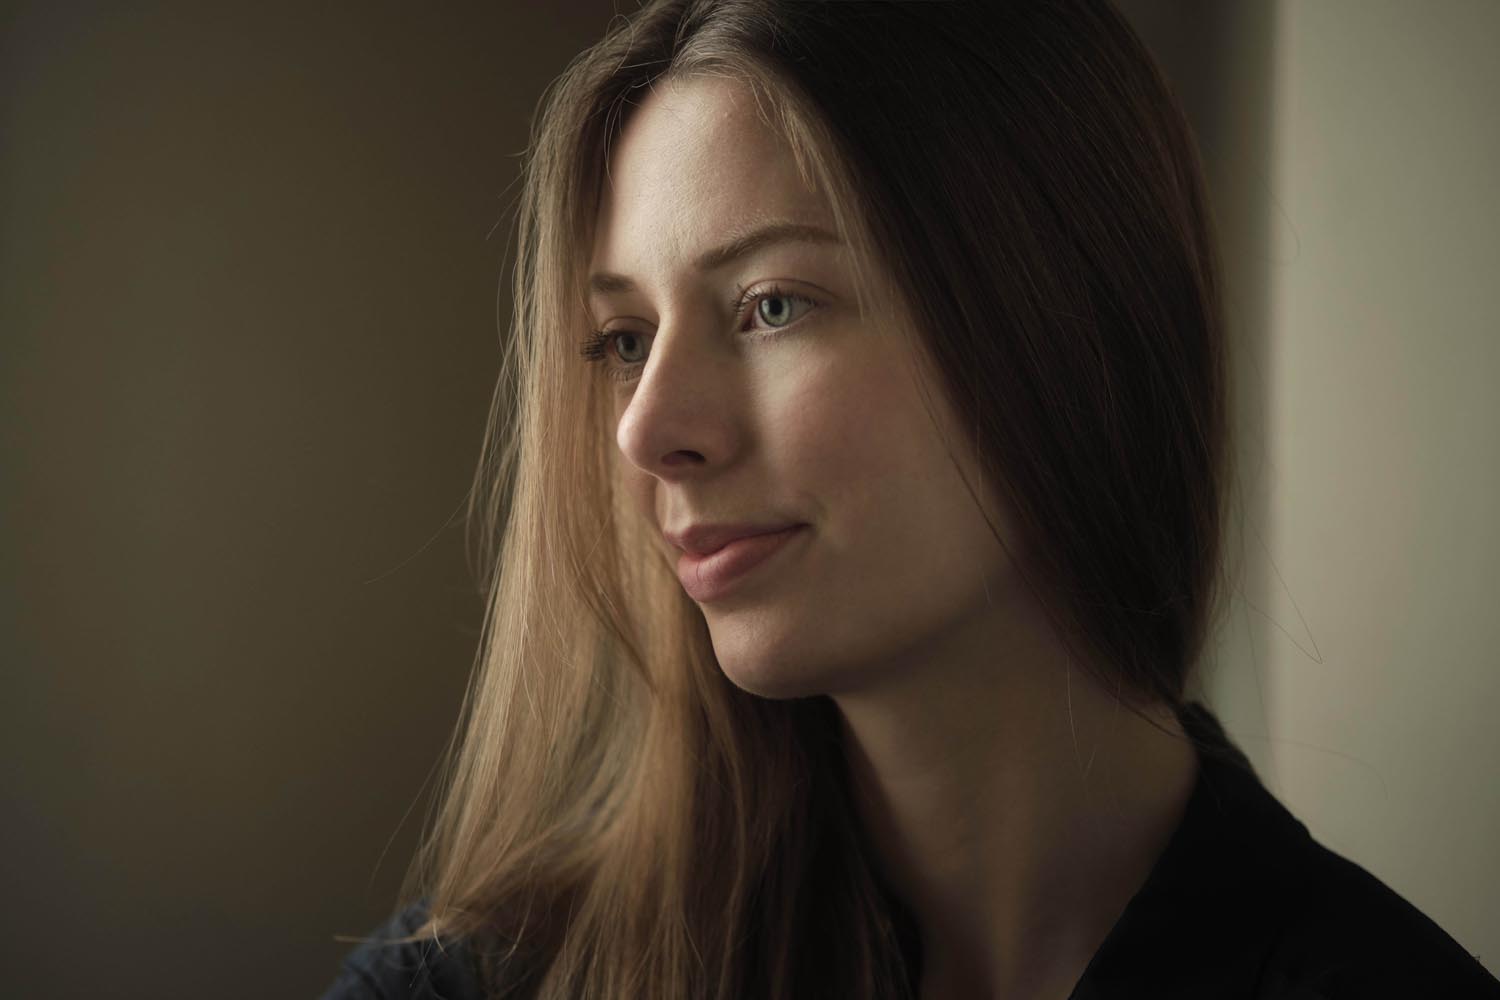
To reduce the light-dark ratio between the two sides of Emma’s face, we asked her to move away from the window a little, which reduced light fall off. We also added a reflector on the other side of Emma to bounce some light back. This gave us a much softer, more natural result.
Step four: moved away
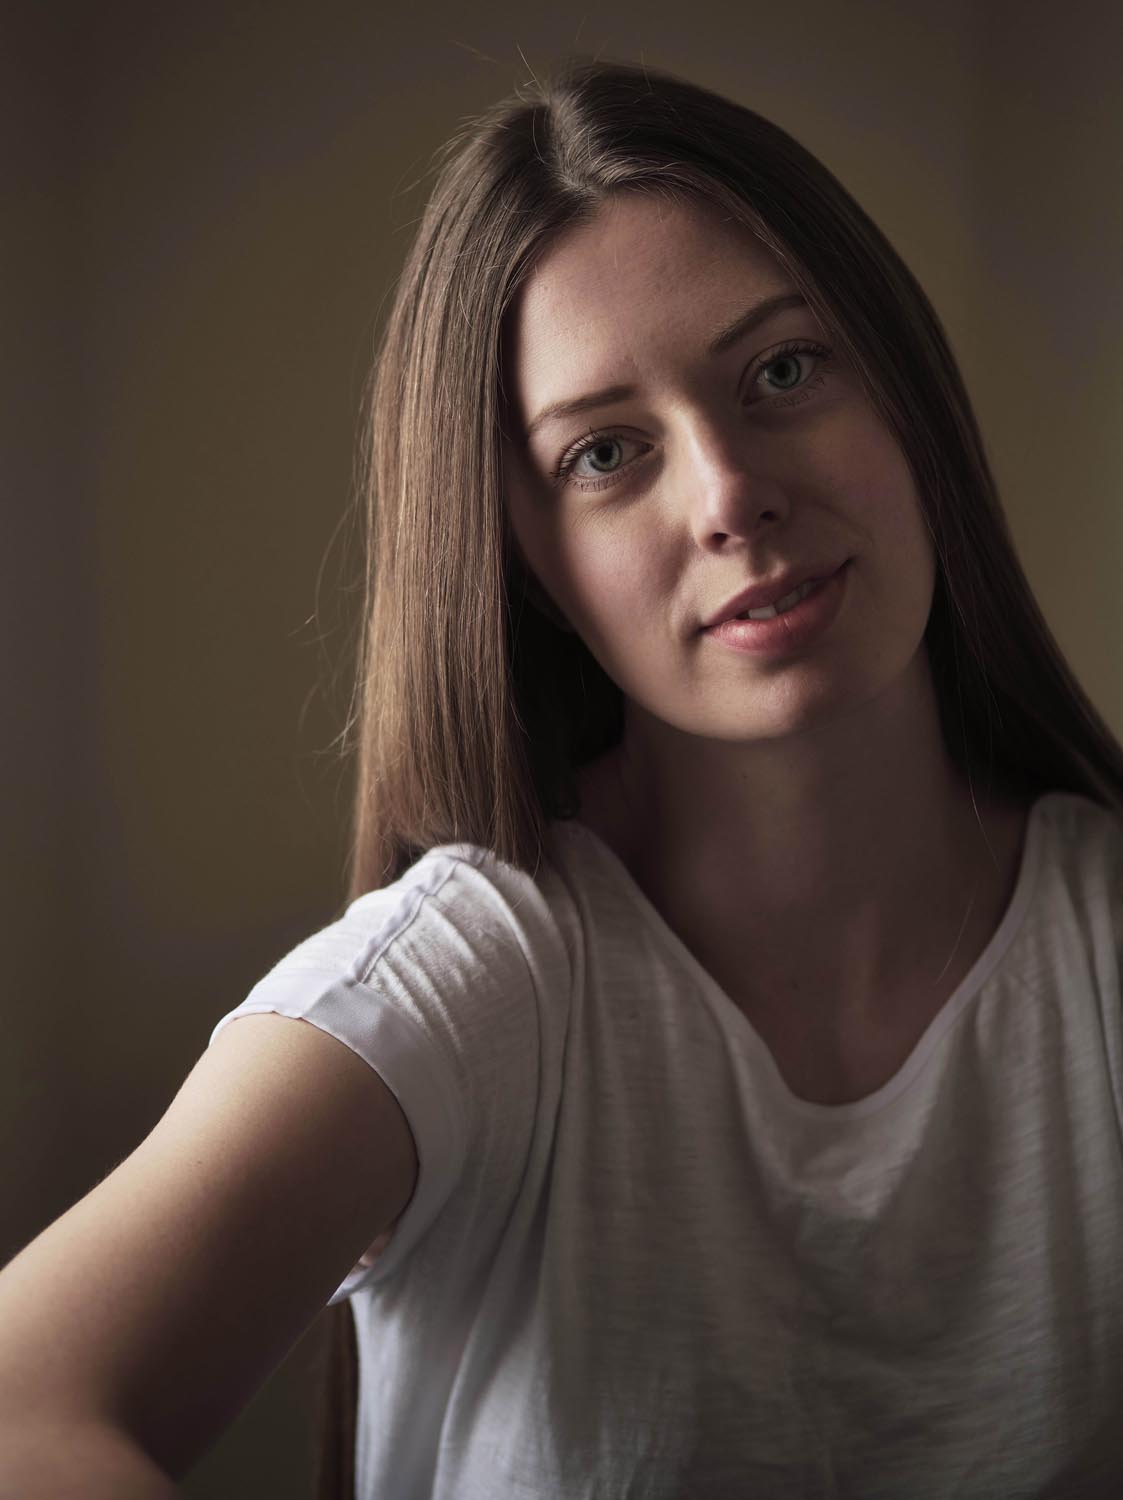
At this point, we swapped lenses to the XF90mmF2 R LM WR (while Emma swapped her outfit) and shot closer in for tighter headshots. The aperture was kept wide at F2 or F2.8, and we used Eye Detection AF to make sure it was Emma’s eyes that were in sharp focus and not her nose.
Step five: something different
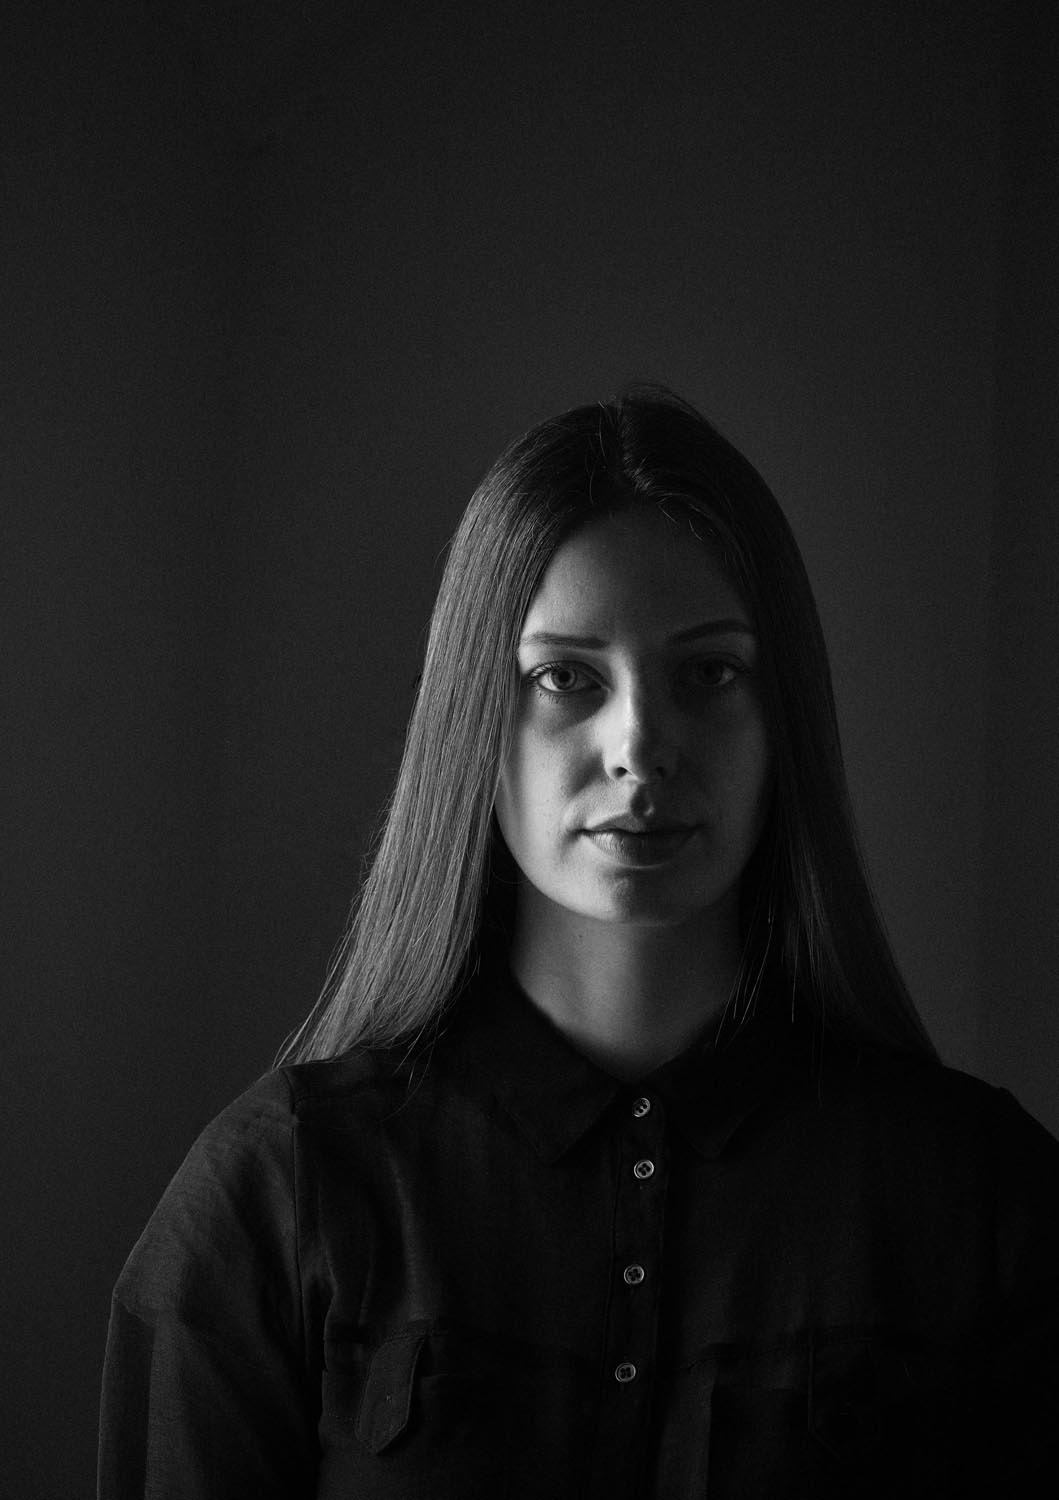
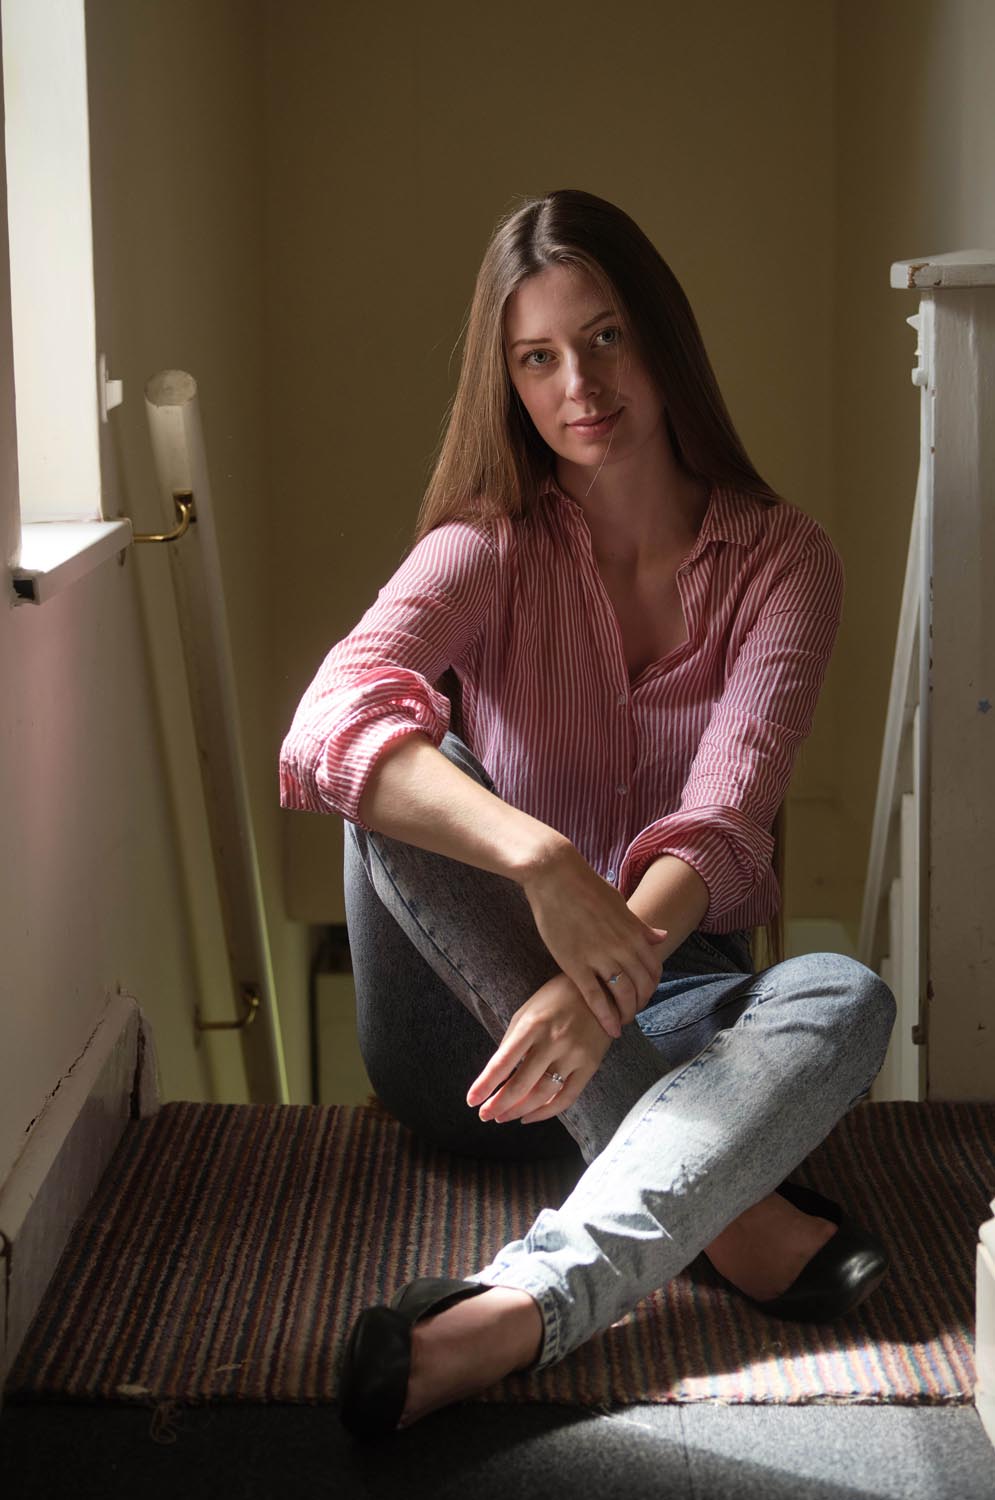
We tried a few variations, too, including pulling the curtains almost shut so only a slither of light peeked through and lit up Emma. The result is much more dramatic and shows just how much versatility can be squeezed out of a single location next to a window in an ordinary house.


